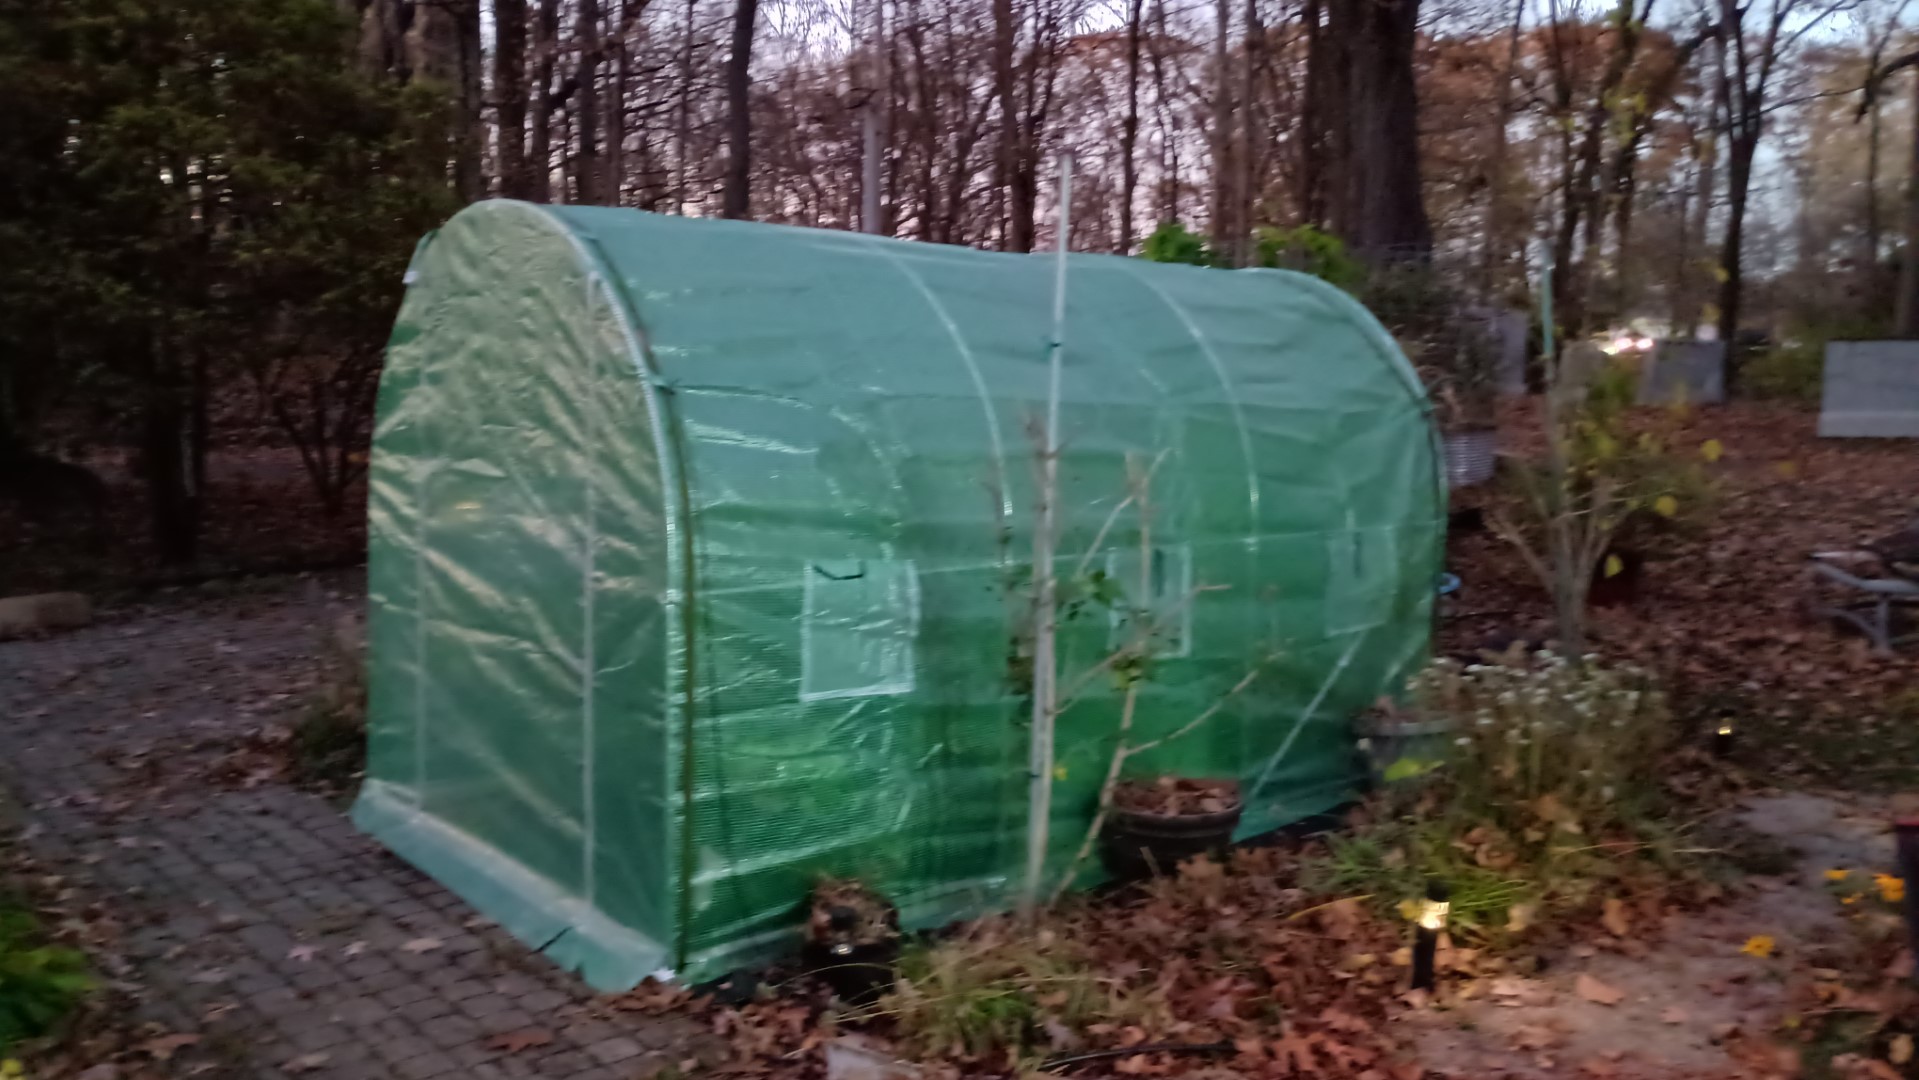
In the fall of 2024, we purchased two inexpensive hoop house greenhouses from Amazon, one 7′ x 12′, and one 10′ x 20′. We set up the smaller one up by the house, to be used for starting plants and herbs. You can read more about them here: Greenhouses
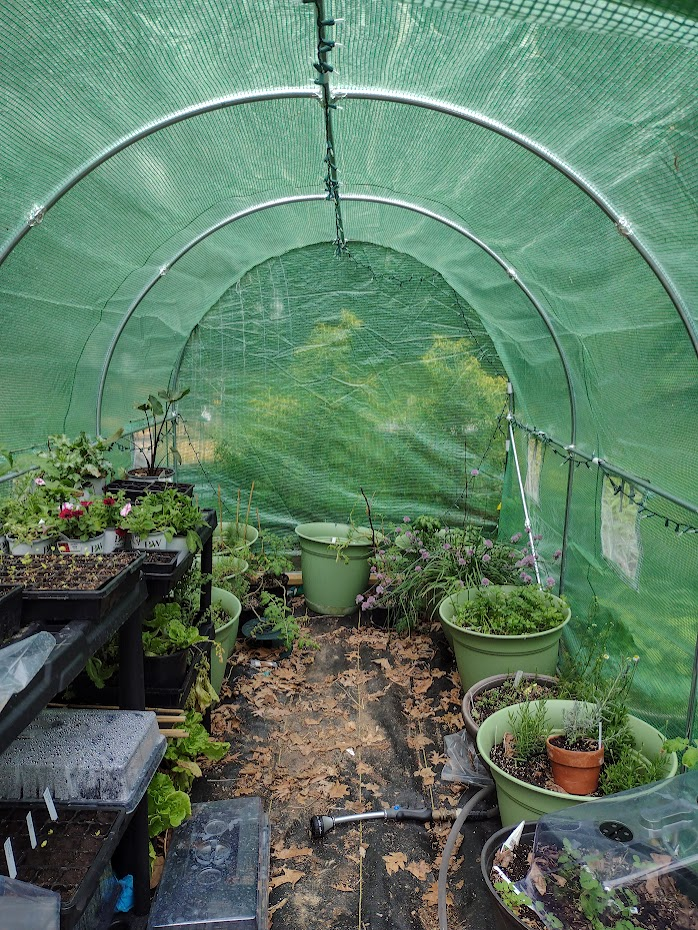
We knew early on that we were going to want some kind of shelving or platform in them, but for the first year, we only used some cheap plastic shelving units. They were fine for holding 1020 trays, but were not ideal.
One of the ideas we had was to make some wooden benches from standard lumber, 2×4’s mostly. They would just sit on the ground along the walls. This would have just involved a lot of cutting and building.
This is a continuation of the post Adding a Drop Down Shelf To The Greenhouse.
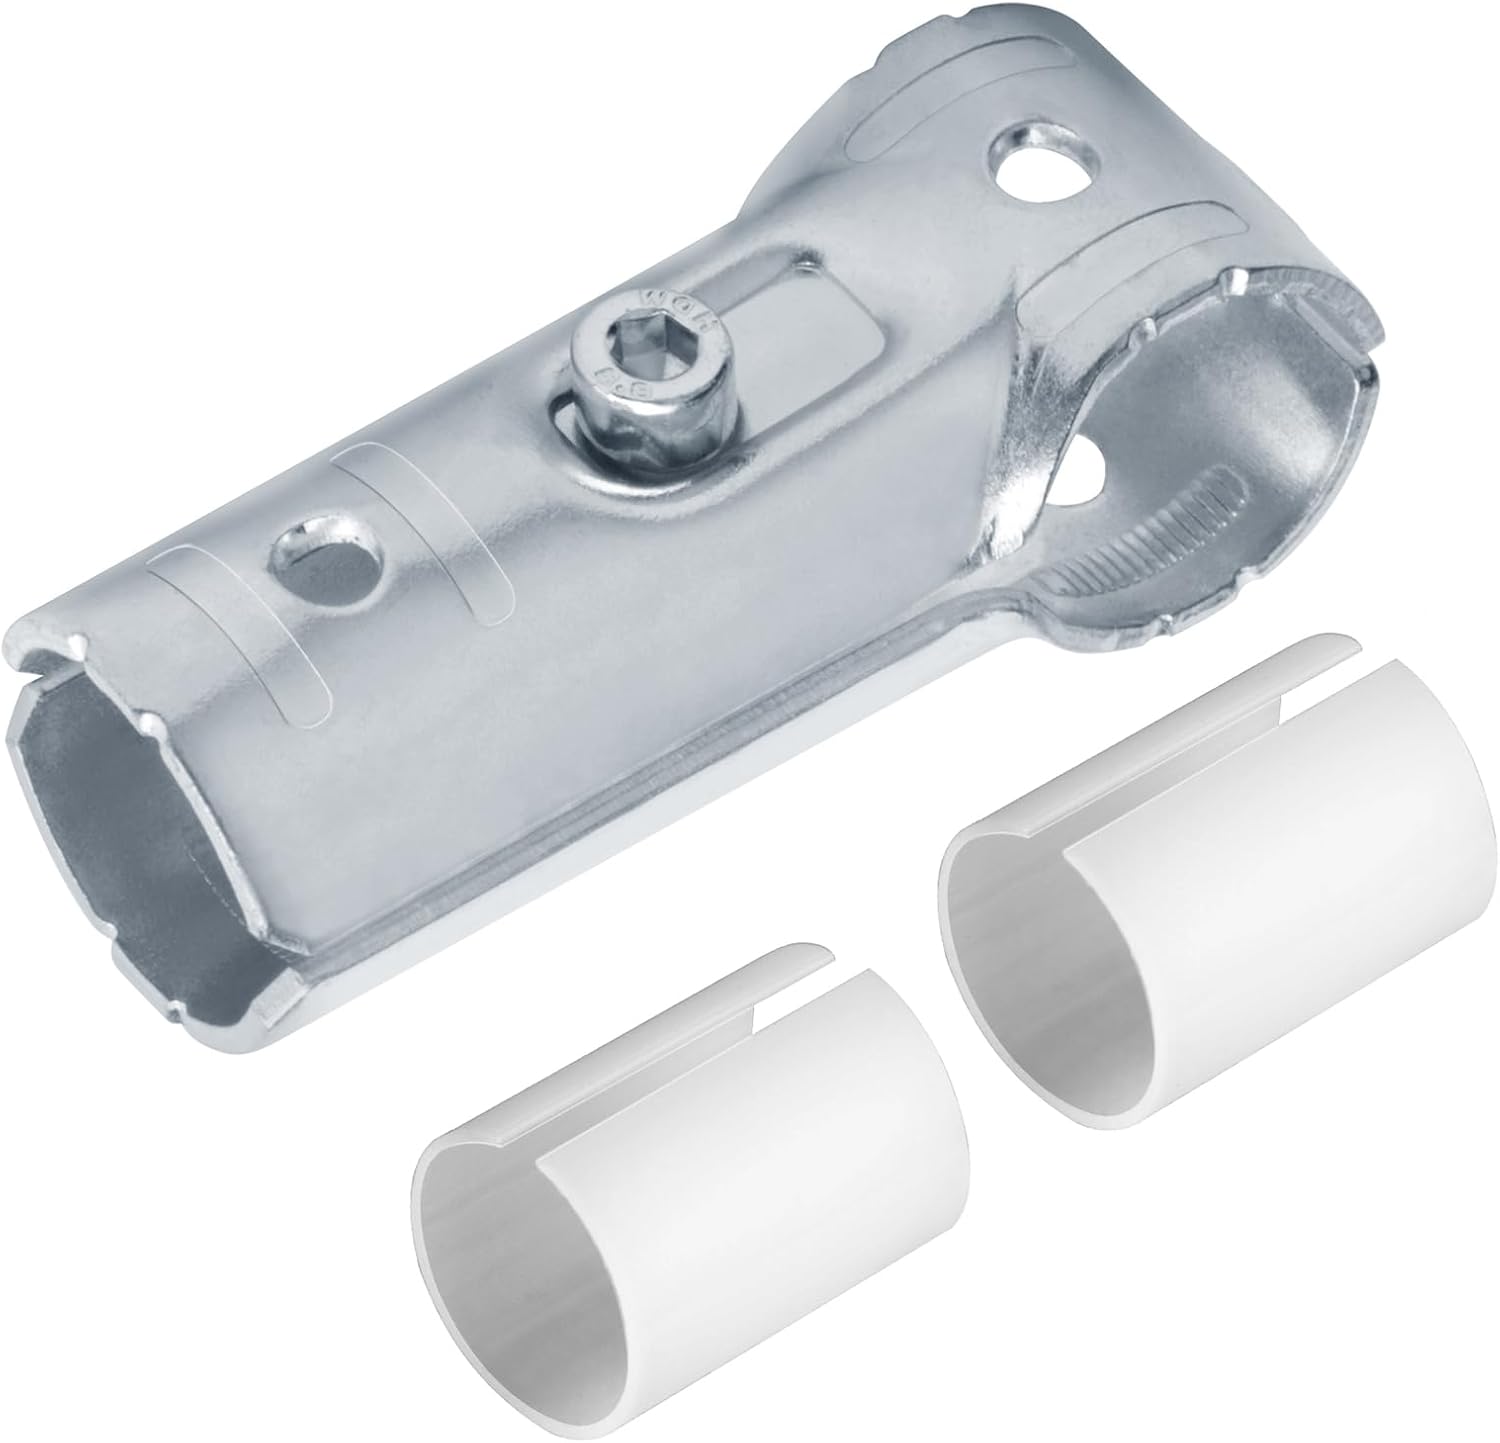
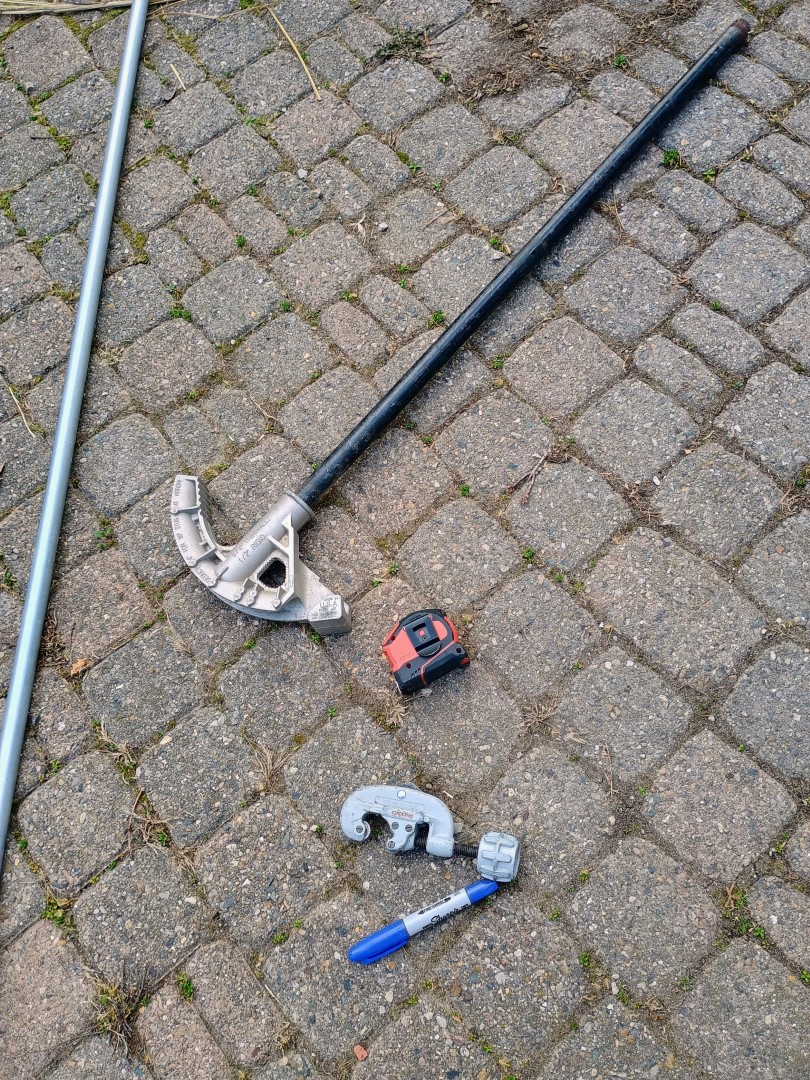
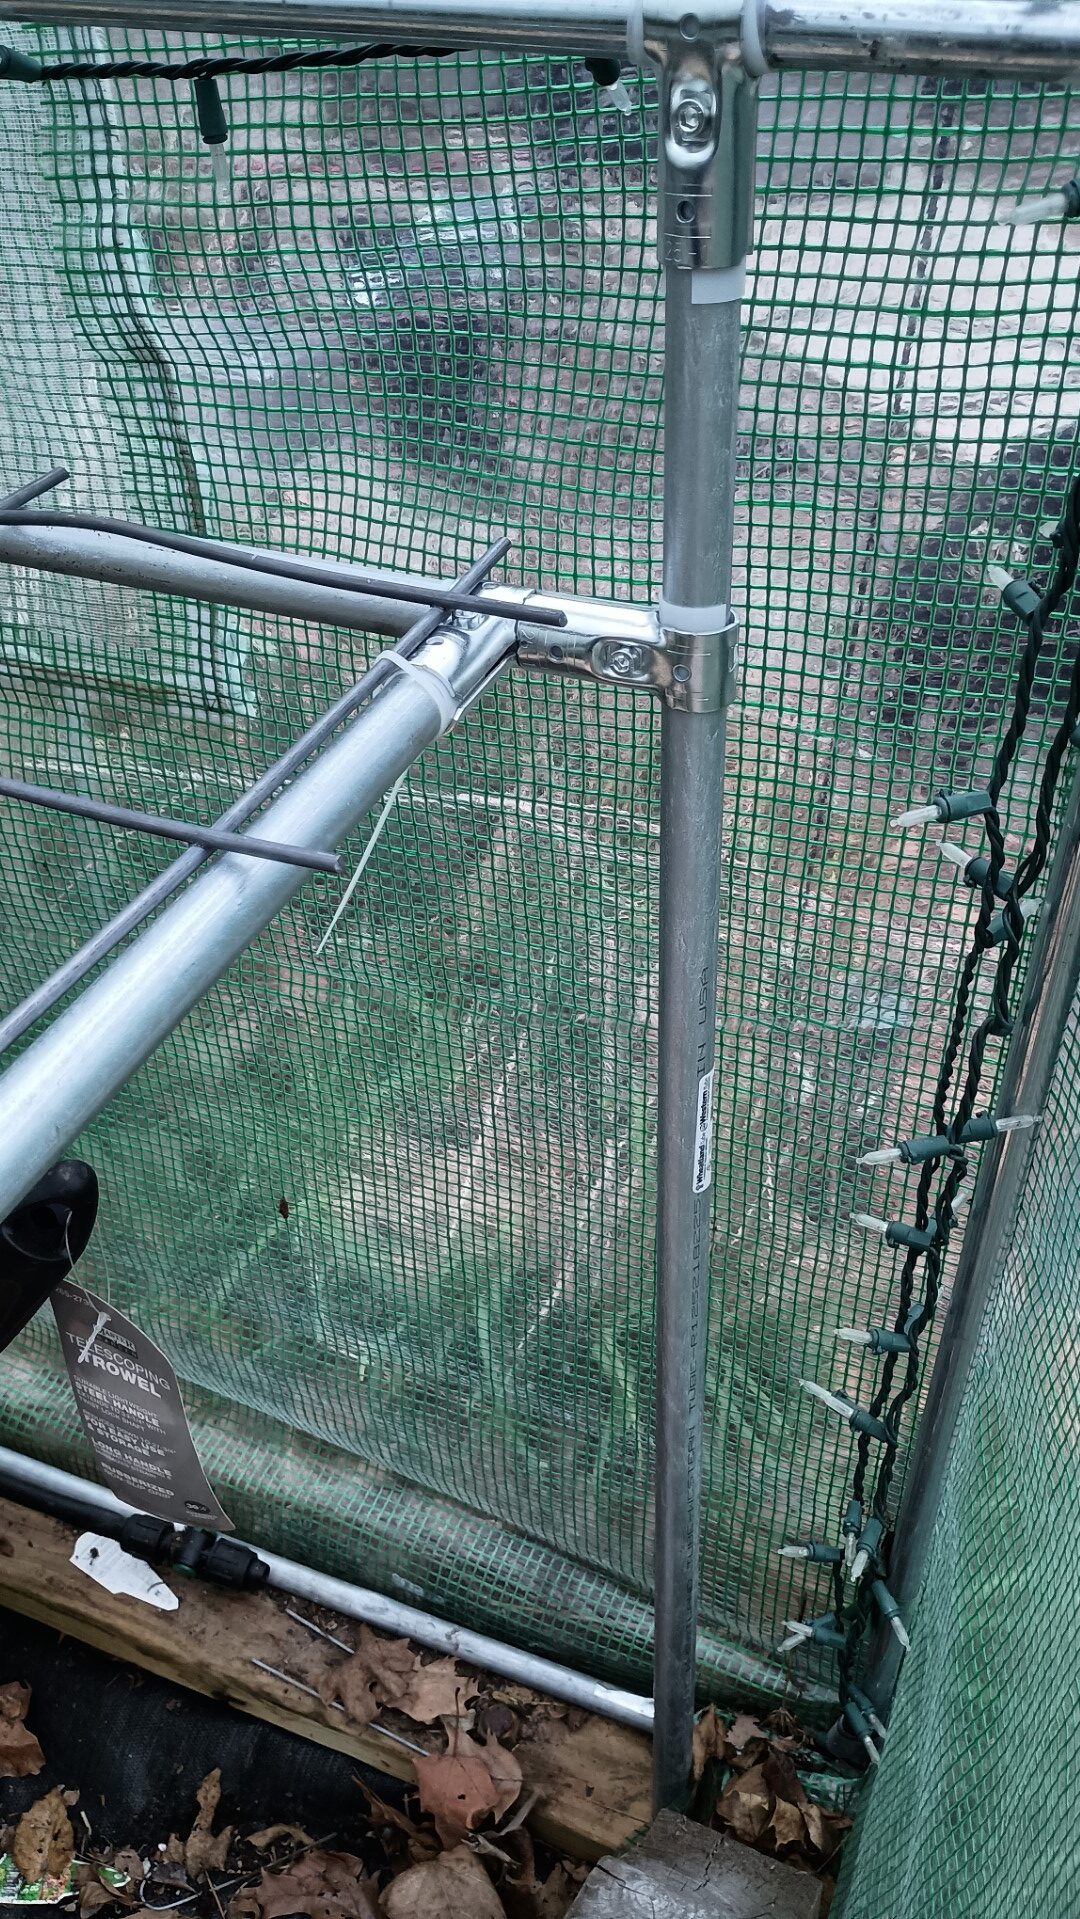
We made these shelves out of 3/4″ EMT conduit and these pipe connectors: T Pipe Connector Tee Clamp Fittings. They come with plastic adapter shims to securely clamp tho the conduit.
Working with conduit is pretty easy, you just need a few tools: a conduit bender, a pipe cutter, and a tape measure and a marker.
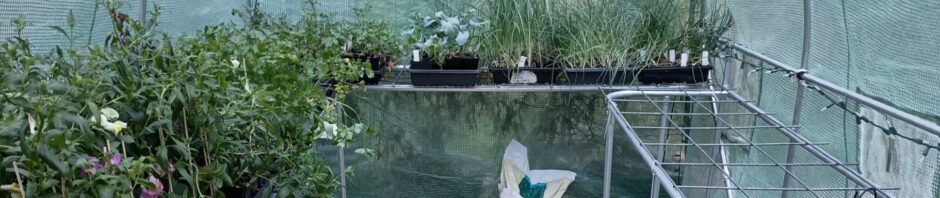
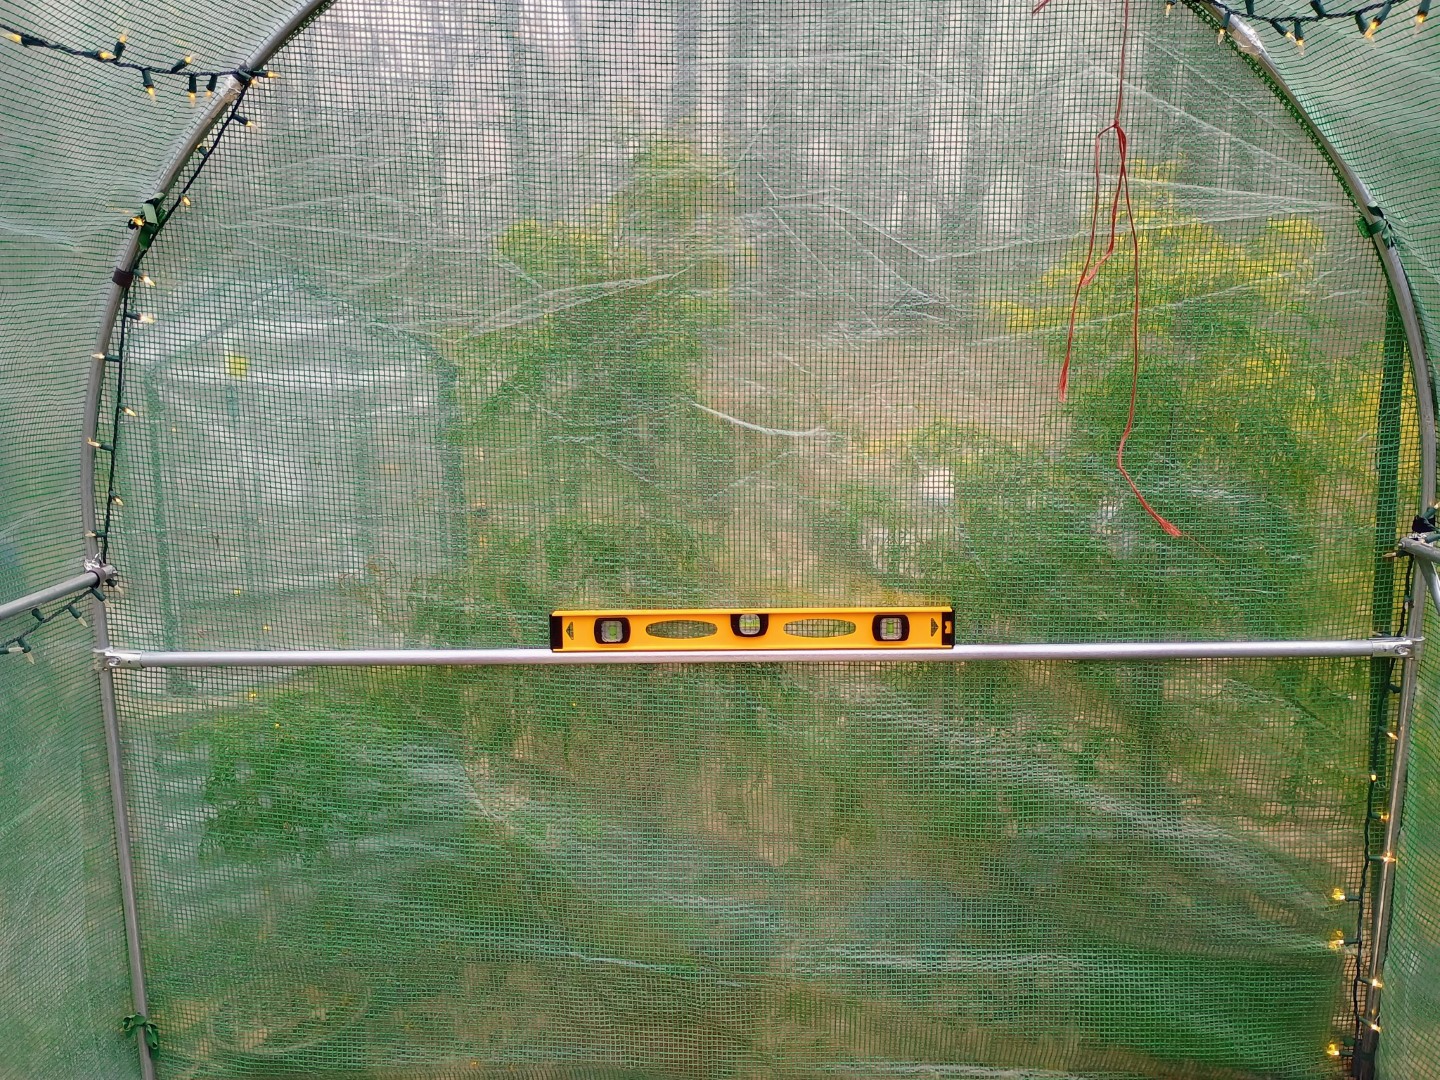
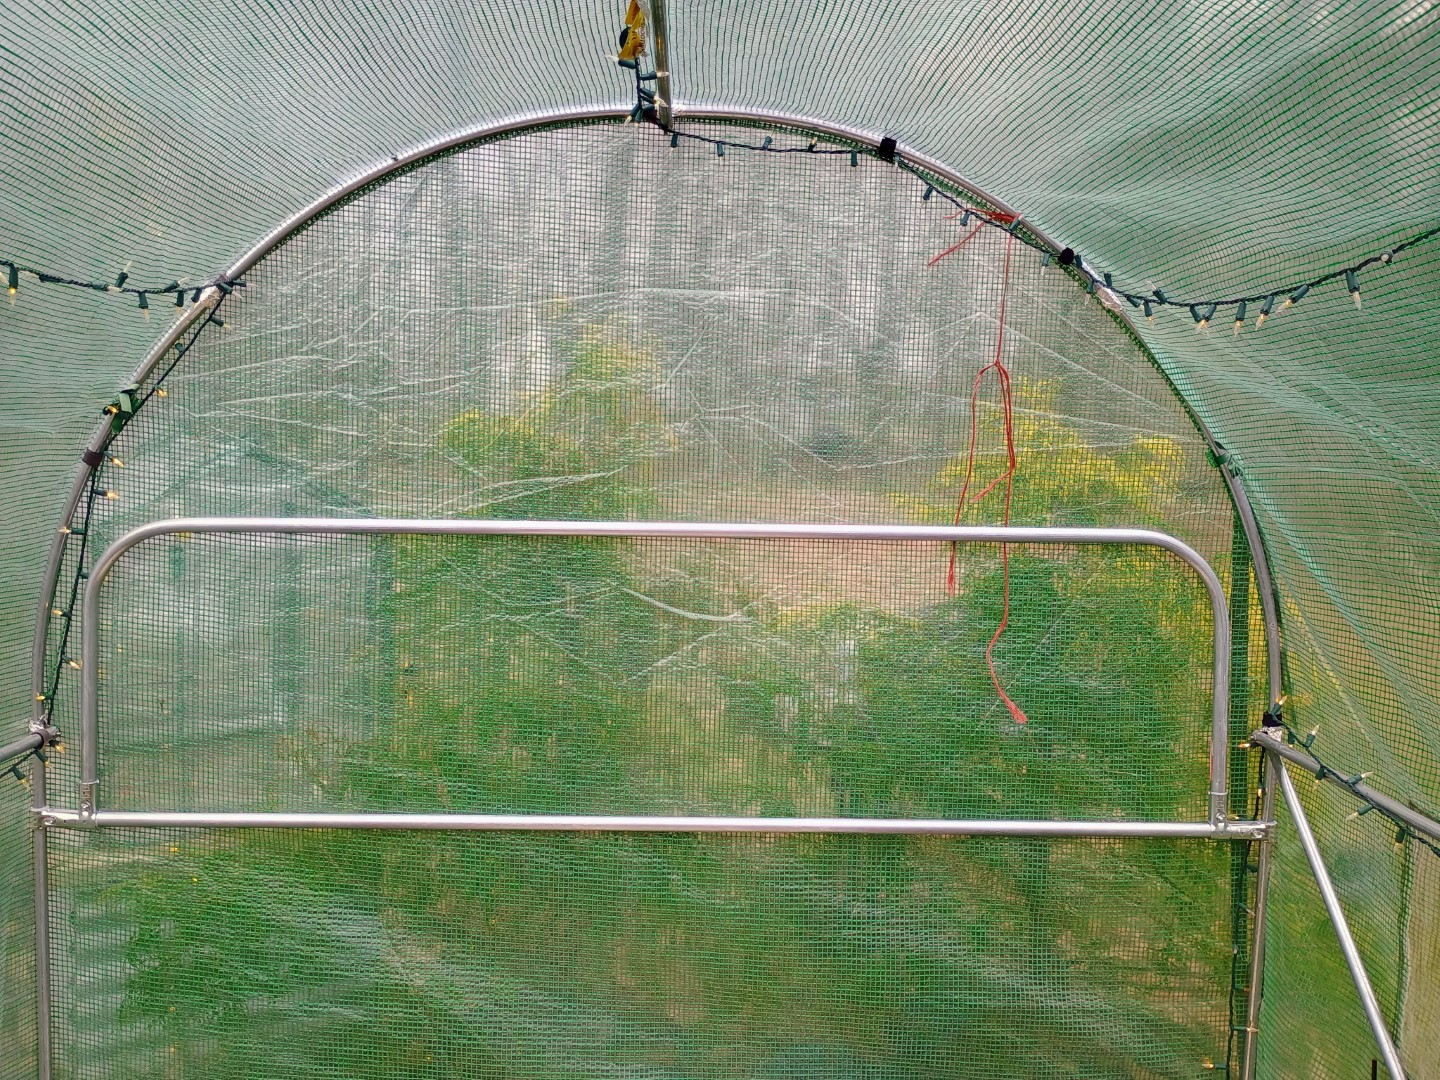
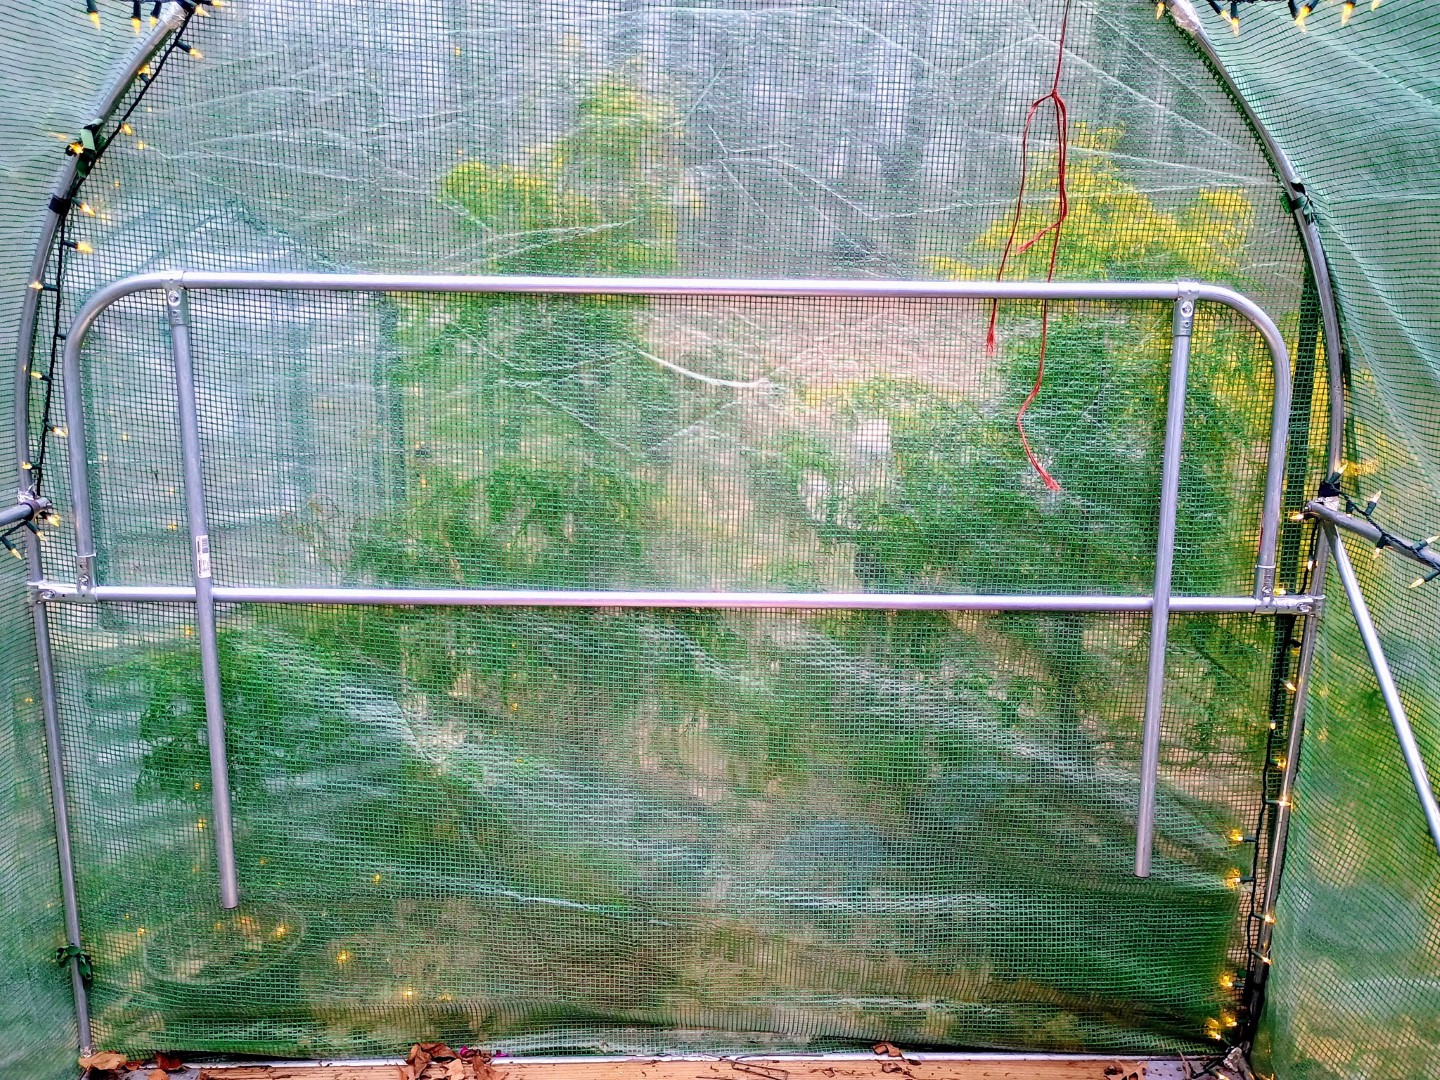
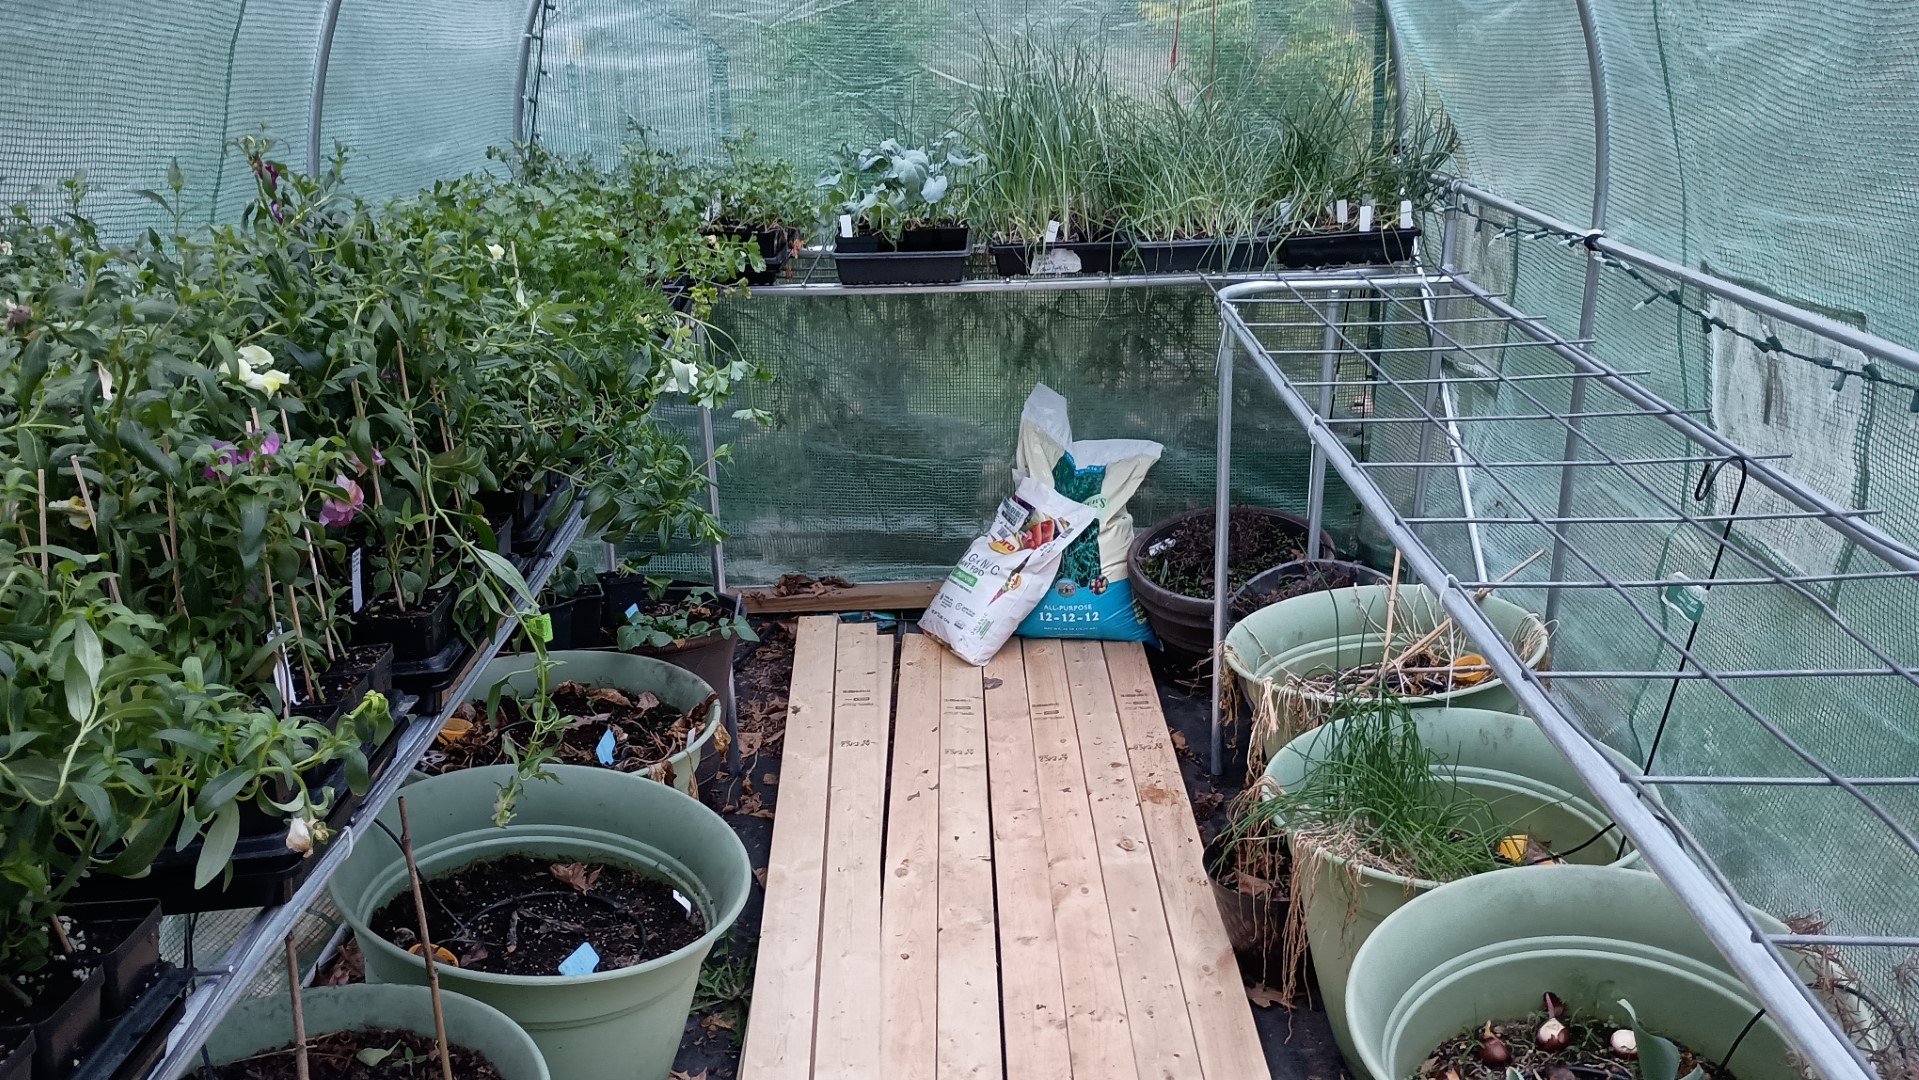
The first shelf was going on the back wall. It’s approximately 7 feet wide.
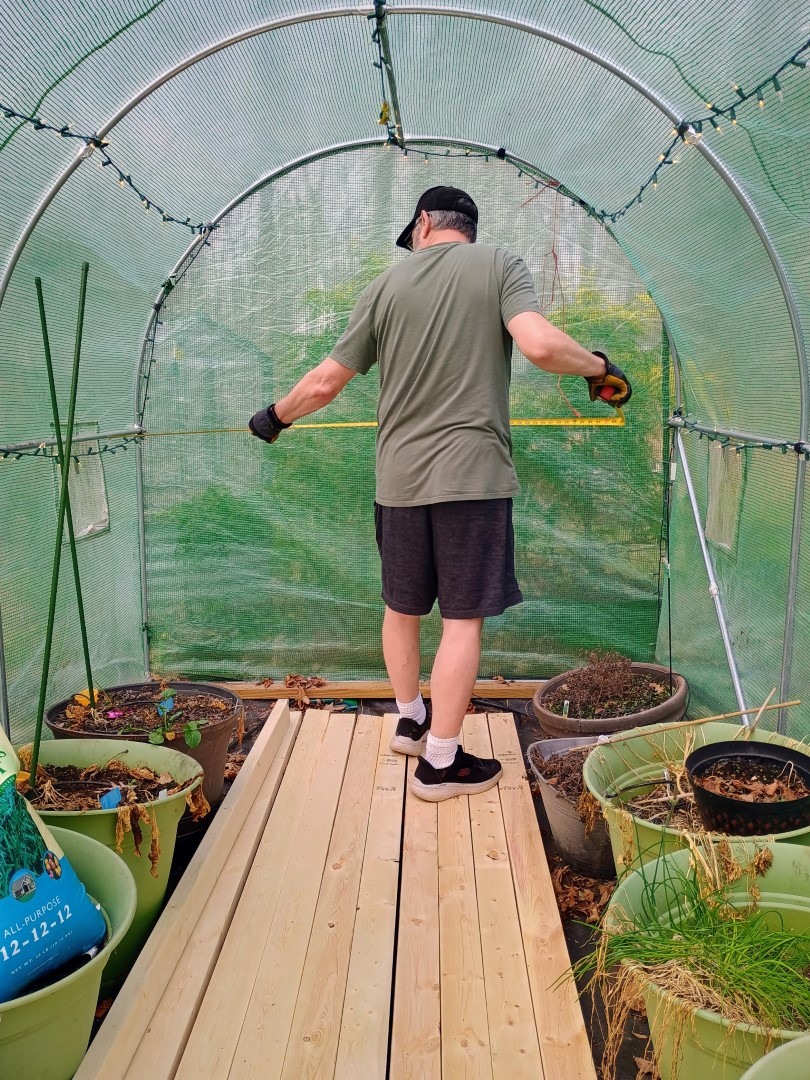
The first piece of conduit would be connected to the corner uprights. I needed to measure where the right height would be, approximately 3 feet.

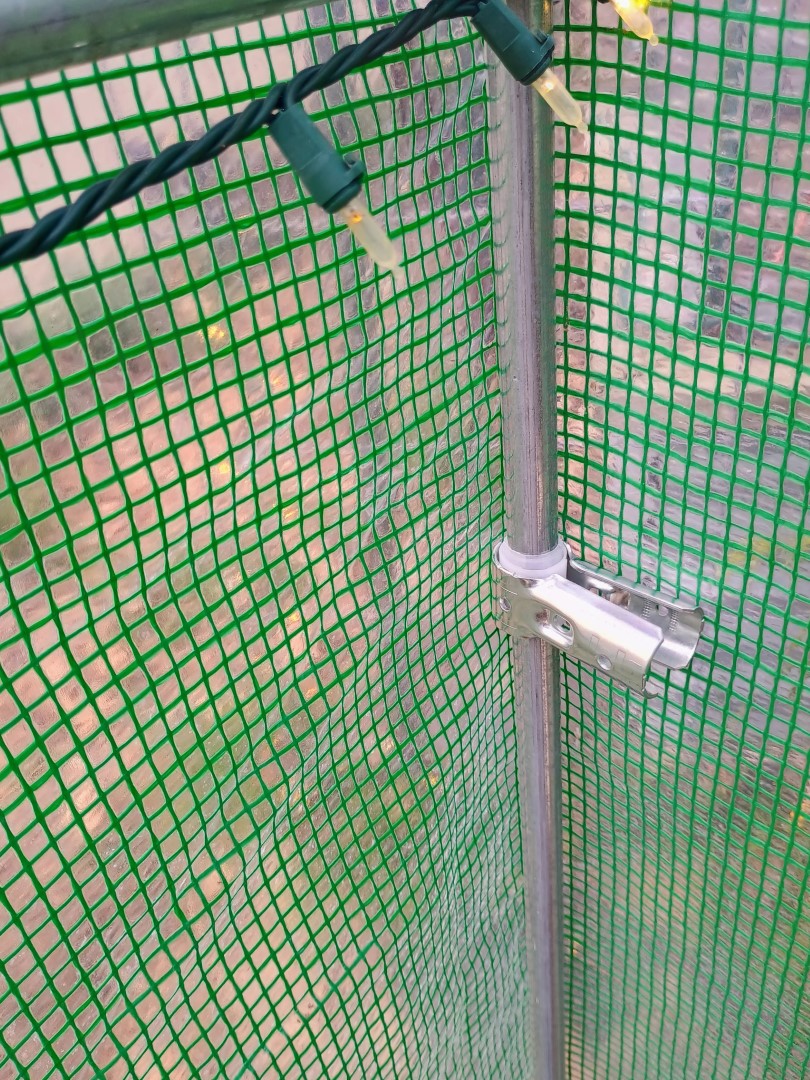
I attached the connectors to the corner pipes. These connectors are for 3/4″ EMT, but the pipes in the greenhouse are only around 1/2″. To make them work, I used 3 of the plastic adapter shims, and they clamped on very securely.
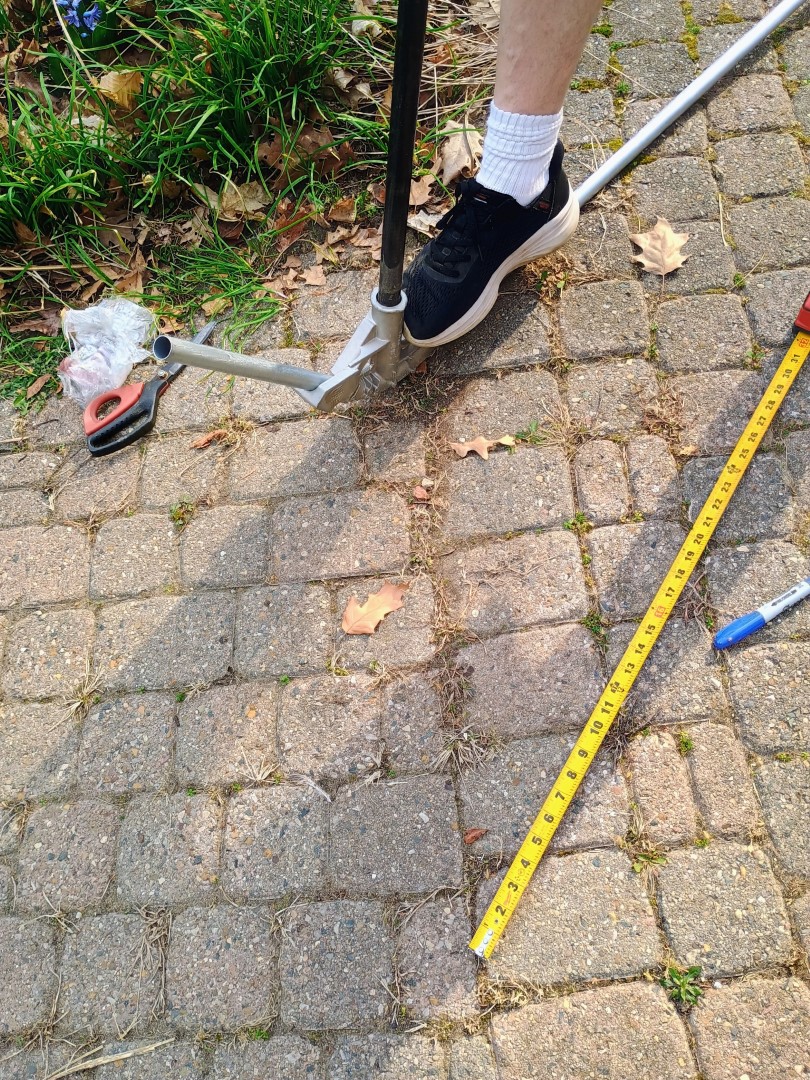
Then measured between them to the tightening bolts to find the length of conduit needed. I then cut it with the pipe cutter, put it into the connectors, and adjusted for level.
I measured from one connector to the other to determine how long to make the front pipe. I made these shelves 18″ deep. The conduit bender has a 6″ radius, so to bend these, mark 12″ from the end, with the bender starting at the 12″ mark.
Bend it to 90 degrees. A carpenter square just to check that the angle is 90 degrees.
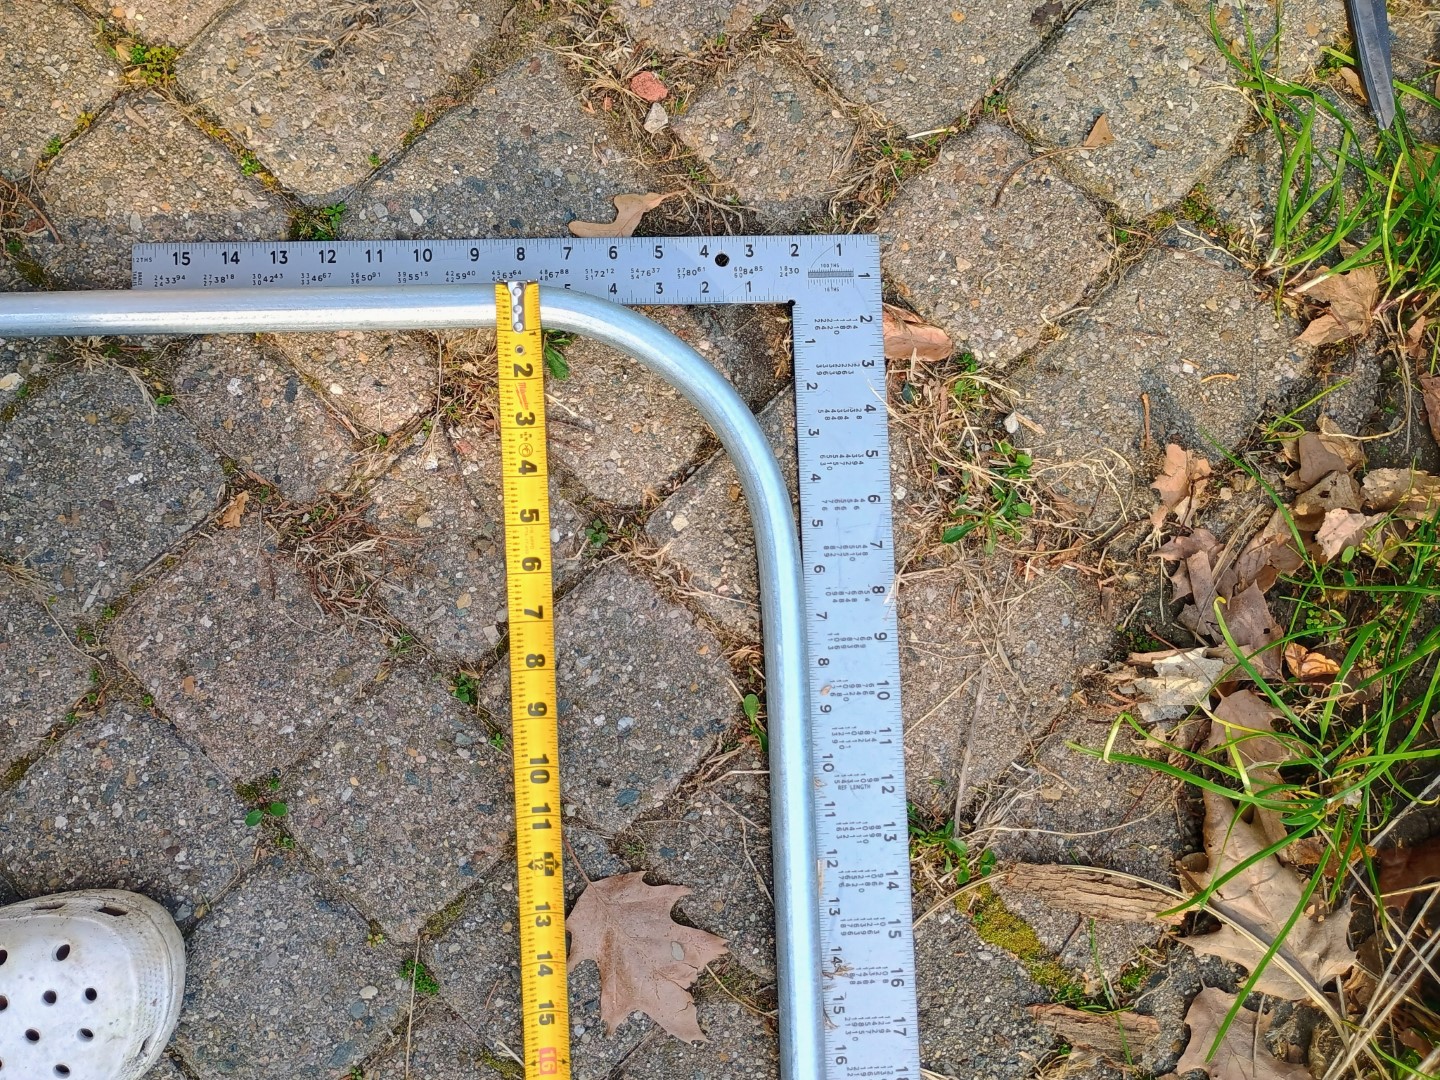
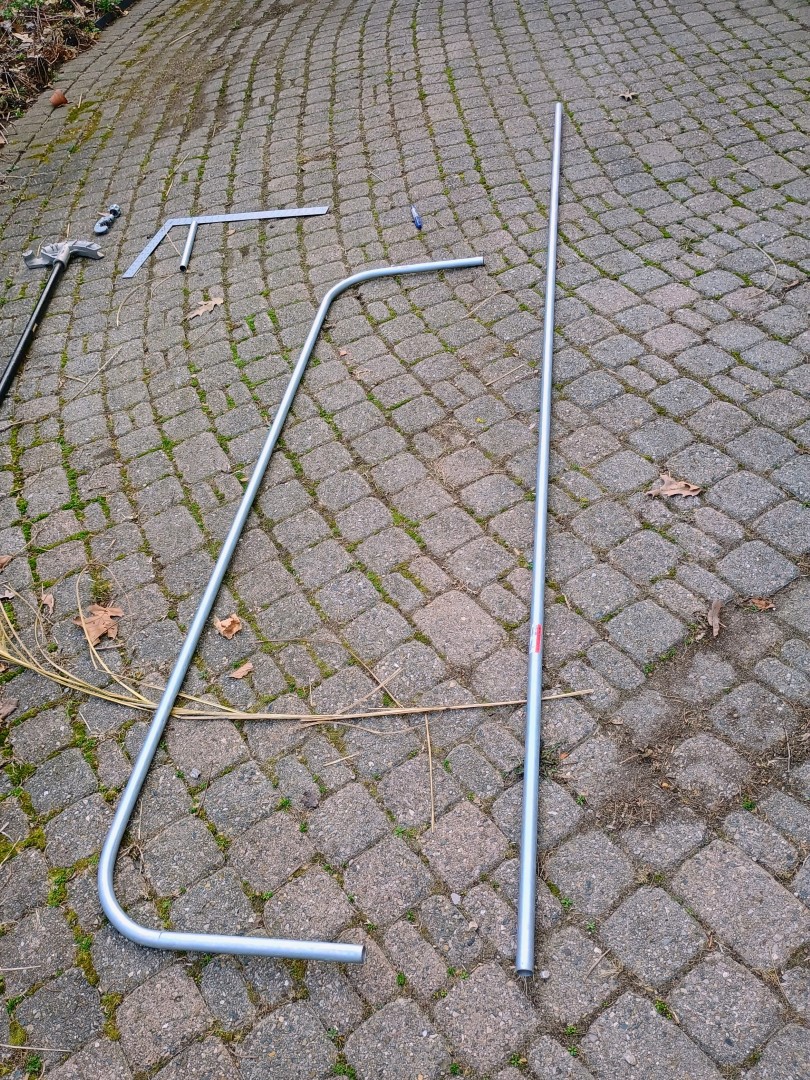
Measure the length from the outside of the bend you just made, to the length you need, remembering to subtract 6″ for the bend. (I didn’t, and the shelf pipe below is 6″ too long. So I had to make a new one. But the bends in this didn’t go to waste, they were used on the side shelves).
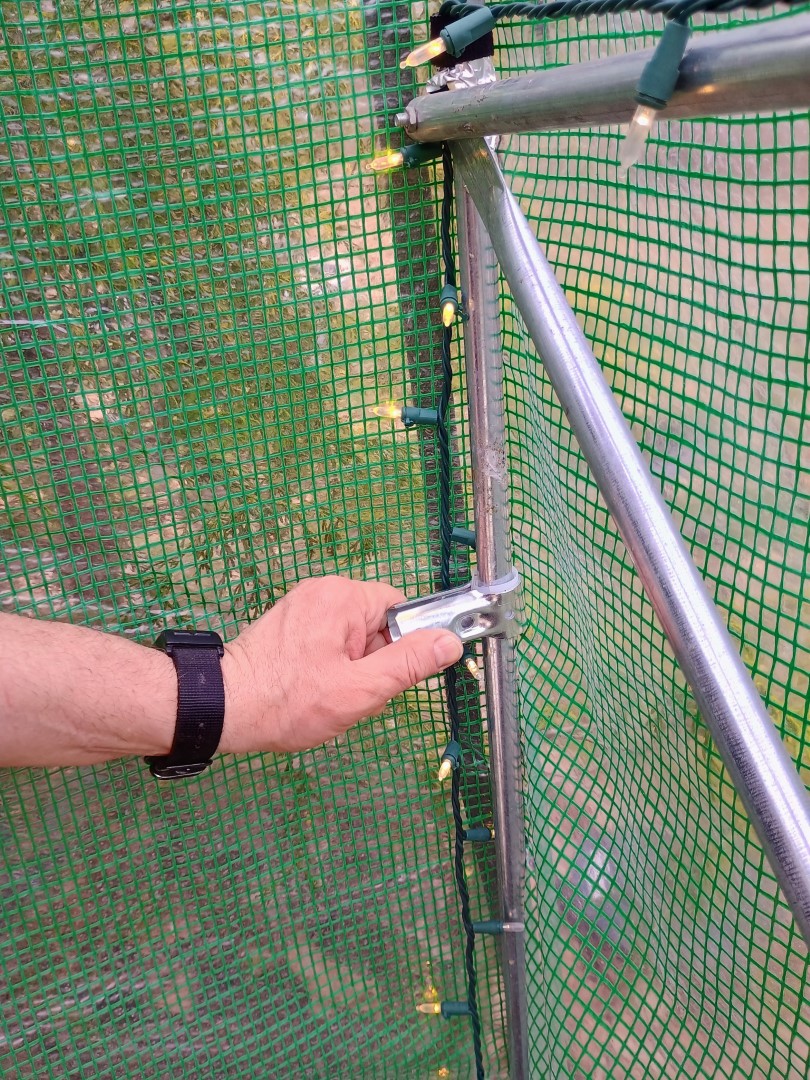
This piece connected to the back pipe with more connectors.
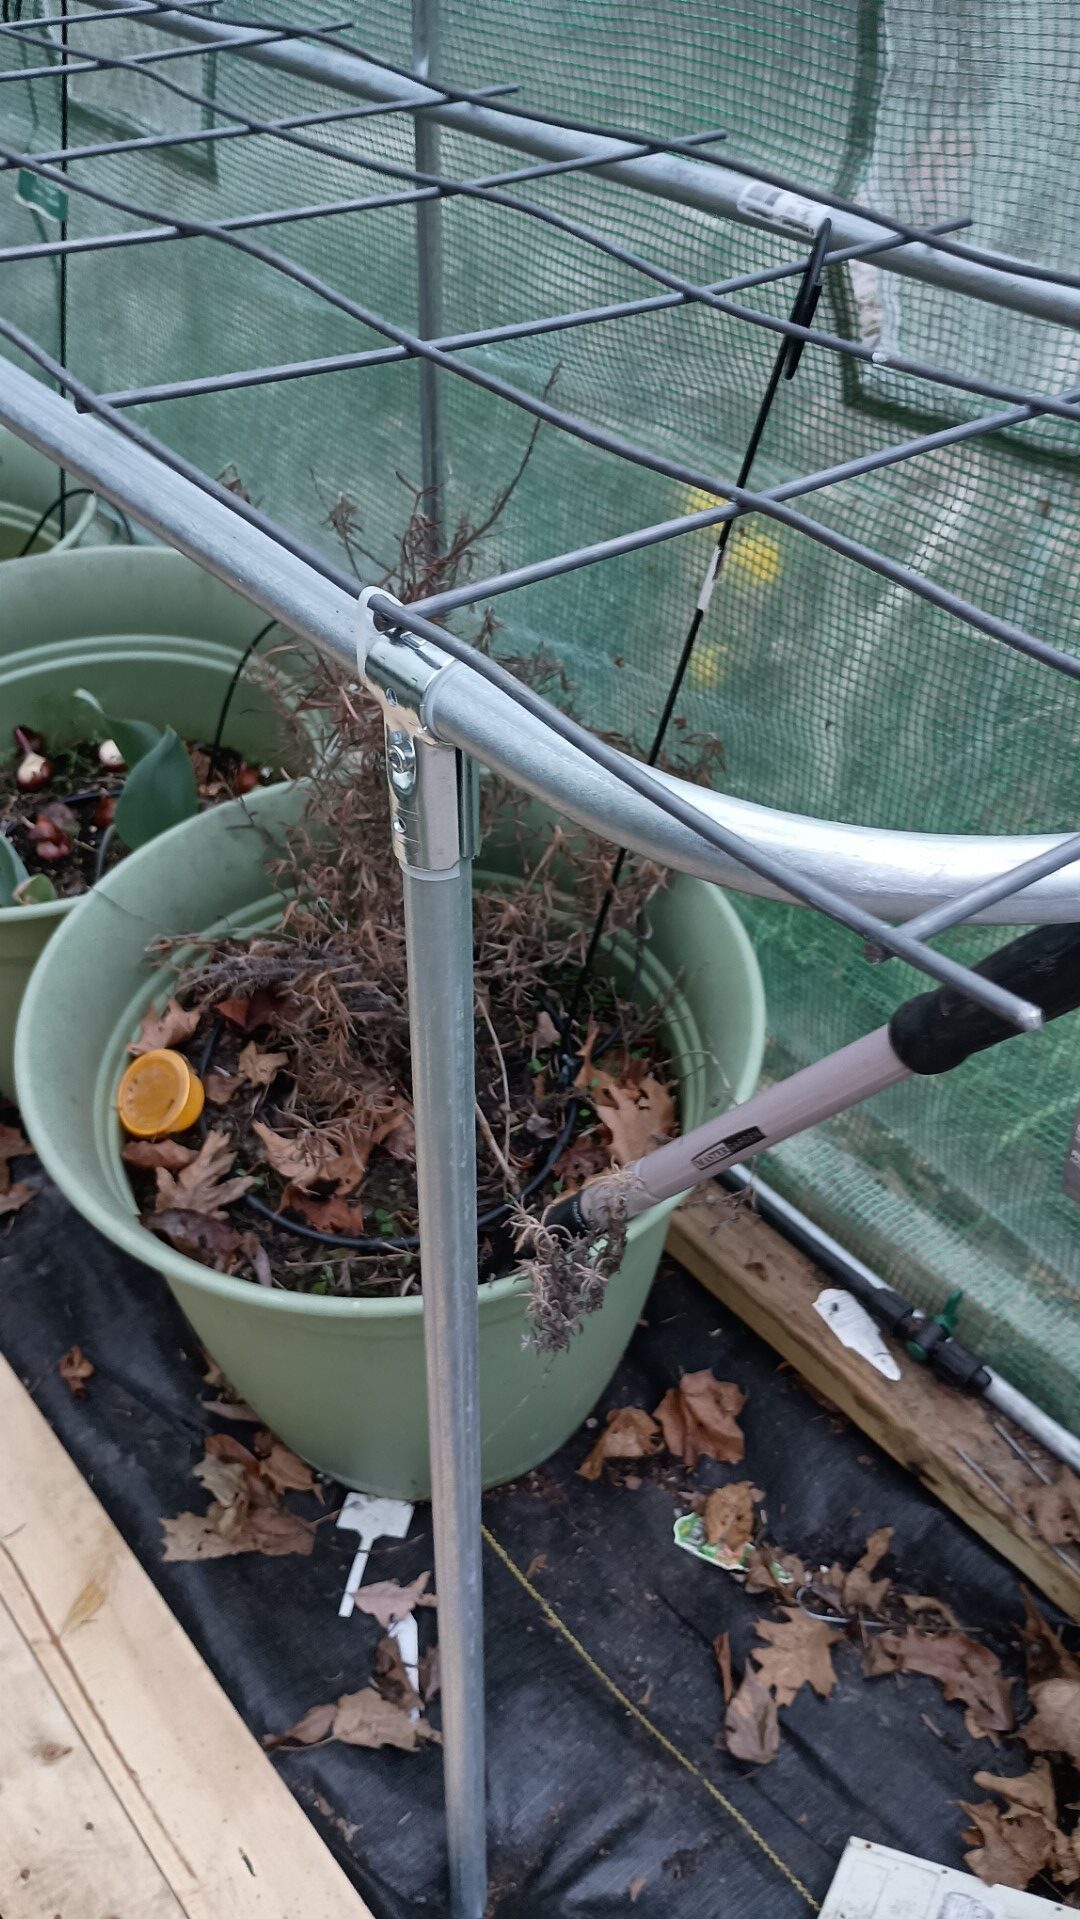
I then rotated the shelf down and leveled it to then determine the height of the legs. The floor in here is just landscape fabric over the ground, and it’s a little uneven. So each leg had to be a little different.
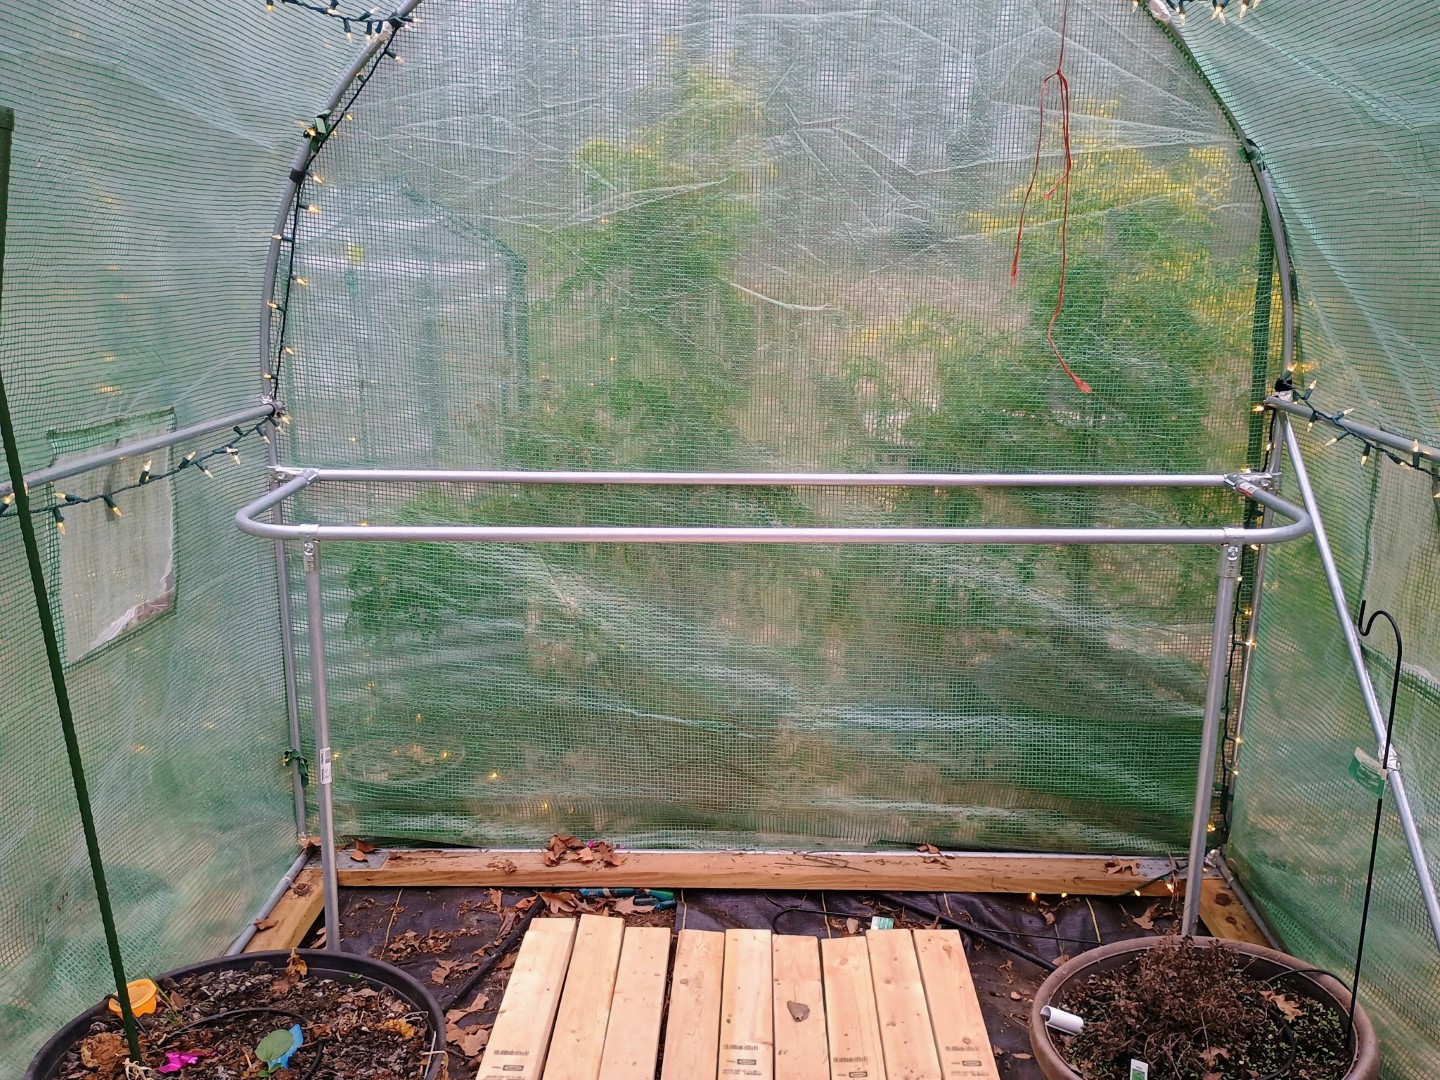
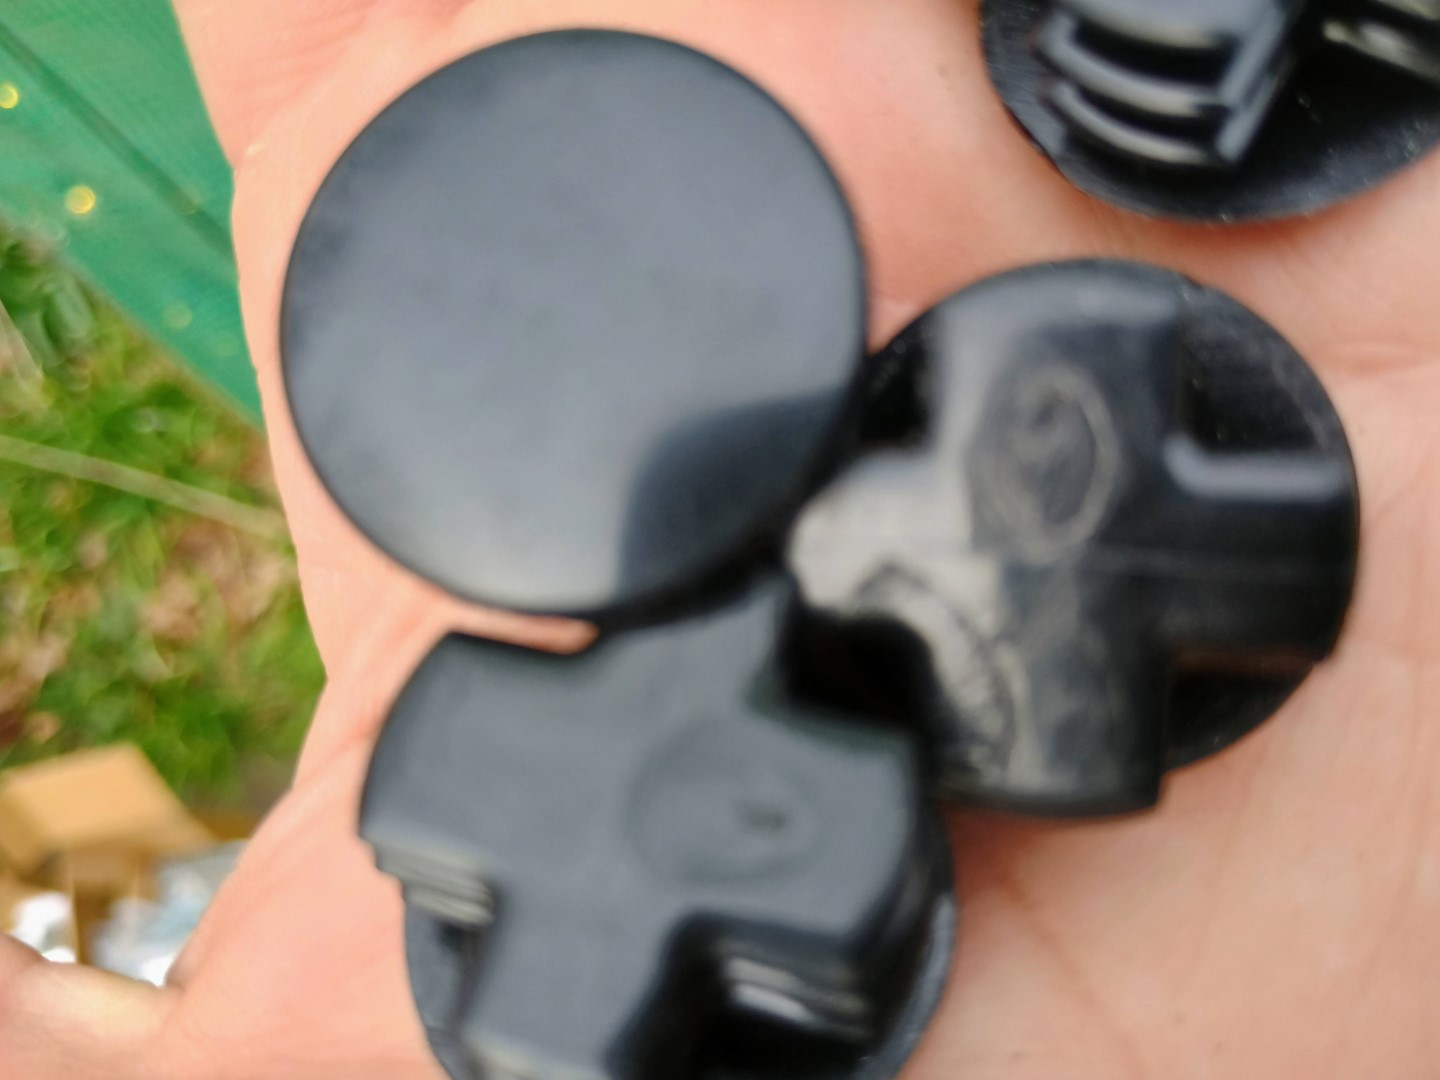
I put these plugs into the ends to keep them from tearing the fabric. The plugs are from metal shelving units we purchased years ago from Sam’s Club. We use wheels on those legs and the unused plugs for them fit perfectly into the conduit. Almost like it was planned.
The shelves can then fold up and out of the way if needed.
The side shelves were constructed the same, except there were no vertical pipes in the greenhouse to attach to. So I added vertical pipes connected to the main cross pipe of the greenhouse. These actually help to add stability to the whole greenhouse.
The side pieces needed around 11 feet of conduit and these conduit pieces were only 10′ long. I made it in 2 pieces, using the bends from the mis-measured back shelf, plus a straight piece, connecting them with conduit couplers.
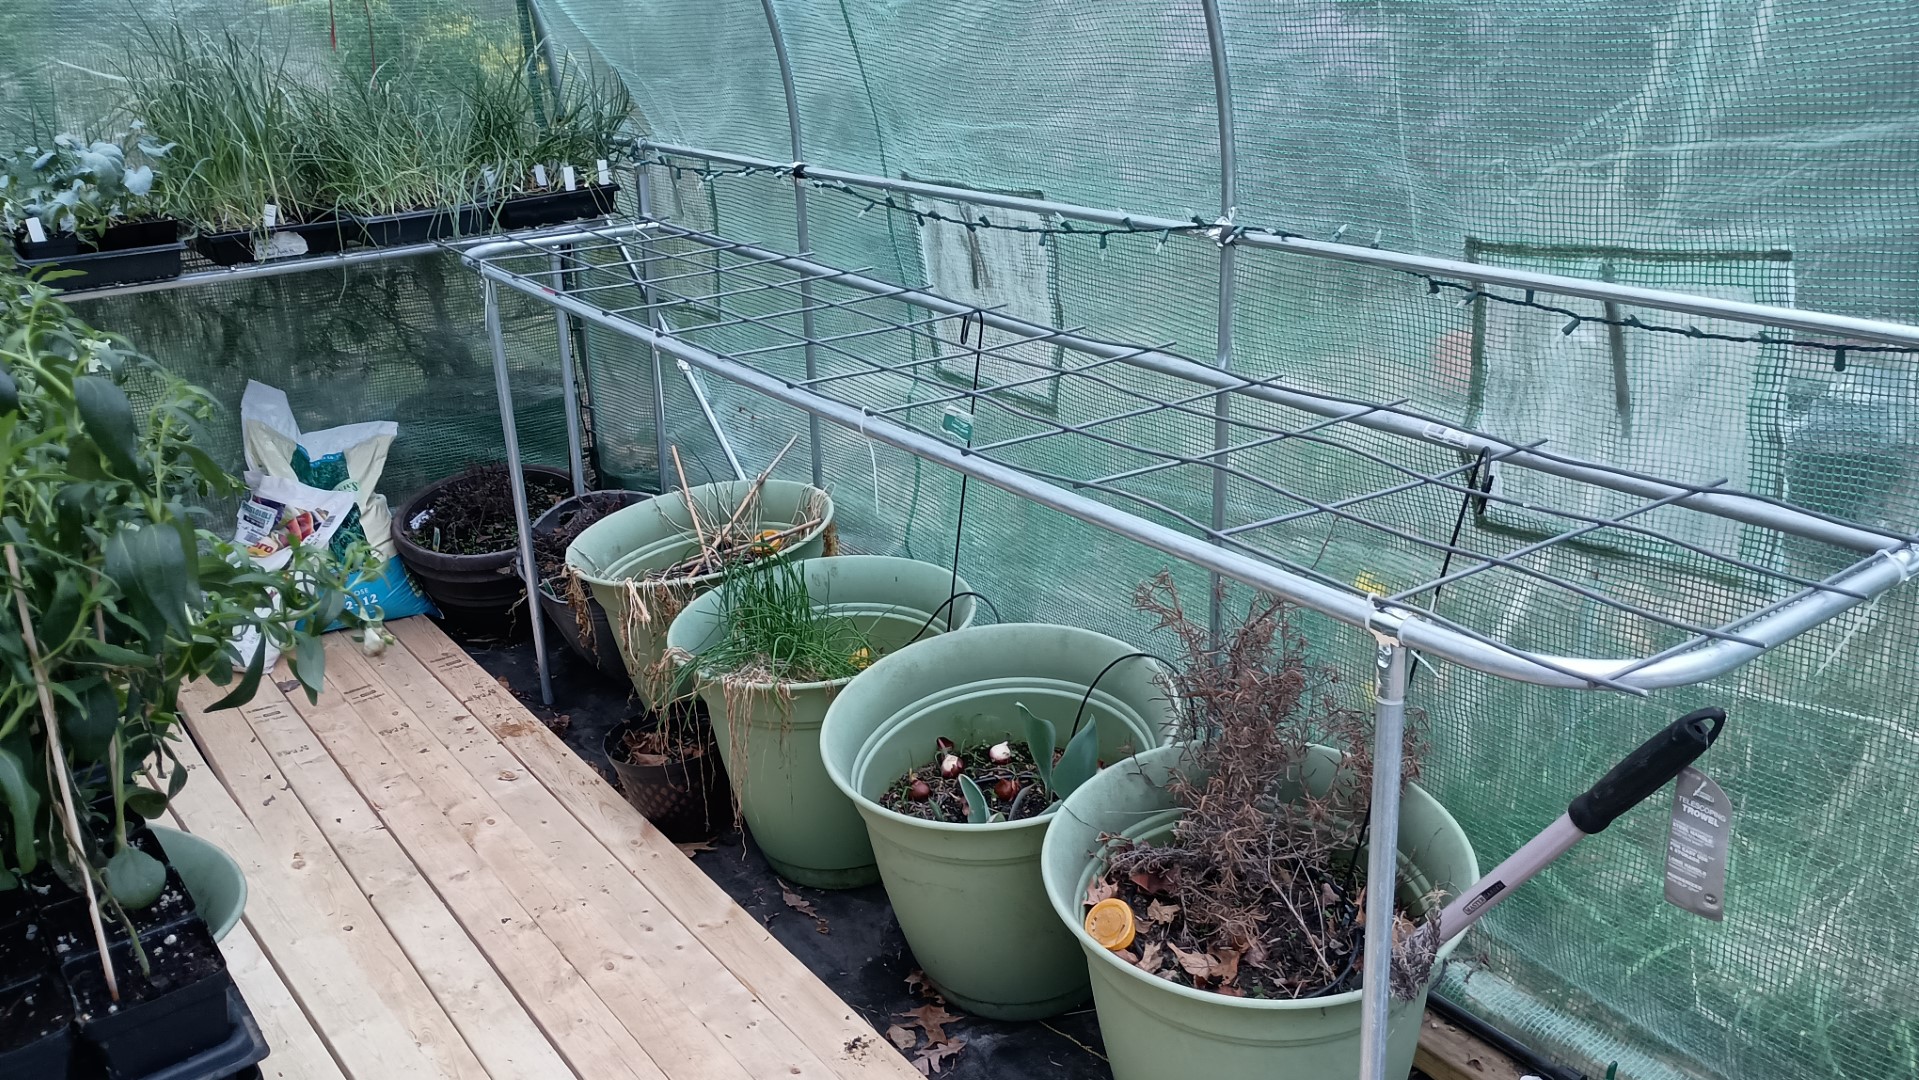
For the top shelf material, I cut pieces of cattle panel to fit on top, and zip tied them down. After cutting them to width and length I used an angle grinder to round off the edges so they could not rip the plastic or the people. On the final side shelf I switched the way I was running the cattle panel so that the long bars running the length are up. The first two shelves I had the short bars that run the width up and noticed that the flats were harder to slide and sometimes were sitting with a side not supported.
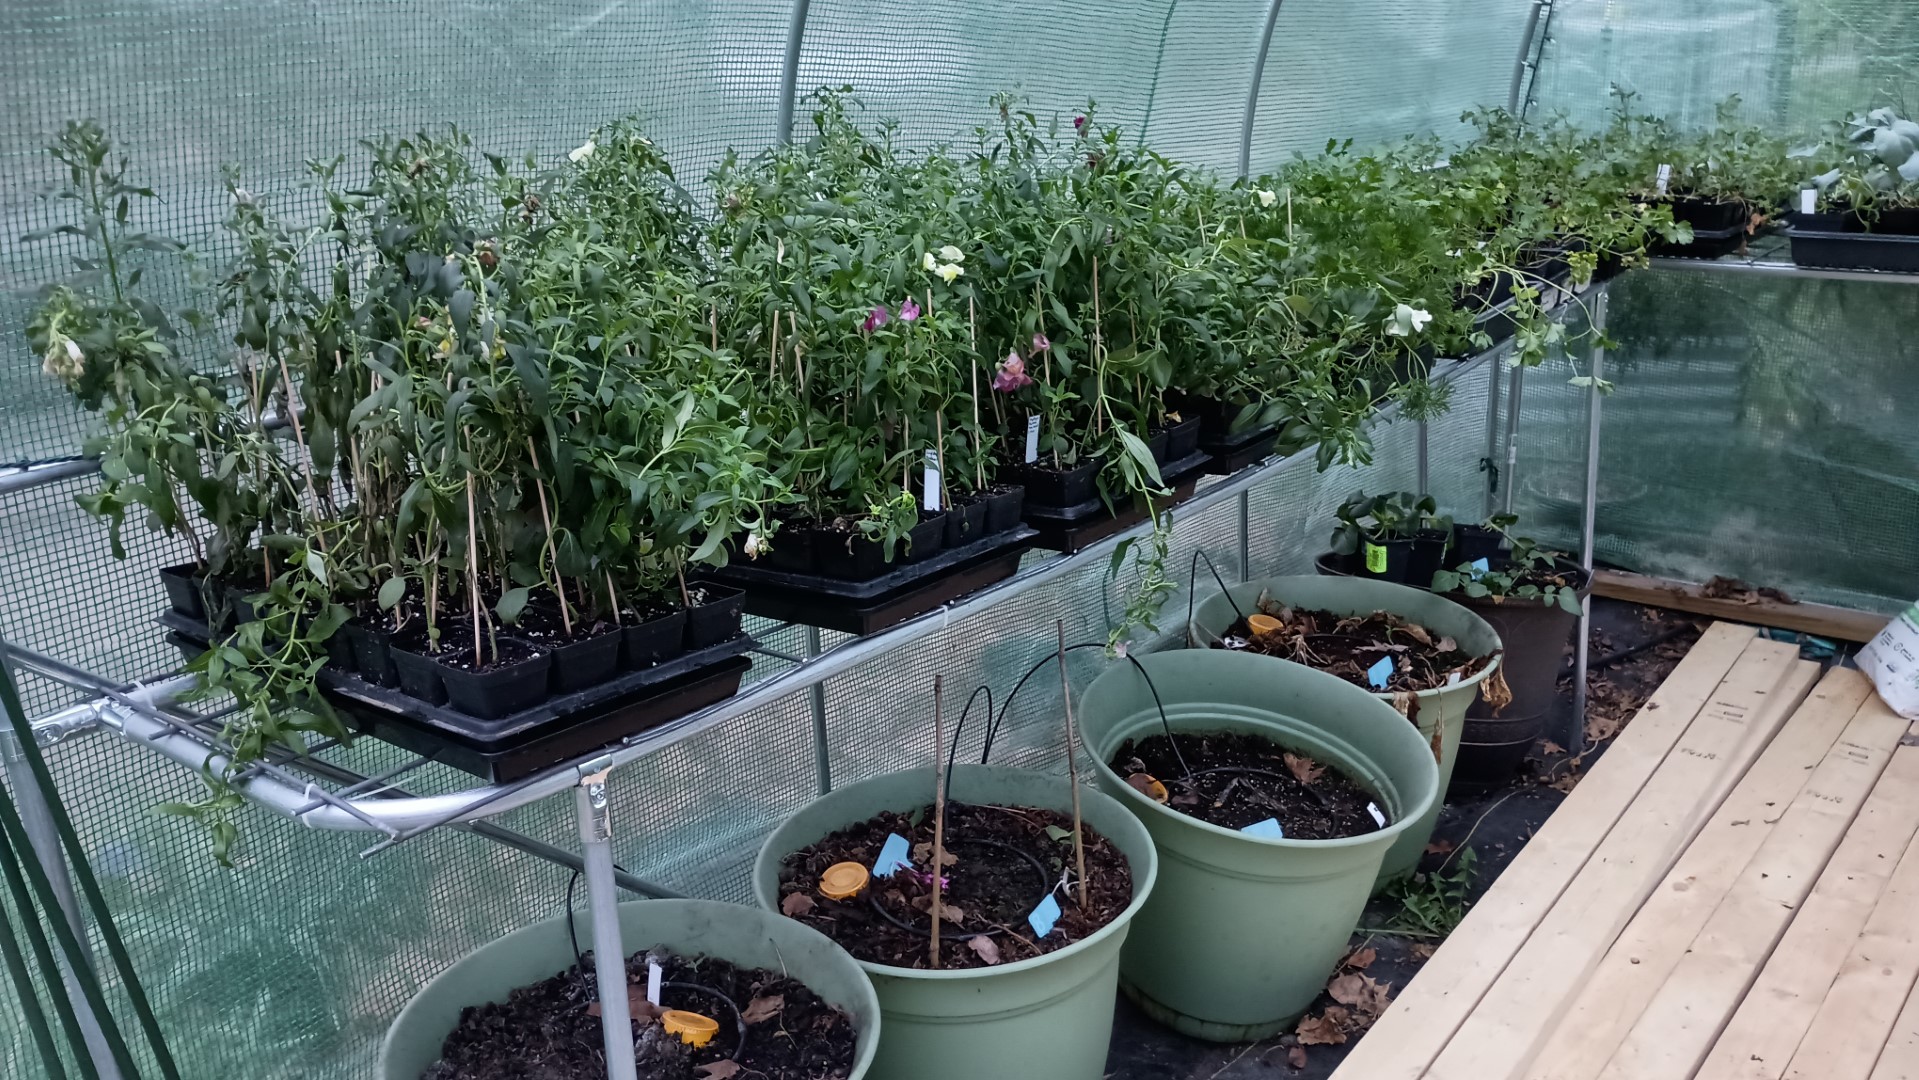
These shelves are almost 9′ long. The three shelves give us enough room for 22 1020 trays. At some point we may need to add a support bar to the middle or a leg in the middle if we start to notice any sag. To further protect the cover it might be a good idea to come back with duct tape or some other means of protecting the side from the metal. That constant wind movement rubbing against the heads of bolts/screws or the cattle panel ends will damage the cover, better safe than sorry.
Thanks for reading. I hope this may be helpful.