6 years ago (has it only been six years? Wow!), our initial “raised bed” garden was a fenced in area behind the shop. The beds were about 8″ tall 4′ by 4′, made with wood that we had milled from our trees and we used the square foot method. I loved my garden. I would throw a board across the top of two beds and sit there and weed, listen to the birds and the wind and just be happy. Time passed, life happened, and I went through a little time where my health was not great. I thought gardening had passed me by.
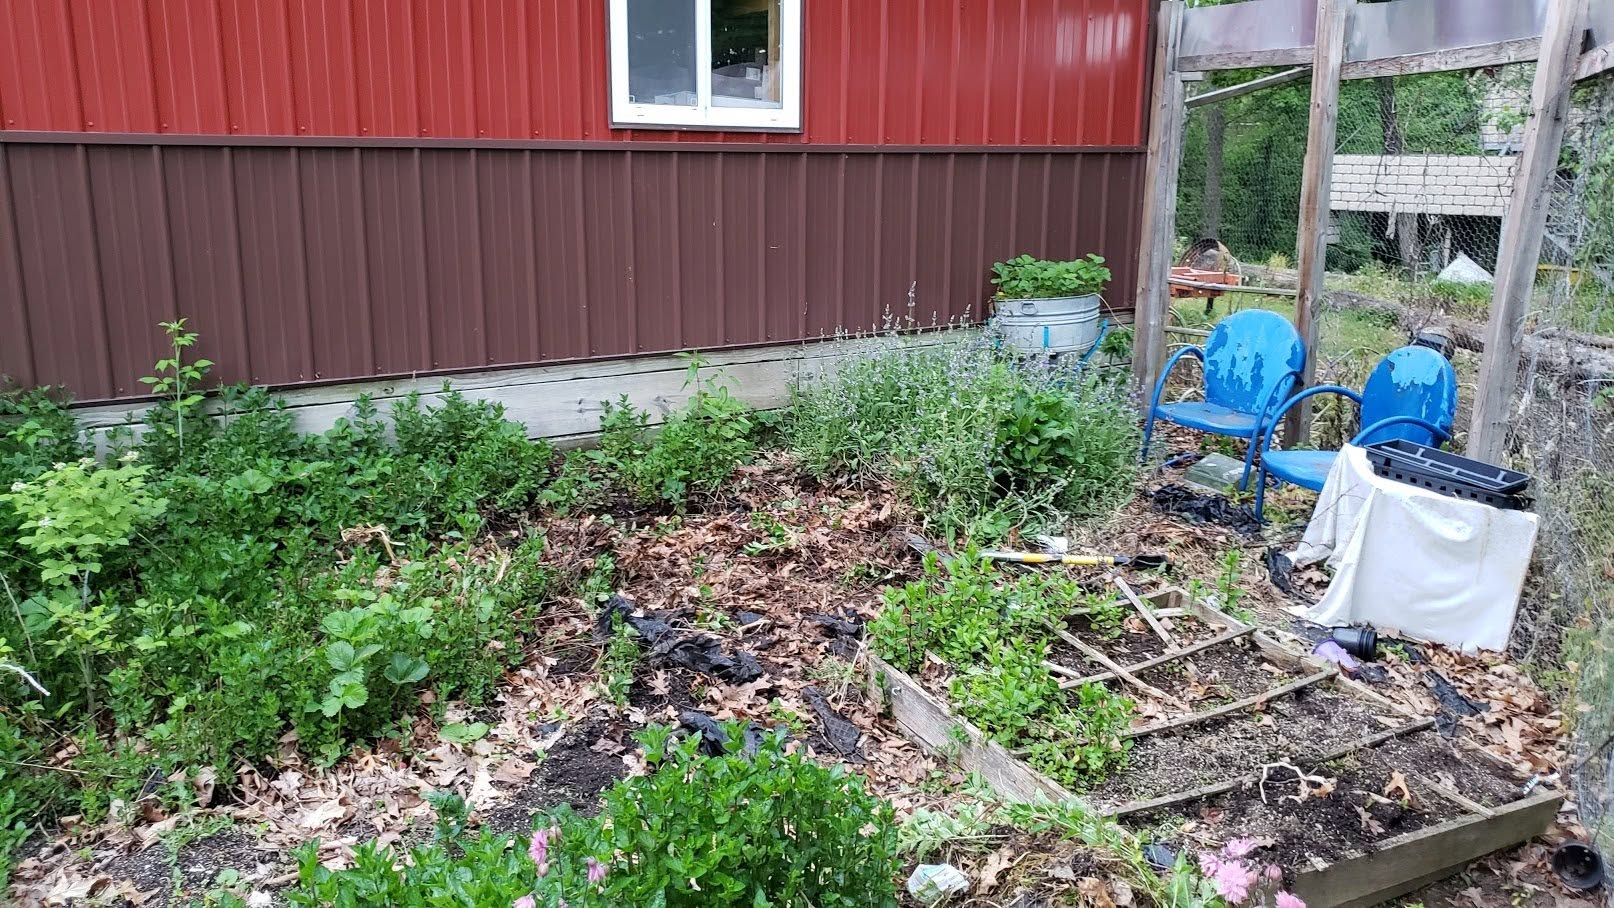
We never treated or painted any of that milled lumber and it held up for a number of years, till it finally could hold on no more. It had become a sad, messy, jungle but we were still growing things back there.
These tall raised beds kept popping up on the internet and I was very intrigued. I was watching a Garden Answer video where she was making her neighbors planters and some of them were self watering! I was like WHAT???? Such a thing exists in this world? I think I need those. What if we could combine the tall beds with self watering and do it with something that would not eventually rot away? Enter the videos about these metal raised beds.
I could not walk all the way back to our garden spot so Bill built me a garden right off the driveway by our front door. I couldn’t stand so he made them tall enough to allow me to sit there and play in the dirt. I could make it out to my chair, some days, even when I could not walk there I could look at them out the windows. The pandemic and shut downs had made building supplies expensive, hard to find and shopping was all done via apps. The metal beds from kits were expensive but metal roofing was not too bad.
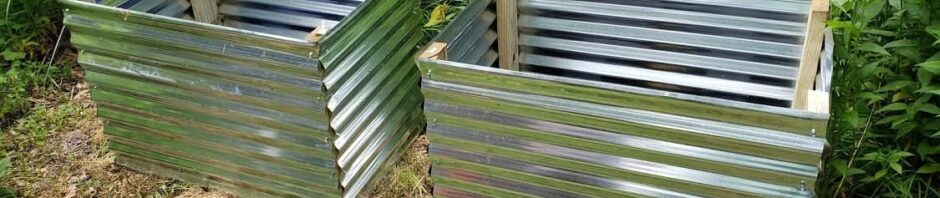
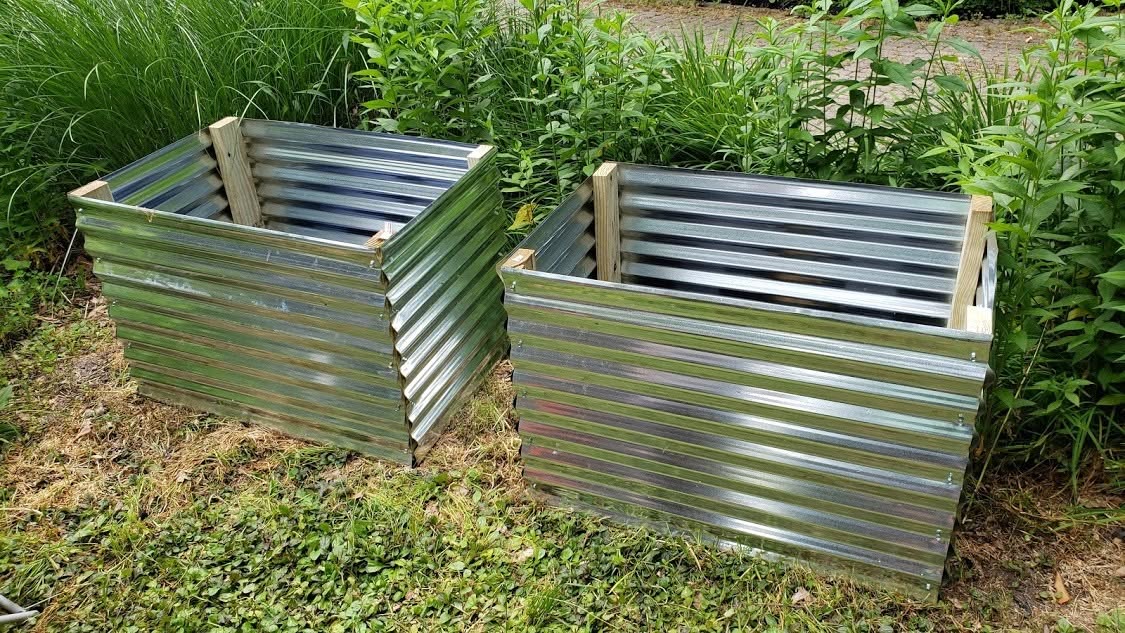
Bill bought several sheets of 8′ x 2′ metal roofing to make me four 3′ x 2′ raised beds lining our cobble turn around. He cut 2×4 boards for all four corners and screwed the metal roofing to them. Later he would use PVC pipe and rivets to put these beds together. It helped to bring the cost down and make them easy and fast to make. These beds have wooden toppers which is why he needed the 2″x4″ corners so he had something to screw those tops into.
Since these are deep and we wanted something that would be very easy to water (at that time we had not gotten into all the Drip Depot fun) we made self watering beds that would wick water up from the bottom.
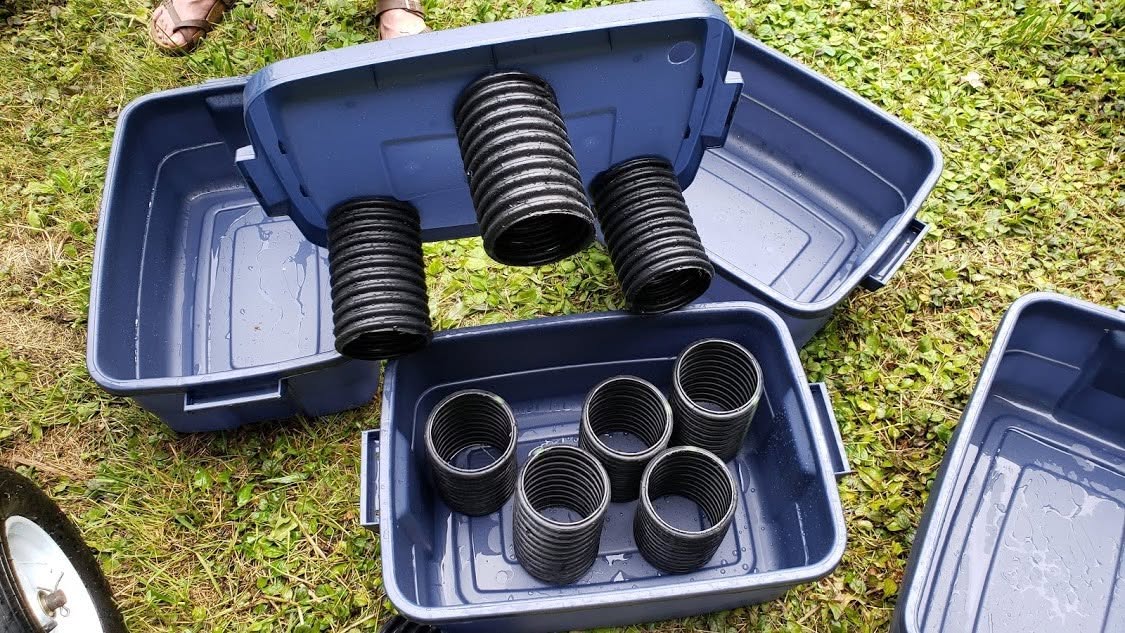
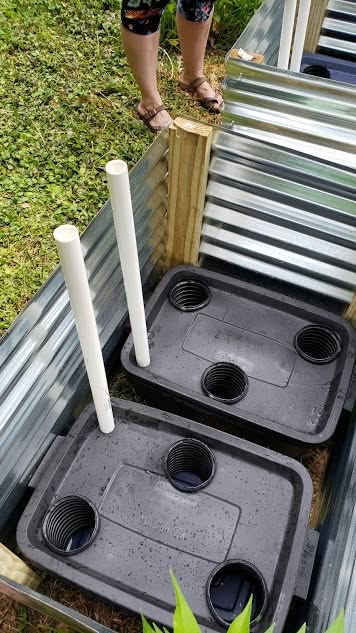
We had tubs from our move, lots and lots of tubs. We also had French drain and a heavy fabric that we used when we dug the drain around our son’s house. We cut pieces of french drain to fit in the tubs. We then cut holes in the lids the diameter of the French drain and stuck pieces of it into the holes. An additional hole was cut in the corner of the lid and this is where the PVC filling pipe would go. Because the French drain has holes to allow water to weep out it can also allow water to weep in. The 3 French drain pieces in the lid are the wicking pieces. The ones in the bottom of the tote are because we had it and we were afraid that the weight of the dirt might cause the lids to collapse.
I used the heavy French drain fabric that we had bought to line the French drain we dug at Peter’s house to make “bags or liners” for inside the three French drain pieces that go down into the tub from the lid. This was to stop the dirt from falling down in them and potentially clogging the holes (same reason you use it in an actual French drain system to hold the stone and cover it so that dirt does not eventually clog up the drainage). The lids snap tight to help keep dirt out and water in. After the tubs were in the box and the lids were on, bags were in the French drain holes we then lined the entire thing with more of that heavy duty commercial fabric and stapled it to the 2″x4″s in the corners to help keep it in place while we filled the box with dirt. Bill also put a drain hole in each box about a half inch below the tops of the French drain pieces. We wanted to give the roots a little bit of air space in the event that we had lots of rain, snow melt, or somebody forgot to turn the water off.
Here they are fully assembled inside the raised beds and partially filled with water. There are two totes per bed, just because that’s the size totes we had on hand. Initially we filled/watered by hand using the hose into the PVC pipes and filling till water ran out the bottom of the bed. Later Bill ran additional PVC from the house, then up each bed, to elbows that went on the PVC pipe ends. Each bed had a valve to shut off water to that bed if needed.
How does this all work you ask, it uses soil’s capillary action to move water from the tubs up into the soil. Those French drain bags are filled with peat moss/vermiculite the tubs are filled with water, the water touches the landscape fabric which soaks it in, the peat/vermiculite mix which is packed into those French drain bags comes into contact with the water and soaks it up, the water continues to move through the soil up to the plant roots. The dirt in these beds is only about 12″ deep and the plants that will go in here don’t need more than that. When it rains that water also helps to keep the soil moist and refill the beds. Since the totes have weep holes in them just above the French drains sitting in them AND since there are air gaps around the totes we have never experienced an issue with the soil in the beds becoming boggy from to much water. We also don’t have issues with the soil ever really drying out and they have been in place for 6 years now.
Initially we had worried about the weight of the dirt and had that become an issue we would have added plywood on top of the totes to help support the weight but we have not had to do that.
Over the last few years as we have expanded the gardens, replaced all the beds in the original garden with tall metal beds, added in our orchard and berries galore lots of things have changed. One of he biggest time saving improvements has been drip irrigation with timers. It’s been a journey on how to set that up with a well and I think every year Bill has to redo much of it because we keep changing the garden layouts. The front has remained semi stable no new boxes but we have added more irrigation for flowers. Each year he takes in the timers and such before the first freeze and then puts them all out again each spring. He removed the PVC pipe run he had done to these front boxes and has run drip tape to them instead. He did that because initially when seeds or young plants go into the beds they need water at the surface and while the wicking is great for established plants with roots that are deep enough to find water it doesn’t work as well to keep seeds damp or to get water to tiny fragile young plant roots. We were still surface watering till things got more established. The drip irrigation does that for us now plus it still keeps the totes topped off as long as we are getting some rain. During those times when it’s hot and rain is only a memory we can still use the hose to fill up the totes and then the drip is mostly used for irrigation during the dry times.
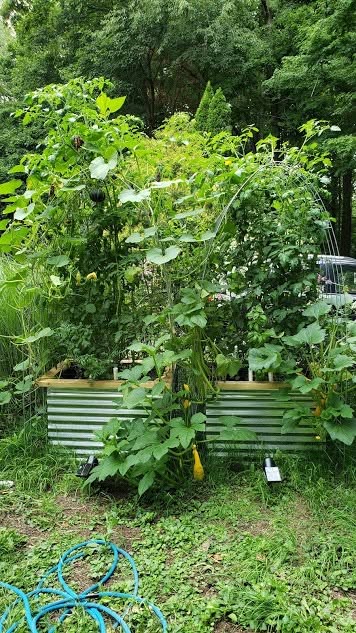
Here is what they look like now that they are completely done. You might be able to see the cattle panels we put over them peeking through all that vegetation. You can see the wood lip I told you about, and I still love this because it looks finished, you have a place to set things on while you are working, and you can lean on it without getting cut because roofing panels have sharp edges. The cattle panels not only allow us to grow things up but they also allow us to drop down a line to help hold tomatoes and peppers up. Plus we have run Christmas lights on them which makes it very pretty at night.
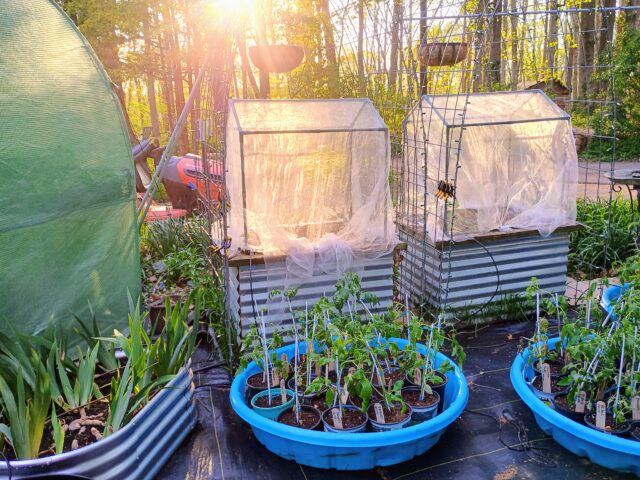
The last change to the boxes was this year Bill bought small metal greenhouses that sit very nicely inside the cattle panels and on top of that wood lip. Initially we used the plastic and put our veggies out early. When it got to warm we took the plastic off but kept the frame up and covered them in bug netting. For the first time our veggies have been unmolested by cabbage worms. Matter of fact we just harvested broccoli and I soaked it, just in case, but no bugs.
Six years, that kind of took me by surprise. It feels like it’s been forever to get where we are today but when I look at everything that has happened and what has been done I’m amazed by how quick is has happened. It all started with four boxes, video inspired ideas, and a husband who wanted to see me smile.