Having a greenhouse always seemed to be an out of reach dream. The entry cost was prohibitive. We struggle with flat land up here. We also struggle with sunlight and a fear of trees. Case in point yesterday I was out looking at the grapes and found a rather large limb laying in between two of the beds. It had hit the wire and mercifully missed damaging the grapes themselves. One tree, with branches that slightly overhang the driveway, had managed to land on our grapes. Imagine if that had been a glass structure, or even plexi glass. You might say, well that flimsy film with light weight aluminum poles will get smashed too, and you would be right. The difference is in the money invested and ease of repair.
Our gateway into greenhouses was the small one up by the house. Pretty protected from trees throwing things, the wind, it gets sun, and the ground is fairly level. We love it and knew we wanted a larger one in the garden area.
I think that initially we thought we would put it in what we dubbed the berry room. We would then put all of our berries in that structure to protect them from birds. In the cooler weather it could be covered with the UV PVC and in the warmer weather it would be covered with bird netting, let pollinators in and keep birds (our own chickens included) out. Reality is we have way more berries than we could ever have room for in a prefab building.
But we already had the greenhouse. The specific greenhouse we purchased in ’24 is no longer available but there are other options that can be had for around $200. The things we liked are the ability to quickly put up a plant sanctuary AND we can fix this if something does happen. We can expand it using conduit, we can raise it up or allow for elevation changes in our land by building a foundation from wood and you can buy covers if something happens to the one that came with it.
Because we were not ready to put up the building in the berry area of the garden we put it up in the new part of the garden we created last year. This is where we grew our melons, which did the best they have ever done up here (doesn’t mean they did great). We also put a lot of plants inside for the winter to see if it would help keep them alive. It worked really well for the strawberries, the blackberries we had just dug up, a grape, some bushes that did not get planted in the fall, and a few other random things. It did not work at all for all the fall mums I had bought, some annual flowers, and the peppers that were in there. I can’t totally blame the greenhouse because things that I tried to overwinter in the garage didn’t make it either. Could have been me, could have been the winter, could have been the plants but what I won’t do again is buy a bunch of mums on fall clearance with the hope of keeping them alive till spring.
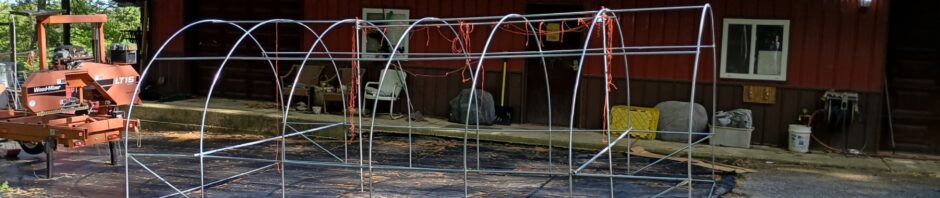
Things were going great we had zero issues with winds, snow load, ice or rain. Until a few weeks ago. The same wind that destroyed two tarps on the lean-to ate the greenhouse cover. Once the wind had discovered that it could take the cover off it just kept repeating that trick. Sometimes it would even put the cover back on again for funzies. The cover lost all of it’s ties that attach it to the poles, it also ripped pretty severely on one of the ends and in a couple smaller places where ties had ripped off. By this time we had also been rethinking our garden layouts. We wanted to add the orchard trees and I wanted them fenced in, because nature and I have a complicated relationship and I don’t want to fight all the woodland creatures. Initially we thought no problem we will just move that greenhouse further into the orchard area. That will make room for the kiln and sawmill compound. That was the plan right up until it wasn’t.
Next plan was to go with the original plan and move the greenhouse to the berry room, and move all the berries over to the new orchard area. Great plan, until it wasn’t. We had started putting shorter raised beds and moving raspberries into them last fall on the back fence line of the berry room. We bought more beds to move all the berries into, we have them built, but we missed the spring window. Which I think was all for the best. We thought we wanted the greenhouse over where the blueberries are now, while we can’t move the blueberries now we could pop the greenhouse over them. It would help keep birds away. This plan required taking out the fence in the new garden area, walking the greenhouse around the front of the shop, taking out the fence and door between the shop/chicken area, walking the greenhouse into the garden, moving all the berries in that area, lifting the greenhouse up and over the big raised bed with blueberries in it, putting the cover back on, moving all the blueberry tubs inside the greenhouse, remake the fence/door between the shop/chicken area, then rerun all the fencing in the new garden area to include the orchard. Easy peasy.
Meanwhile I have been toying with the idea of adding meat to our self sufficient lifestyle. In the form of meat chickens, turkeys, fish, and rabbits. The idea is to move all this over to the side of the shop where we already have animal buildings, just expand it and make it better. Plus put in an area where the whole process of processing is easier and more efficient. In the past it’s always been a headache and not very efficient. This plan changed how we were looking at that whole space. It has a lot of slope and more shade than gardens like. We have always looked at it like it would need to be a tiered garden and had planned the beds to run along the tiers. The tubs have been running up and down the slope and it makes it more difficult to navigate walking the rows. Since we already have buildings running the top tier, electric, and water available, we just need to plan out how to finish building it out. The raspberries can stay on the back fence in a single row which will make harvesting them easier, the rest of the berries will move into the new orchard area.
For now sweet potatoes will go in the 2’x8′ low bed we did not get berries moved into last fall. The rest of the low beds in the new garden area will grow tomatoes this year. We can still build the new trellis system we have been thinking about and run water and have a whole season to live with our ideas before we commit. That still leaves the greenhouse.
The kiln will now be built on the trailer frame to make it movable as well as collapsible if needed and the sawmill has moved to the front of the shop. We no longer need to reserve space for the sawmill compound. We also have a space available in front of the shop by the sawmill. The ground there is relatively flat and it gets sun. It felt perfect. Except that we both had reservations about putting any kind of structure in front of the shop, but we lived with the sawmill canopy there and surprisingly neither of us died. The decision was made. We would move the sawmill down closer to the wood deck and put the greenhouse in front of it closer to the coop.
Moving day arrived.

First things first we had to get everything in the greenhouse out of the greenhouse. It was surprising how much stuff we had in there. The cover came off, the damage was more than we had initially thought and we were pretty sure we would be buying a new cover. Bill drove in the metal posts for the orchard fence expansion, we had laid down all the landscape fabric, and we had two more rolls of 5′ chicken wire fence ready, along with a brand new bag of zip ties because that’s how we roll baby.
When driving the fence posts Bill had left a larger area open on the driveway side. This would allow us to walk the greenhouse out and up to it’s new home. We knew that once the fence was cut and the garden was open to the woods we had to move fast. One night is all it takes for these Disney rejects to lay waste to any plants we have planted and we already had plants planted. I had gone out and removed all the staples from the skirt and cut as much free as I could several days before. Bill had zip-tied conduit carry poles to the greenhouse frame. We were ready. Bill measured from post to post on either side and made his cut, you could hear the forest hold it’s breathe and turn it’s hungry eyes to us. The clock started ticking.
The two sides were opened up and zip tied to the new fence posts on either side. With the path open we assumed our places on the carry poles, lifted and couldn’t move the darn thing. Bill was telling me to walk forward. I was yelling back at him to just go I AM walking forward. We did this comedy bit several more times till we realized that one of the lines we had used to try and keep the greenhouse from lifting off in the wind was still up. Every time we tried to move the frame it snagged on that line and jerked us backwards. Totally intentional. Now free from our tether we easily walked the structure up to it’s new home. Before anything else happens we need to get that fence back up.
The length of fence we would need for the new section was 62′. The first idea was to measure out 62′, cut it free from the roll and put on the top fence piece. Did it work? Yes. Was it easy or elegant? Not in the least, the wire flopped, it snagged on everything, we lost track of which was up or down, but it went up. We decided to not cut the wire free from the rest of the roll when we did the bottom piece. To make it more fun on one section there is no place to stand on the outside of the fence. Thankfully Bill has developed the ability to hover. The fence was completed with very little swearing and only one severed arm. The woods expressed their deepest disappointment in our ability to finish the fence just as the sun was going down.
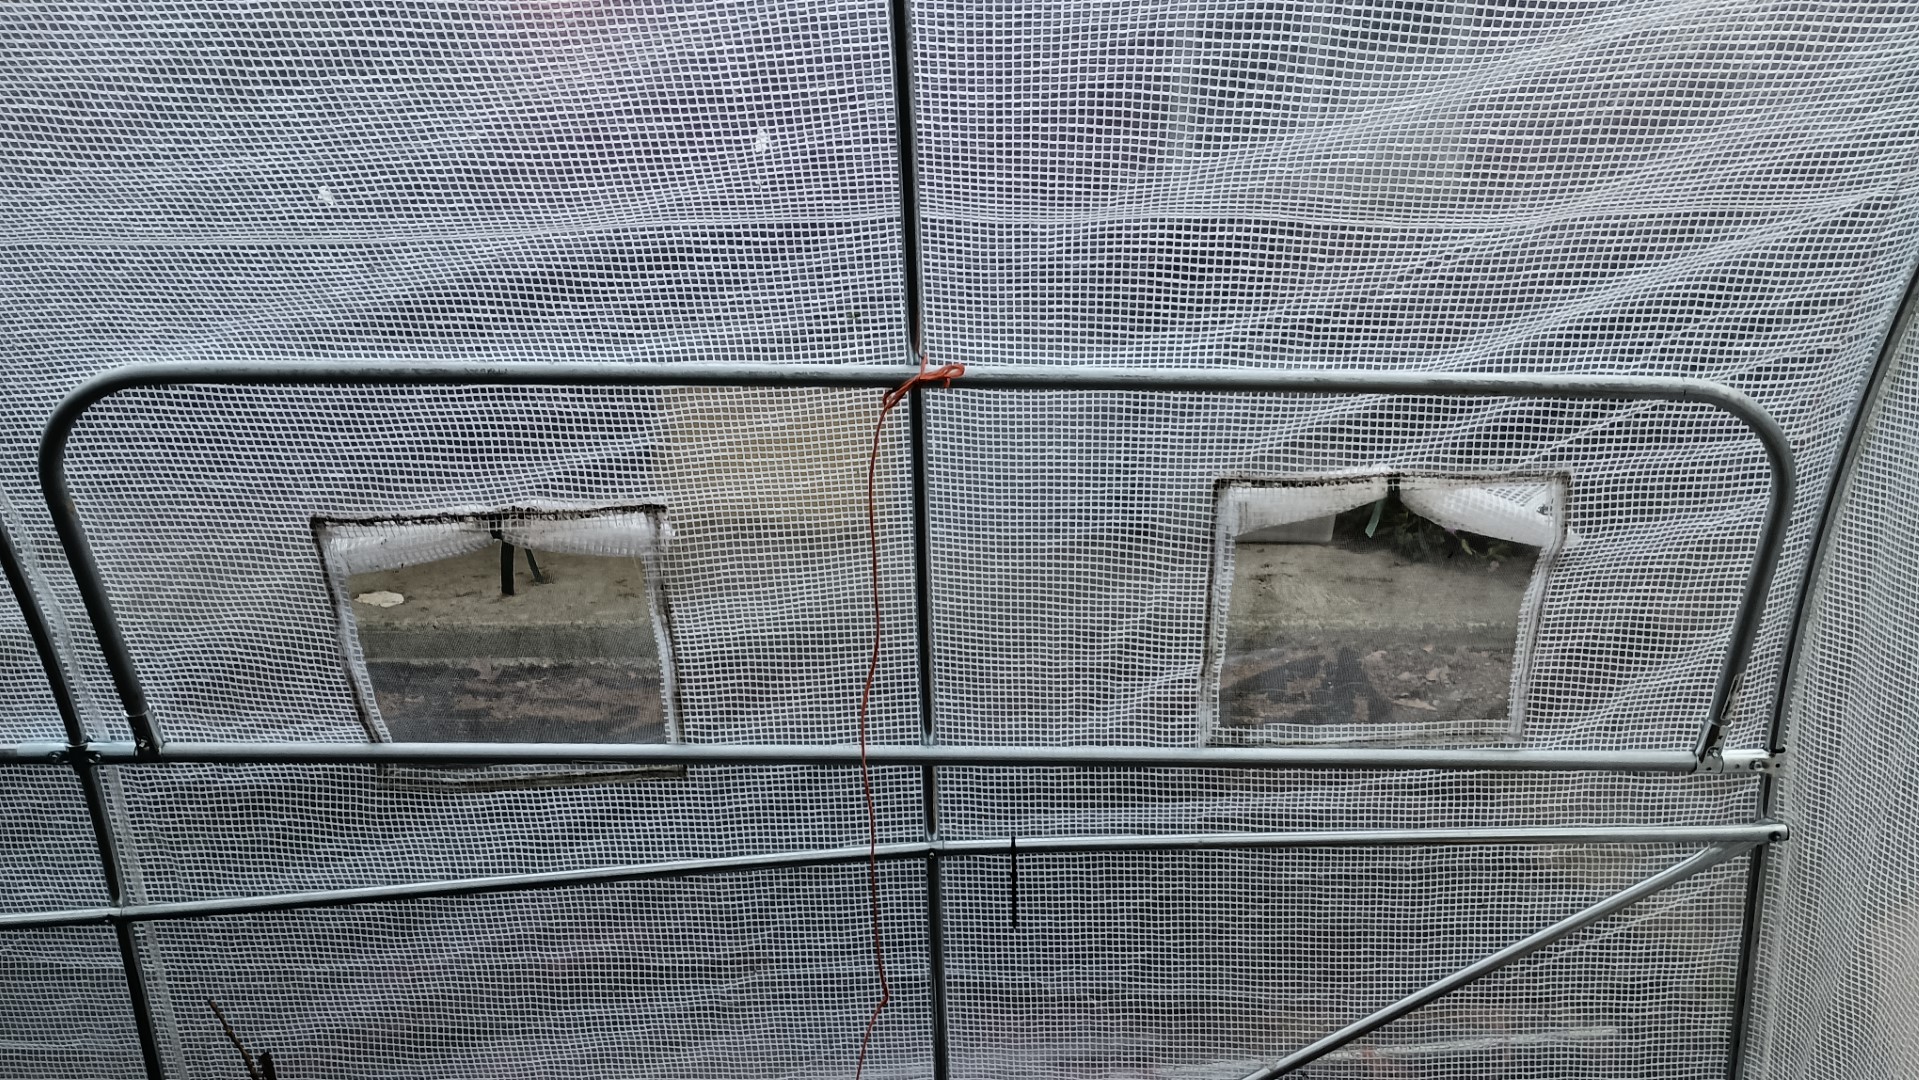
We talked a lot about how to secure the greenhouse in it’s new location. When the sawmill canopy was put there we ran tie downs out from the building. I have been enjoying being able to drive the tractor between the shop and the sawmill and if possible I would like to continue being able to do this. This means figuring out a way to tie down the frame and cover without running ropes out from the building. Bill came up with an idea but we are not 100% sure it will work. Since the cover is already ripped we decided to give it a try if it works great, if it doesn’t we end up buying a new cover which we might end up having to do no matter what.
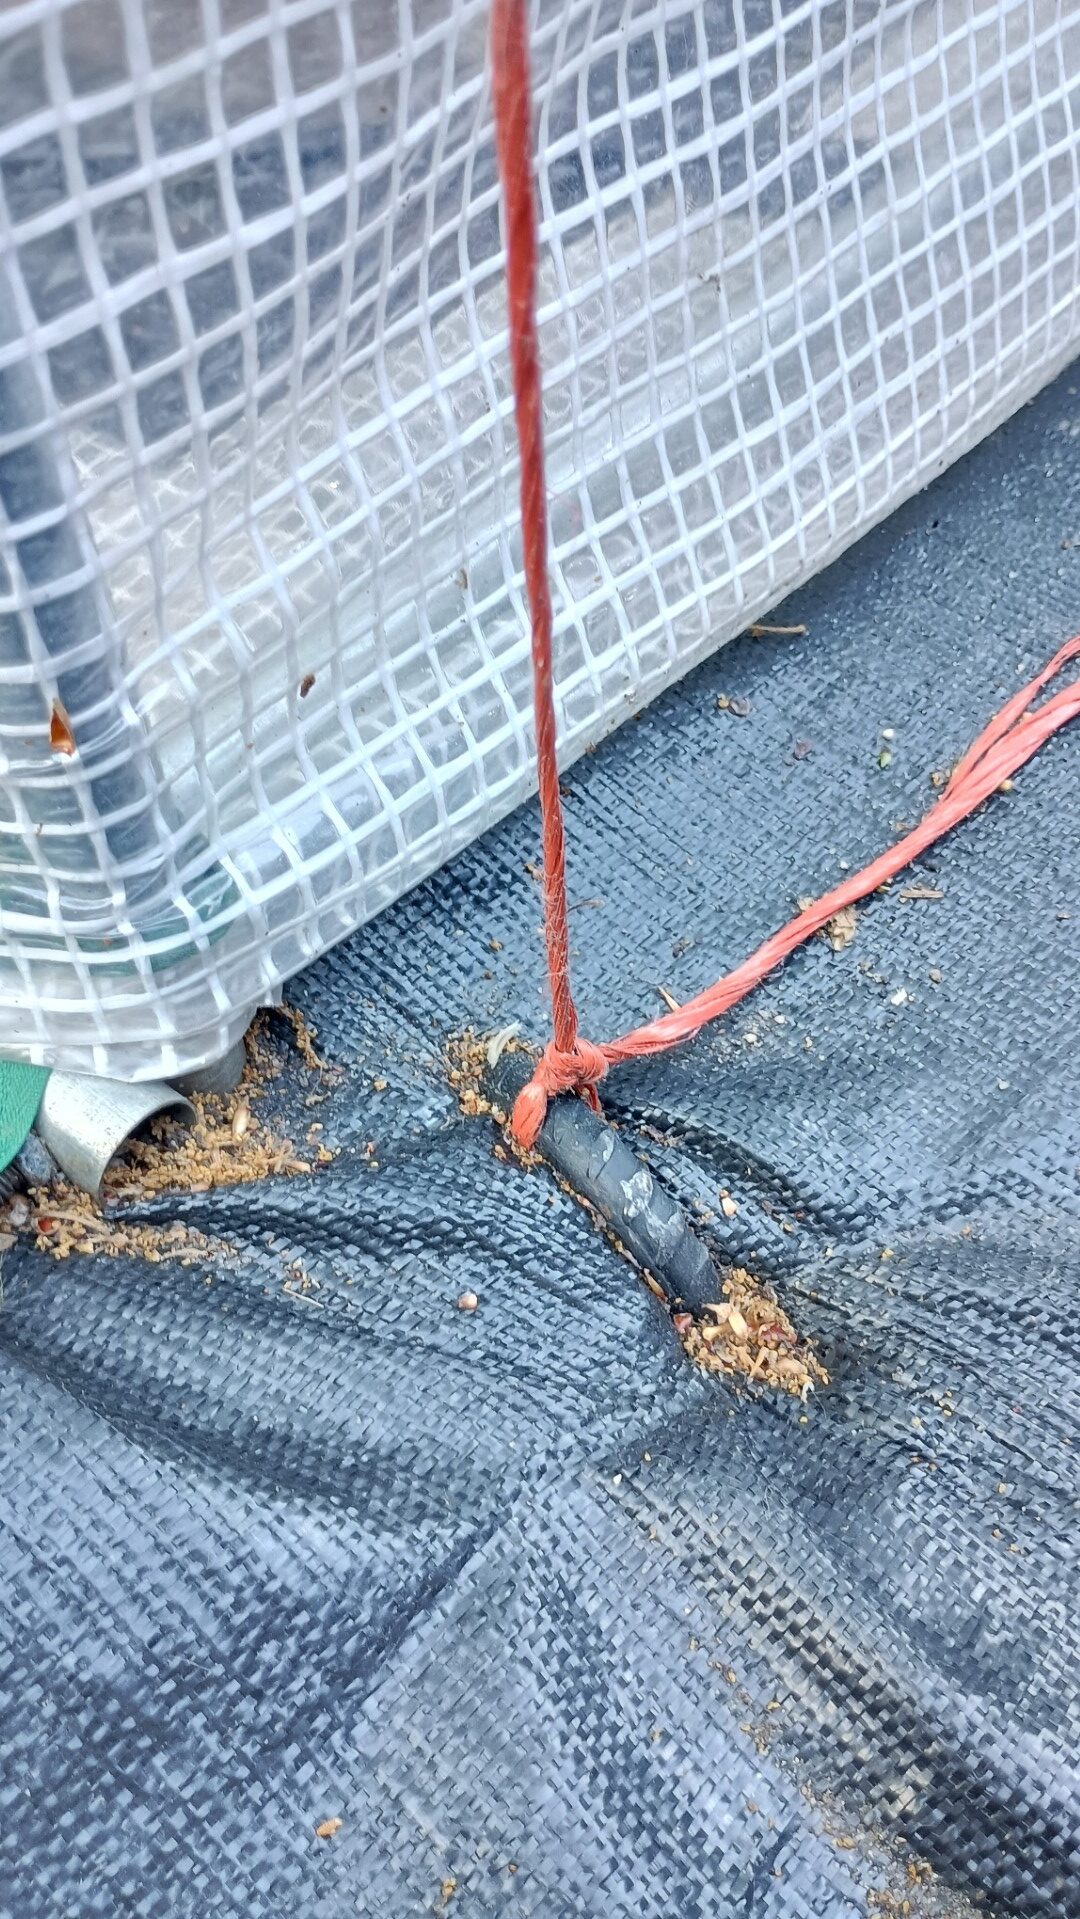
First thing was to try and fix the rips. Here is where science will probably not be our friend. They sell tarp repair tape, they have tarp zippers that use a sticky tape attachment. We have waterproof 4″ wide super sticky Gorilla tape and it worked on the cheap plastic shower curtains I used to cover the PVC raised bed cover Bill built. Will this tape work long term, maybe. If we redo it I would probably try something like this, but you use what you have. To try and give it the best chance of working Bill used the tape on the inside and outside of the rip. The idea being that the tape will maybe stick to itself as well as double coverage. The tape does clearly say, “Not for seams” and yea we used it on a seam. We then put the cover back on the frame. Time to tie this mother down. Bill had bought heavy duty rebar stakes to hold the frame down without having to run tie down lines out and away from the building.
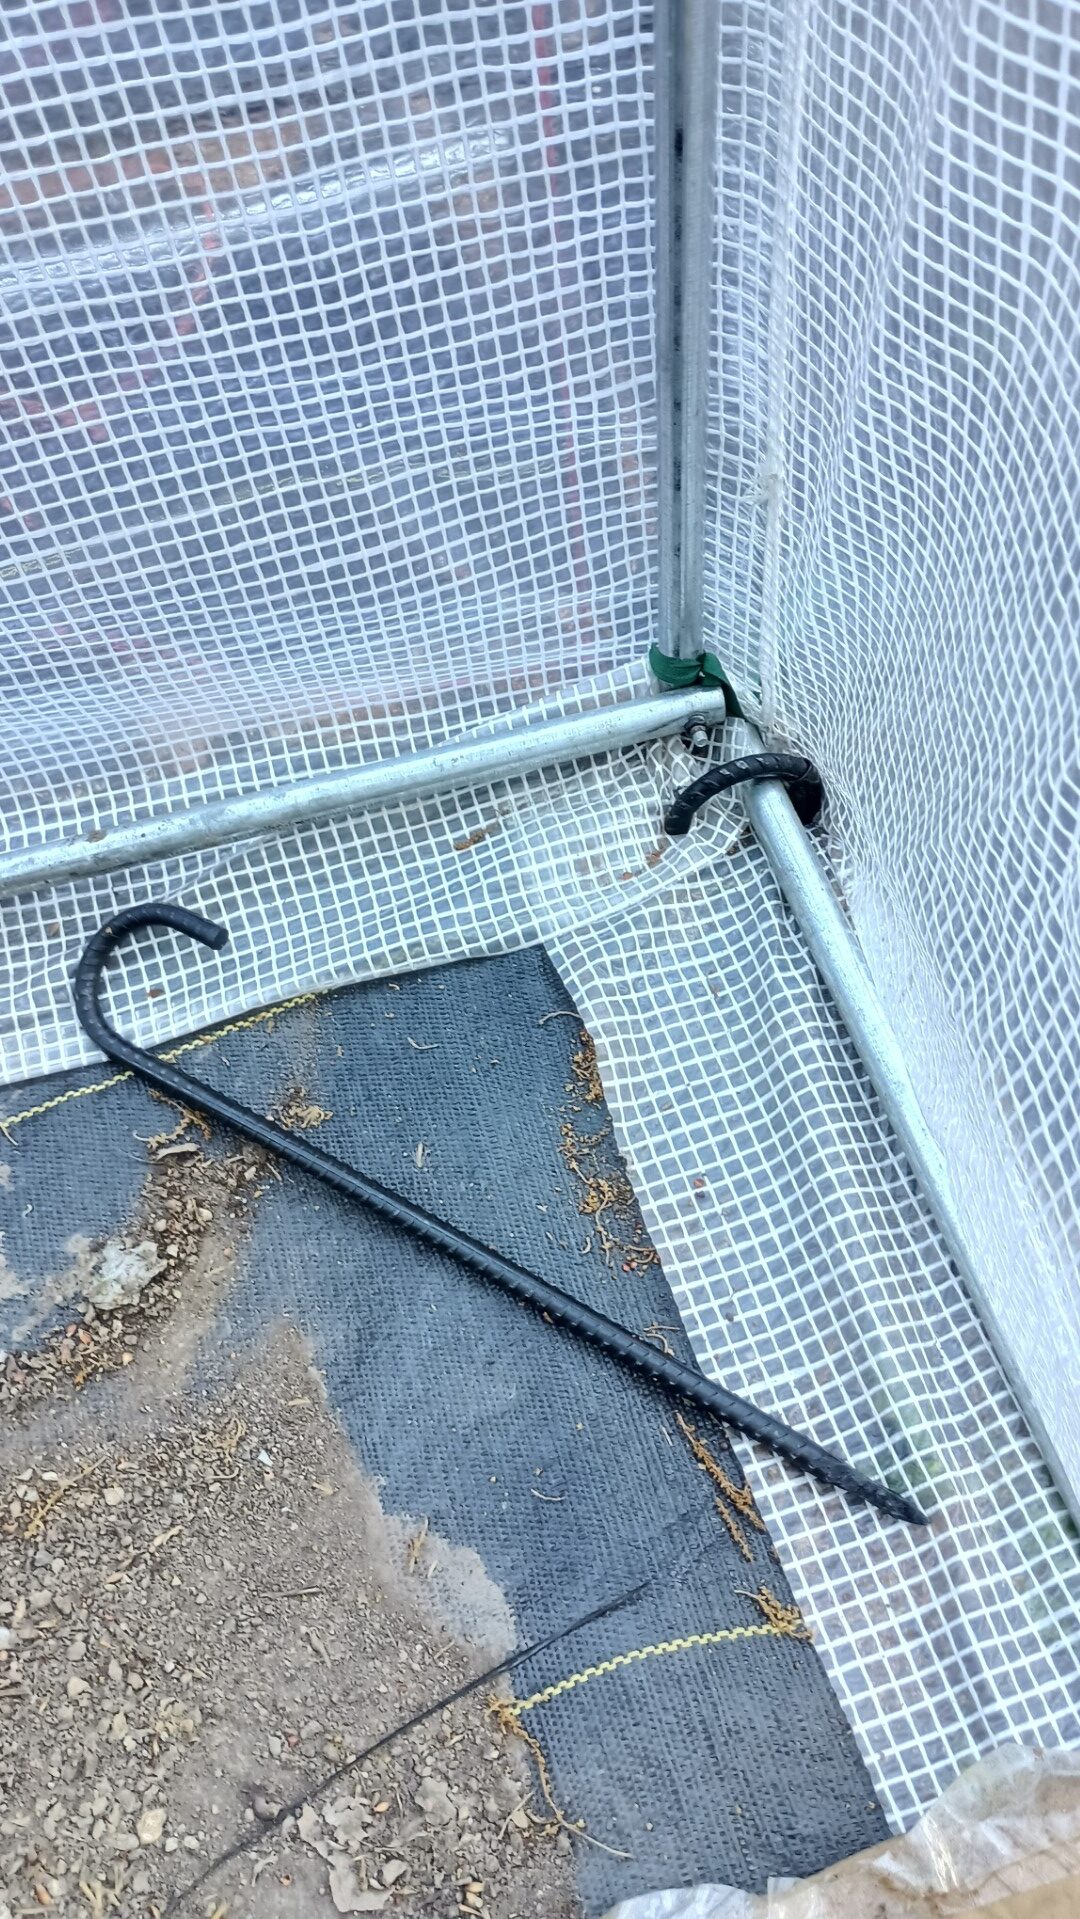
Because the cover no longer attaches to the frame he used a hot knife (similar to this) to melt a hole in the bottom edge of the cover. He could then pound the rebar into it without worrying about ripping it. It might still tear, we didn’t put grommets in like we talked about but that is for future us to worry about.

(He also used that hot knife to cut the landscape fabric so it won’t fray because when you use scissors or a utility knife it just shreds.) Just to try and hold everything together a little bit more he put tie down rods in on all four corners and in the middle on each side and then ran line over the top and secured the ends to the tie downs.
Do I love this greenhouse? I do. I spent all day yesterday in there potting up strawberries and seeds. I love where it is sitting now. I loaded up the tractor cart with flats of seedlings, parts of a shelf unit I’m putting in there till Bill has the shelves built and my garden tools and drove down to the greenhouse like a boss. Being able to move lots of stuff quickly means I get more done. Do I still need to carry things from the garden to the greenhouse and visa versa? Yes. Yesterday I was grabbing bags of strawberries, their new planters, and moving it all to the greenhouse for potting up. Would it have been easier to just move the dirt to the garden and pot up in there? Yep. But moving them to the greenhouse allows me to take care of them while they are getting established and it keeps birds away from the berries. I have water and electric right by the greenhouse so I pulled the hose in and bought a cheap oscillating fan. I can still drive all around the greenhouse which means we can also load and unload tools from the shop easier plus filling up the water tank will be simpler, no more dragging the hose out to the driveway. Since we now have a way to put tool storage on the frame of the greenhouse keeping needed tools handy is also a thing. We are putting in a gate in the new orchard area that will allow us to drive the tractor and cart in and out. Which will make moving things so much easier and quicker.
When Bill makes the counters for this he plans on making each side in three sections.
That way if I’m not using the counter I can put it up which is perfect because this year I wanted to try the melons on the sides of the greenhouse instead of down the middle. I can just put up a shelf/counter section and put my bags for the melons on that wall then run the strings up the sides.
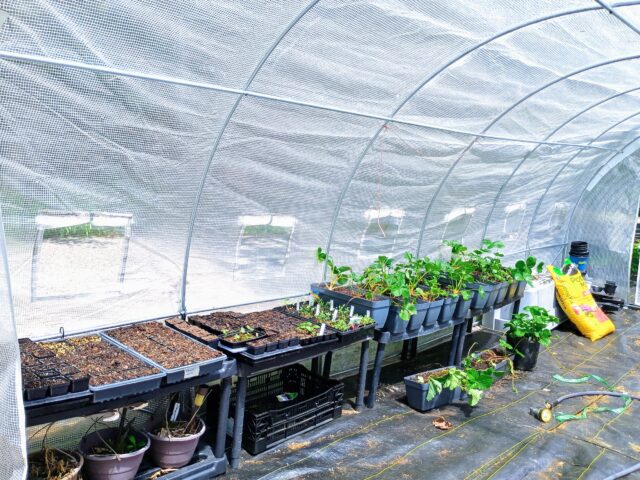
I took apart one of the plastic shelf units we had to use as “benches” for flats. Because this greenhouse lives outside of the protected fence area I’m not keen on leaving anything on the ground. Animals have zero respect for nice things and the ground puts things at a convenient feeding height. Shop cat did show me that my plan has a flaw. One of the first things she did was attempt to jump up on the flats. In an attempt to stop that, because the doors are left open during the day, I took fine mesh netting and clipped it to the highest horizontal bar and let it drape down to the ground. My hope is that because it’s not solid and it’s pooled on the ground cats won’t be as keen to risk jumping up.