For years we have wanted to create an enclosed space for the sawmill. To keep it out of the weather and allow us to work regardless of the weather. We would watch videos of people who had built buildings to house their mills , with hearts in our eyes, if only. Those people typically had some large piece of equipment to hoist their log onto the mill and move stacks of milled lumber to the kiln. Alas we have only two old people and a hand crank system. In the absence of any kind of “building” we have tried a number of alternatives with varying degrees of “well that didn’t work”.
For years the mill sat out in the weather and she was okay. She even survived the fire, it literally broke and went around her only melting her water tank a bit. There have been some problems which probably could have been avoided had she been better protected. Things like water infiltration into gas or freeze/thaw type things. Our first try at protecting her was a tarp, but not just any tarp. I sewed a cover for her out of an orange tarp. Tarps eventually wear out, it was a little bit of a chore for one person to get it on and off AND there was the year we could not use the sawmill till the barn wren was done raising her families. Yes, plural we missed the window between births. The next year Bill built a birdhouse for her and we took the cover off the mill before she had laid her eggs. She moved into the bird house and the cover just stayed off. By that time it had already started to rip and fray a bit.
This is probably one of the worst pictures ever but it’s the only one we have. It looks like the tarp was just draped over it but that tarp was actually cut and sewn to fit. At this point it had been in use for a bit and was ripping and fraying. You can see the folds and that is where the barn bird built her nest. She was so well hidden that we did not notice her till we went to take the cover off and saw her stubbornly sitting on her nest refusing to leave.
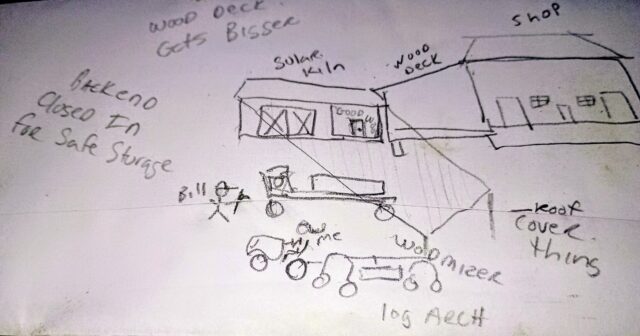
Again the sawmill was in the elements but she had been moving, to different spots near the shop/wood deck. She moved from the asphalt near the shop to the side of the wood deck. That made it easier to move the boards from the mill to the deck and we had better access with the log arch and tractor to the loading side. You can see the log arch in action here, Bill built it to be used either towed behind the tractor or a person(s) can use the handles and move the log. We then put down stone to level the front of the shop/wood deck and moved the mill there. The stone made it nicer to work, till the weeds grew through it. A master plan was hatched we would build what basically sounded like a wood milling compound. All off of the wood deck. There would be a large kiln, a storage room, an overhang to cover the sawmill as well as giving us a place to park the lawn tractor and log arch. Then we would expand the wood deck allowing us to store MORE wood as well as have an enclosed end where we could move some of the things currently being stored in the shop. With a door and ventilation and lights and racks, oh the racks we would build to put the boards on.
No matter where we had placed the woodmizer we were working at the mercy of the weather. If it was raining we were not milling. If it was snowing we could mill but typically choose not to. If it got dark we had to either hold flashlights or call it a night. If it was sunny Bill had to listen to me whine non stop about being hot. We then came up with the brilliant idea of using wire and shade cloth. There would be posts close to the driveway. Then we would put eye hooks in strategic places and run wire. On that wire we would hang shade cloth with grommets so that when you were working you could pull the shade cloth down so that you could work in the cooler shade and when you were done you just secure it back up against the wood deck roof. Easy peasey.

We even bought the shade cloth. Then I saw an eagle shopping the chicken run for dinner. The biggest thing I had was that shade cloth. So I used it to cover the run and protect the chickens and that’s where it is to this day.
Now the garden has eaten up a chunk, okay most, of the space we had been mentally building our compound on. What we had done, and it actually worked pretty well for a few years, was put a lean-to off of the wood deck. Under this lean to we could park the Woodmizer, the log arch, the lawn tractor and all sorts of other things. This was fairly inexpensive and honestly pretty easy to do. We put 4′ metal fence posts approximately 20′ away from the wood deck running parallel. We then bought 4 cattle panels. One of the short ends was secure to the wood deck roof. Bill used conduit hangers first just because it was easier to drive screws and hold up a fence panel while balancing on a ladder than to pound in the other hangers.
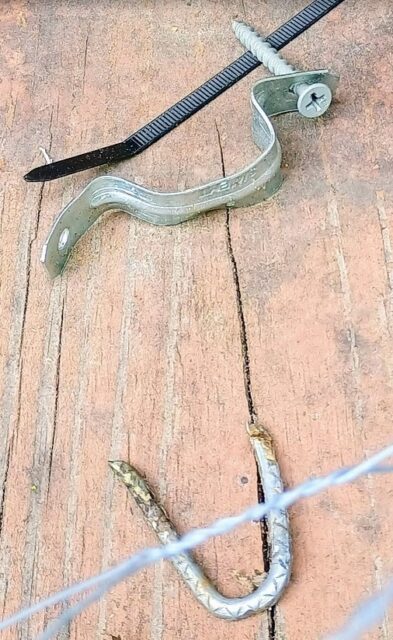
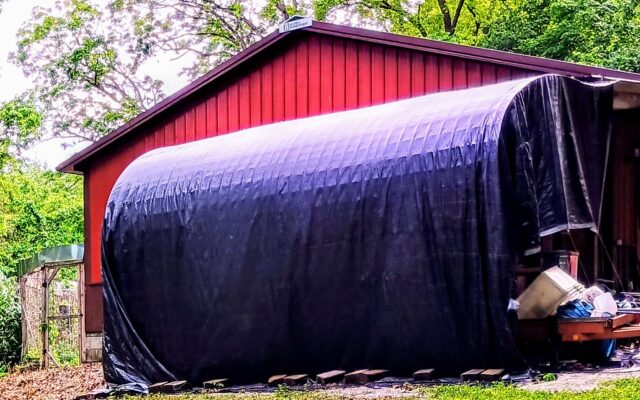
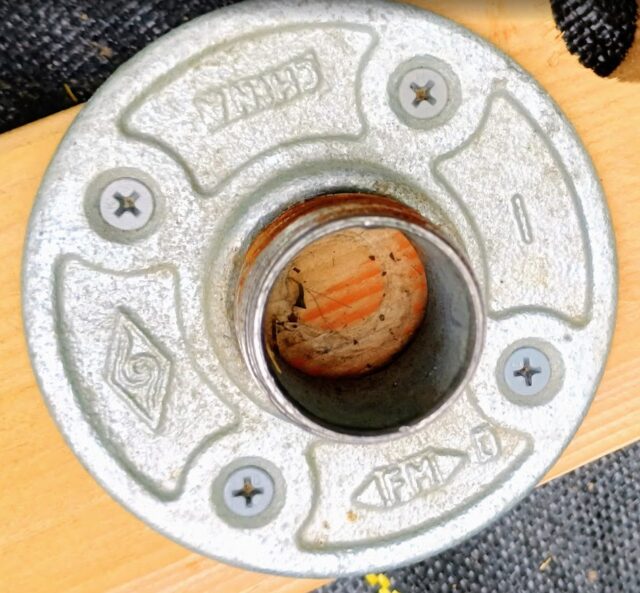
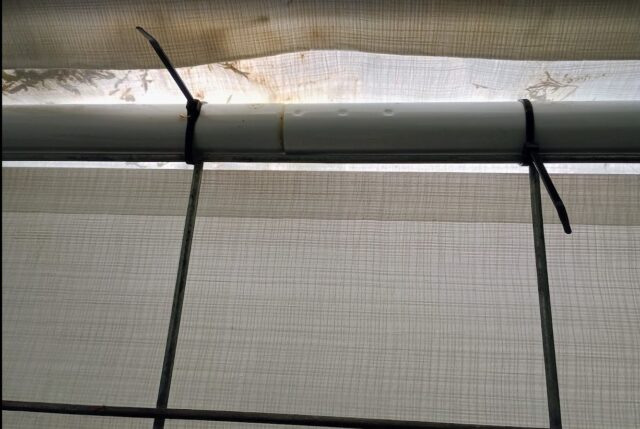
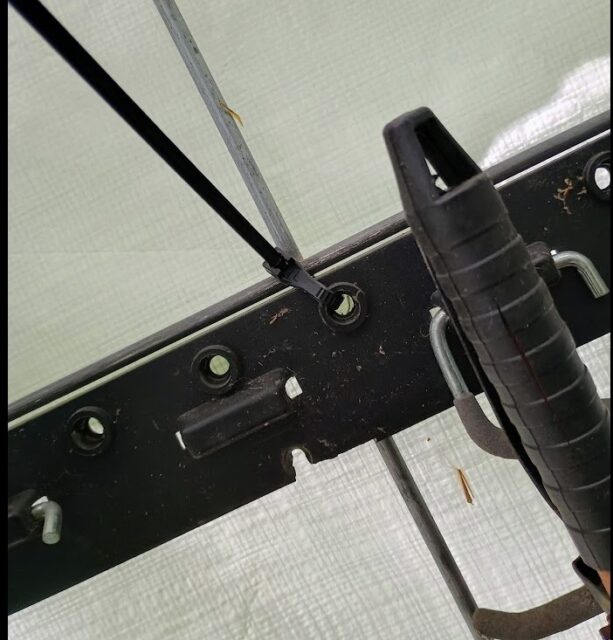
The other short end was zip tied to the top of the metal fence posts. This created a frame that a large tarp could be draped over. The grommets on the tarp were secured to the wood deck roof with hooks shown here with the orange arrows. (The fence panels were installed just under the hooks.)

Bill held the tarp up, got the grommet position and then put a hook in. He worked down the entire tarp that way. The grommets were not spaces evenly so it wasn’t possible to measure and do hooks first. This is a cool tool for quickly screwing hooks in and it made the job much less frustrating. And the bottom was weighted down with landscaping blocks.
The Woodmizer stuck out the front and offered a nice flat surface to just start stacking things on, randomly. Not a good thing.
There were some issues with snow load. Using pieces of 2×4 and pipe flanges, we could insert a piece of metal conduit and use that to lift the fence. Initially we used a full 8′ 2″x4″ with “legs” on each end.
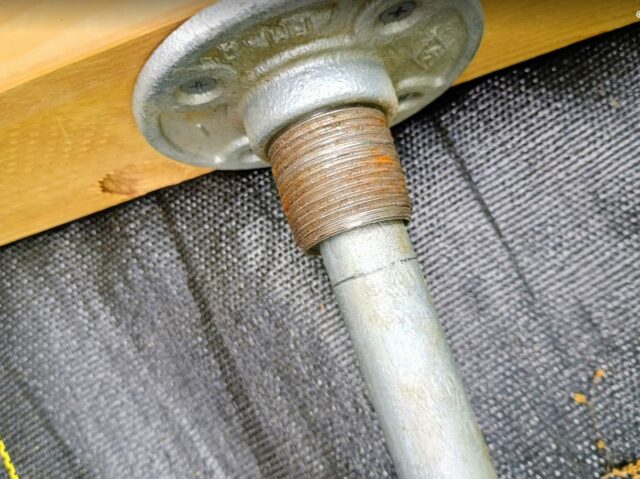
Eventually we used scrap pieces of 2″x4″ cut to a size that would span several of the squares in the cattle panels, put a screw in each one of the three deck upright supports up towards the top of the post, then cut the conduit so that it was long enough to keep tension on the fence when the conduit end was slid over the screw. That allowed us to move around without having to worry about knocking out a support. There were times that the wind lifted the tarp enough that one of the supports was able to fall but for the most part this worked great. Tarps do not last forever they just break down. We started getting rips and holes in our original tarp. This year we replaced it, and almost immediately the wind started ripping the tarp to shreds. How is it that one tarp can last years and the next tarp is rendered almost useless in less than a month?
Meanwhile, we had bought a unit from Menards to put the sawmill in. There were several factors in our decision. The first being that we now used that lean to as a walk through to get to the new garden section. With the sawmill and arch in there you could not walk through easily. Leading to another round of discussions about building something and where it should go. To complicate things, we wanted to be able to park the lawn tractor somewhere out of the weather as well as have places for the walk behind leaf blower, chipper, lawn carts, cement mixer and snow blower. All of these things had been living either in the weld bay of the shop, under the lean to, in the she shed, or under a $59 pop up sun tent. What they all had in common was when you needed one of them, they were extremely difficult to get. So difficult that we liked to just pretend we didn’t have them.
This whole project started off innocently. I had seen these shelters at Menards years ago and thought to myself, self how much do you think those cost? To the interwebs! Where I saw this: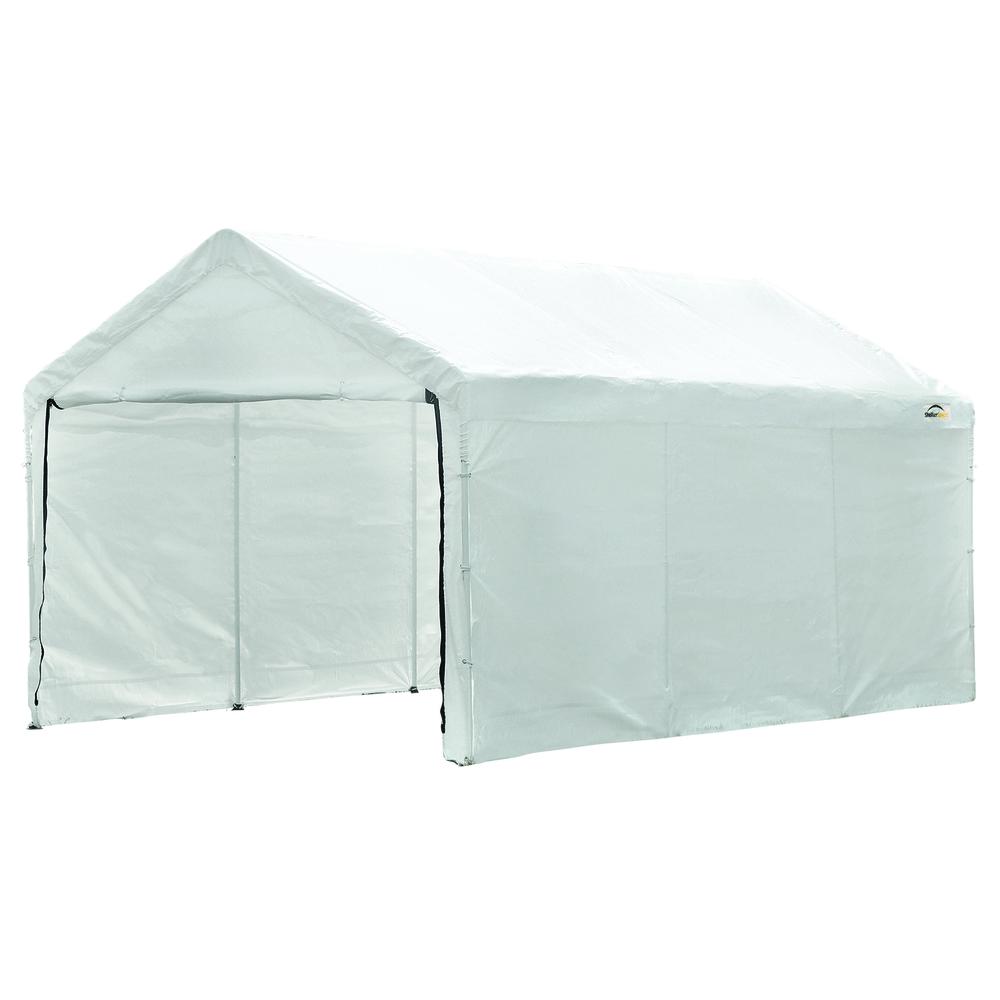 For the low, low price of only $97 sign me up, yes please! Now what neither of us noticed was that the price was only for the side cover, not the full building. Imagine our surprise when we went to pick up our new “building” and got one smallish box. Where is the rest of it?
Luckily the Harbor Freight here in town carries the frame for the low price of $139. You can find it here. If we knew that the whole thing was going to cost well over $200 would we have bought one? I don’t think so, but once we had figured out where to put it and were so excited about it AND we already had the one part weeeeelllllll let’s just finish it.
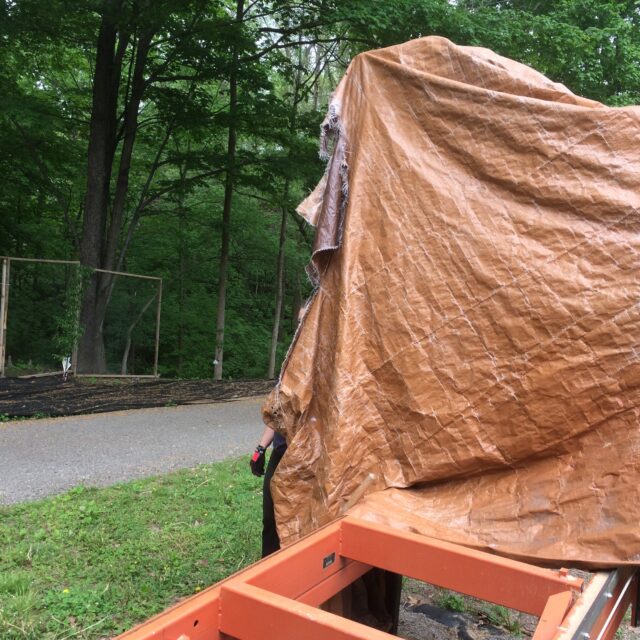
It’s simple to build the frame and the covers go on using bungies. The roof supports are just fitted together. Those top pieces in the middle have come apart in winds but if we just put a screw in there that will fix it. The four corners are open so it’s not wind tight or completely weather proof. It has a door only on one end and the sawmill is longer than the building. We let the hitch hang out the back (no door end) and put a tarp over it then secured that tarp to the frame. Frankly it worked really well but we still needed a place to store all those other things especially the ones from the lean to because the lean to is coming down.
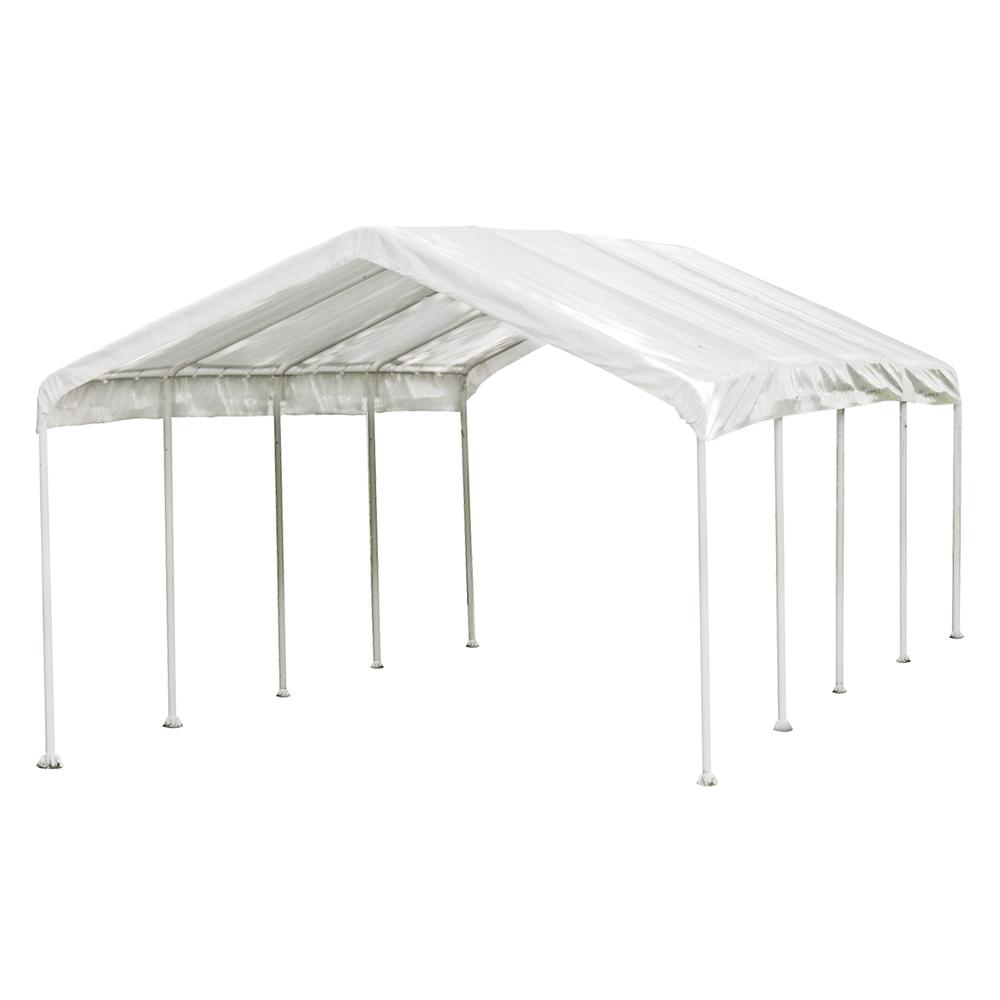
Menards to the rescue, again, only larger. This is the 12′ x 26′ version and it will hold all the sawmill bits and pieces with some room to spare. The cost on this one is higher especially given that it has no sides or doors, at $293 (after clearance price) it’s a chunk of change. BUT we already know we like it and that we can use tarps to make sides and doors. Honestly I’m beginning to believe there is no problem in life that a tarp, bungies, duct tape, and zip ties cannot fix.
That original 10′ x 20′ solved our problem of where to put all of those other things.
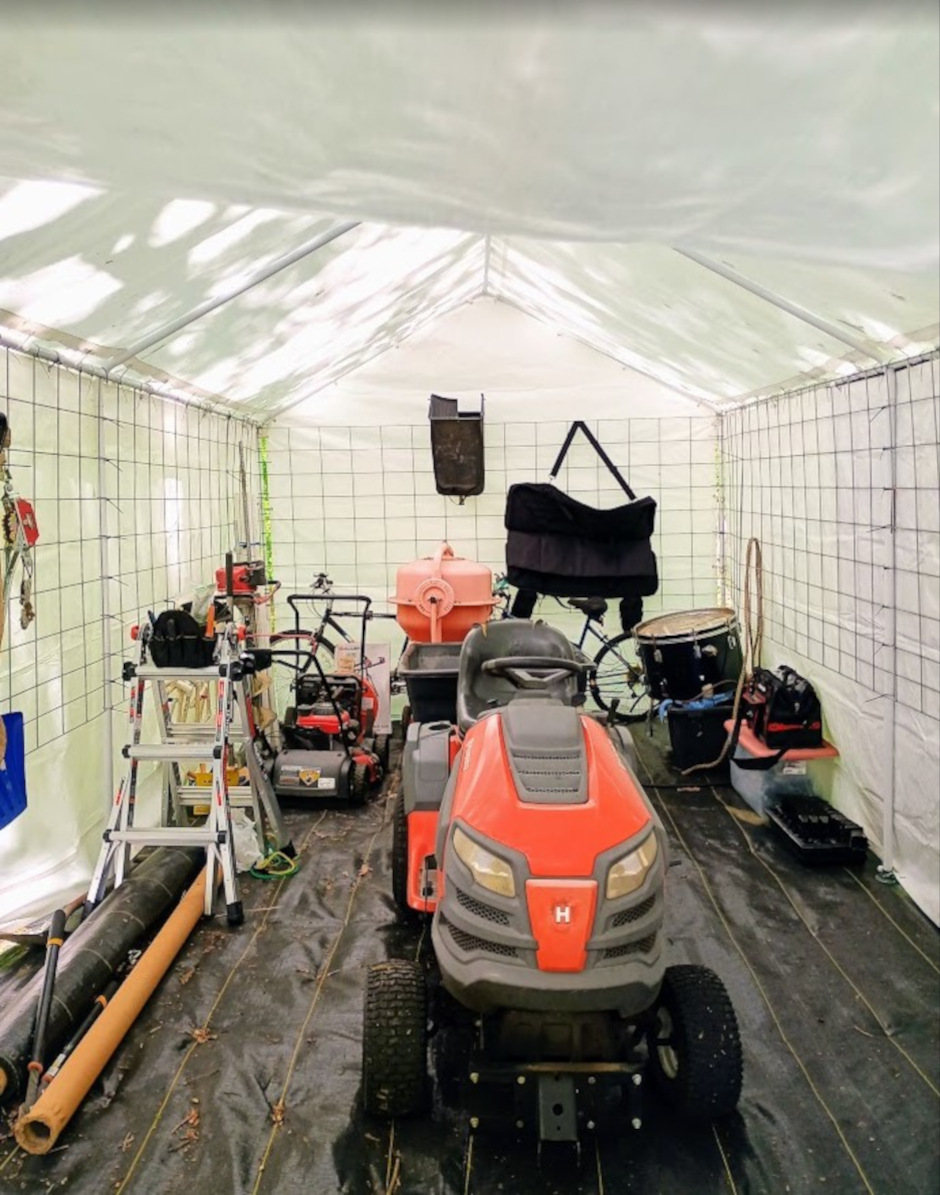
To move it, we took the sides off, Bill attached metal conduit (using zip ties and tape) in two places and we picked up the building and walked it up our driveway. Because many of the things that we want to keep in there are typically things that we might want as we are leaving the house, the decision was made to bring it up by the house instead of keeping it down by the shop. Nothing is simple which meant cutting down a couple of dead trees and dealing with the mess before moving the building. We also ran out of landscape fabric halfway through and had to wait for another roll to be delivered. Sigh.
I was lamenting the loss of my ability to hang tools like I had been doing in the lean to, Bill suggested taking some of the cattle panels from the lean to and using them in the new “tractor garage”.
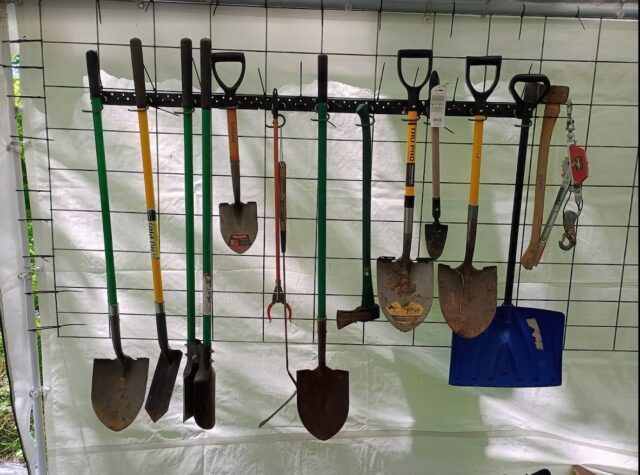
I love this solution so much and want to expand it to be able to put more things up and easy to find.
The back panel was bent on both ends so that there was a vertical piece of wire where each leg of the canopy is.
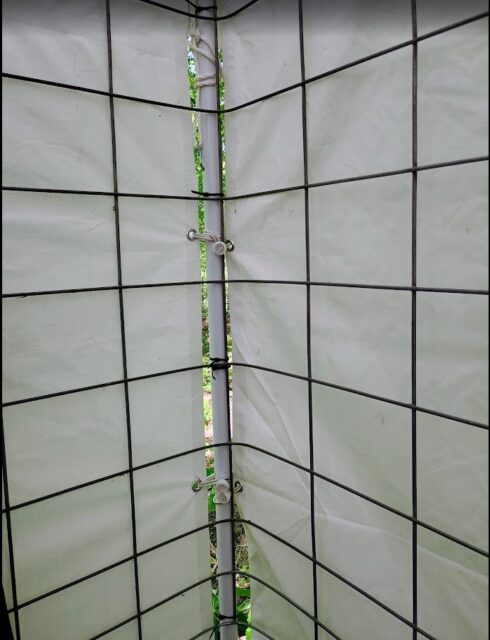
We then secured those wires to the legs and secured the tops of the panels to the horizontal roof supports with zip ties.
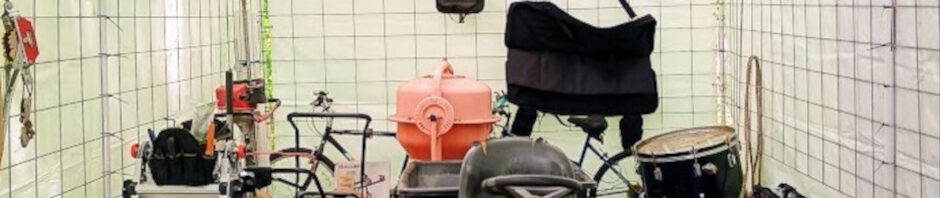
Two full panels were secured to each side of the structure giving us 4′ x 48′ of wall storage. I had figured out that I could secure pieces from our old tool storage system to the cattle panels back in the lean to. We took those same pieces and attached them to the front of the long walls.
The bikes, post hole digger, pipe etc… are all secured to the panels as well. This helps to keep them not just organized but upright and secured so they don’t keep falling over. The cattle panels themselves help to sturdy up the entire frame. Is it secure, as in you want to keep your spare gold bars in there all safe and protected? No, not at all. Is it secure as in I can now find a shovel and it’s kept out of the rain? Yes, yes it is. Maybe someday there will be an actual “secure” building but for now this is good, really good. I can get the chipper or blower out easily. At night I pull the tractor and cart inside and the next day I just back it all out and start working again. No having to unload the cart or dump the rain water out of it. I frigging love it.
It always starts so innocently with some small wish or idea. Next thing you know you are cutting down trees and walking buildings up your driveway. We still don’t have the one for the sawmill built. But with enough time, duct tape, bungies, zip ties, and a tarp we will get it done.