
Please don’t yell at me. I feel bad enough as it is.
I have my maternal and paternal grandmothers sewing machines. They are well over 100 years old and I did a terrible thing to them. I painted over them with Anne Sloan Chalk Paint and then put on her protective wax. In a world of regrets this is up there on the list.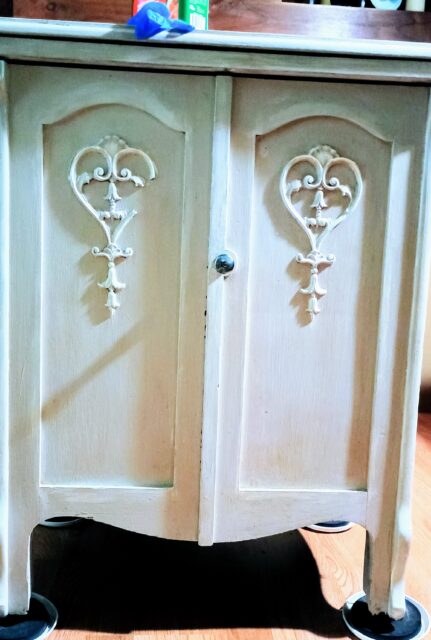
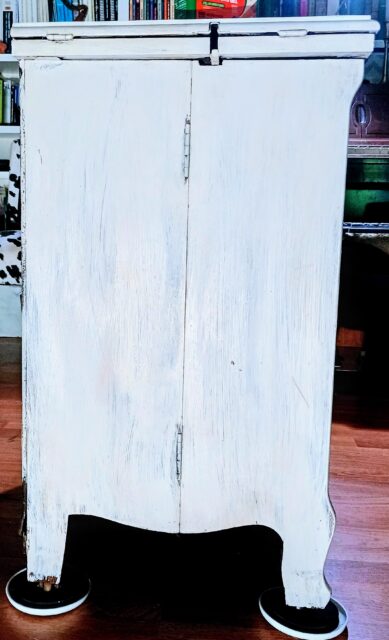
Apparently brown is or was boring. Grey is/was king and all things not grey are (insert gagging noises and throw up face here). At that time chalk paint ruled the world. I specifically mentioned the brand because not all chalk paints and or wax protectors are the same.
I will also say please do not attempt to touch the finish on anything that you value or could potentially have value. Appraisers and experts should be consulted before you risk damaging them and tanking their value.
These two sewing machines as well as the secretary desk, that I painted and now have stripped and refinished, are family pieces. The value that they hold is purely in my heart. (Weirdly enough not many people collect 100+ year old cabinet sewing machines. ) As for the secretary desk it was built in a time that did not include monitors, speakers, the need for holes to fish cords through and or any kind of technology. Not in great demand in a world that collectively may soon be asking, “What the heck is a stamp? Is that what they put on your hand when you go to events?”
The first sewing machine cabinet had damaged veneer on the top, back, and in several places on all three sides. This meant anything to aggressive was out. We want to try fuming veneer to redo the top because we believe that the finish on these cabinets is either a shellac or they are fumed. I believe we also have some white oak lumber that we can make veneer from.
The process on these machines will be slightly different from what I did on the drop front desk. That desk is solid wood and I could do more sanding. Plus we are pretty sure that the finish on that desk was lacquer.
The process:
- I needed to get the wax off so I wiped the whole thing down with mineral spirits. Then wiped the mineral spirits off.
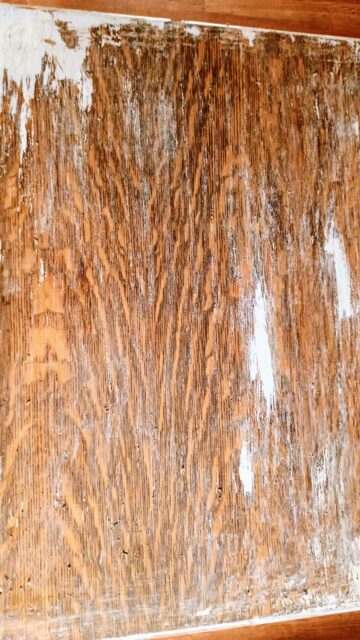
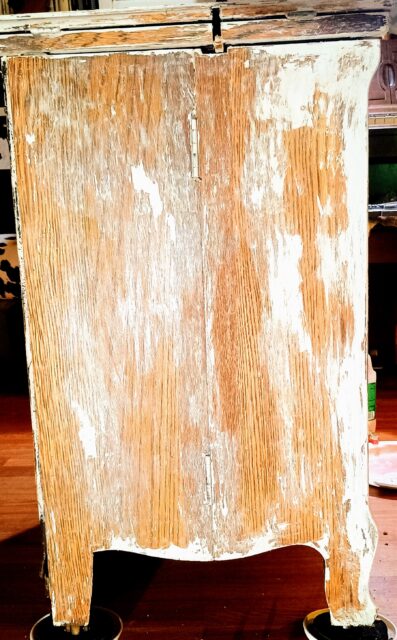
- I used CitriStrip which has become my favorite finish remover. I painted it on with a chip brush and I worked in small sections. I started with the top, put stripper on and let it sit while I painted a side. Then I would go back to the top with a plastic scrapper and lift off the softened paint and finish. I needed to work in small sections because the stripper was drying quickly. When it dries you have to apply more stripper or mineral spirits to soften it, you can’t scrape off the dried gunk. This is how the cabinet looked after apply and removing stripper once:


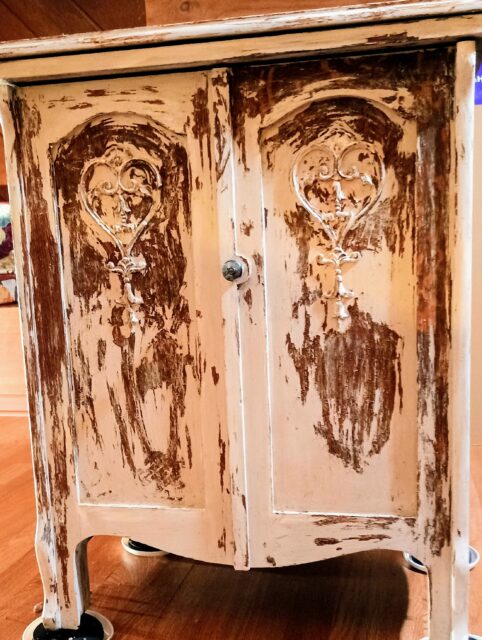
- I repeated the above steps until I had removed as much of the finish/paint as I could with stripper. This is how the cabinet looked after applying the second coat of stripper and removing it.
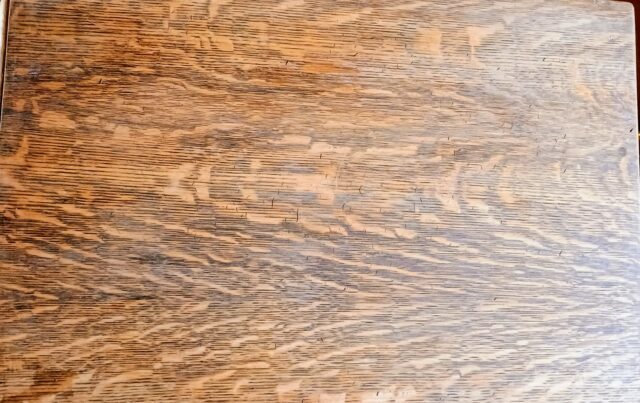
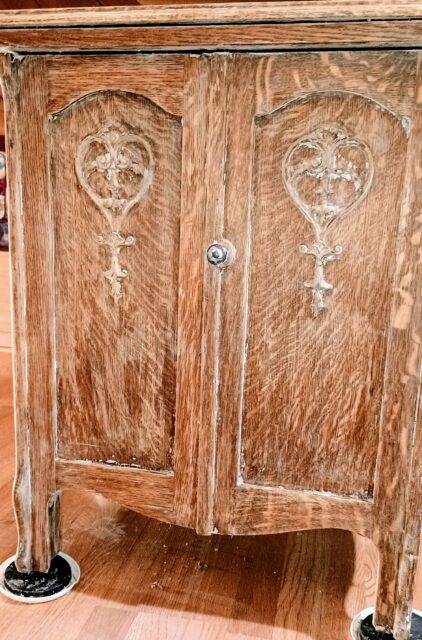
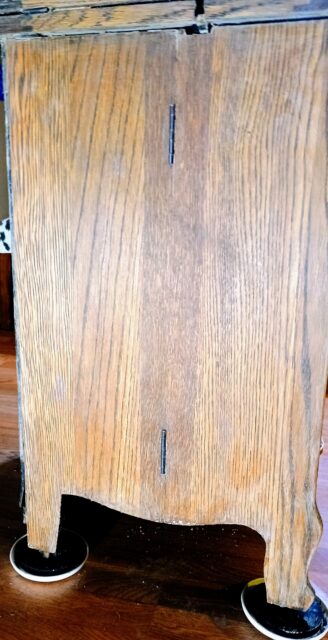
- I bought a pack of three brushes from Dollar Tree for $1.50. The brushes could get into places that were not flat or had curves and helped to break up the paint/finish. I would dip the wire brushes into either stripper or mineral spirits and lightly rub them over and into areas the scrapper could not get.
- Toothpicks were able to get into all of the really detailed areas as well as corners and edges to pull out the gunk. I could also wrap paper towel around the toothpicks to get into the larger, deeper holes like in the medallion on the drop down desk.
- I also used steel wool. Wal-Mart had a pack with course, medium and fine steel wool all in one. After the initial stripper/scraper application, I would put stripper on a paper plate and then dip either a medium or course steel wool pad in it. I could then apply the stripper using the steel wool effectively “sanding” as I was applying stripper. I did the same thing with the mineral spirits. I bought a small, cheap, stainless steel pet water bowl from Dollar Tree. I would pour the mineral spirits into the bowl and then dip either a medium or course pad (different from the pads I had used in the stripper) in the bowl and use that to help remove finish/paint or stripper residue.
- After removing as much of the finish as I could with stripper I now had to remove the stripper residue as well as any finish/paint that might still be there. This is where the mineral spirits came back out. Mineral spirits alone might have been enough to remove the finish but it would have been a lot more work.
- I’m not sure if it is the age of these cabinets, the wood type, the fact that they are veneer, fumed, and possibly have lacquer or shellac on them but stripping them was different than the desk. It felt like the material I was scraping off was gooey and if I rubbed it that goo would get pushed into the grain of the wood. Once it got in there it was really hard to get out and the piece was left with a sort of white cast to it. With the first sewing machine I went ahead and just started the finishing process. With the second one I repeated all the above several more times as well as going over everything with sandpaper. Starting with a 220 grit and working my way to 40 grit. I felt like that white cast was as good as it was going to get.
- Because these sewing machines open up, prior to starting the poly I opened up the top, front and side and discovered that paint and stripper had worked there way inside the machine. I cleaned off any product, gave it a light sanding with 220 grit.
NOTE: Because this is veneer and already damaged I did not wet it to raise the grain before sanding. Do I have any scientific reason or any sort of wood expert to back up my logic? I do not.
- After sanding I wiped down the entire piece with tack cloth to remove any debris or dust.
- I then brushed on my first coat of General Finishes Arm-r-Seal oil based poly. Why General Finishes? We had it. Why oil based? I used up all the water based.
- I let that dry over night. The next day I sanded with fine steel wool, wiped it down with the tack cloth and brushed on another coat of poly. This was repeated until there were 3 coats of poly on. On the interior I only applied one coat of poly. The inside had not been painted and the only parts that I used stripper or sanding on were the edges where paint had seeped through.
- I opened the doors and put the top down and let it sit for 3 days before moving. I wanted to make sure it was fully dried before touching it.
While the first machine was open I discovered that the belt that connects the foot pedal to the machine was gone. The finish on the sewing machine was in need of some love. Some of the gold decals, and yes at the time that The Free machines were made they were no longer hand painted they were using decals, were rubbed off. The metal of the machine was showing oxidation. I toyed with the idea of cleaning the whole thing up before shutting it up again. One of the only reasons I did not was that the recommended way to clean the finish without damaging it further was to use sewing machine oil. I thought okay if I cover/clean this with oil that will only attract and hold more grime from the air. Maybe I should leave it be as it is.
One of the cabinets has a piece of decorative trim missing. Later I may see if I can recreate that somehow to fix it. This might be something that could be 3d printed. I could create a mold from that and use wood putty to recreate the missing parts. Whatever is used it needs to be able to be stained so that it will match the rest of the cabinet.
The Free Sewing Machine History
The St. John Sewing Machine Company, founded in 1870, was the predecessor of the Free Sewing Machine Company. In 1883 it was renamed the Royal Sewing Machine Company. After the company relocated to Rockford, Illinois it was renamed again in 1897 as The Free Sewing Machine Company after company president William C. Free. Most machines made by the Free company were sold mail-order. In the mid-1920s Free became associated with Westinghouse and machines were labeled Free-Westinghouse. In 1927 the Free company merged with New Home Sewing Machine Company.
The Free, sewing machine manual.
An ad for these cabinet machines billed them as being hygienic. You ask how can a sewing machine be hygienic? Well because this one has a cabinet which sits 4″ off the floor no longer will dust bunnies be allowed to gather.
The second sewing machine is The Free, No. 5 and it is in much better condition. This is not the “French” cabinet which the company declared was the most elegant piece of quarter sawn oak ever produced for a sewing machine. The decals seem to be in good shape, the black lacquer finish is still in good condition and there seems to be less oxidation on the metal parts of the machine. The belt is still there and it works, there is even still a wooden spool of white thread ready to go. This my friends is the machine that yours truly learned to sew on.
In the process of working on these machines somehow I felt closer to the generations past. Remembering sitting with my grandmother in her room while she taught me how to sew. The sound and smell off the steam from the iron. My mom singing to herself, the creak of her sewing chair, her machine humming along in the next room. My grandmother leaning in to help me get the scraps positioned right, lowering the needle, and getting the foot pedal started. Sunlight streaming in from the window behind the machine. That feeling of I DID IT when I sewed two pieces of scrap together. As I was working on the finish it made me think of those women. Their dreams, their hopes and their losses. Children who passed as infants or very young. Husbands who died to soon, the moves and decisions about what to take and what to leave. They lived through depressions and war, lost their homes, got jobs in factories and they held their families together. Yet they persevered.