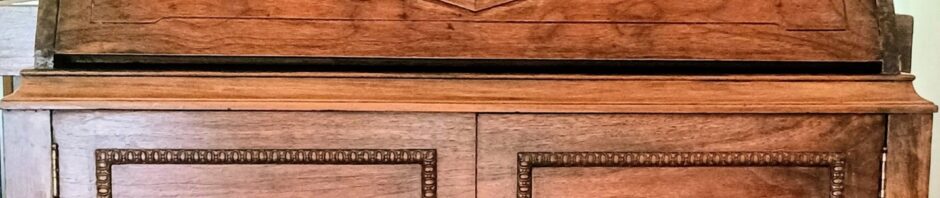
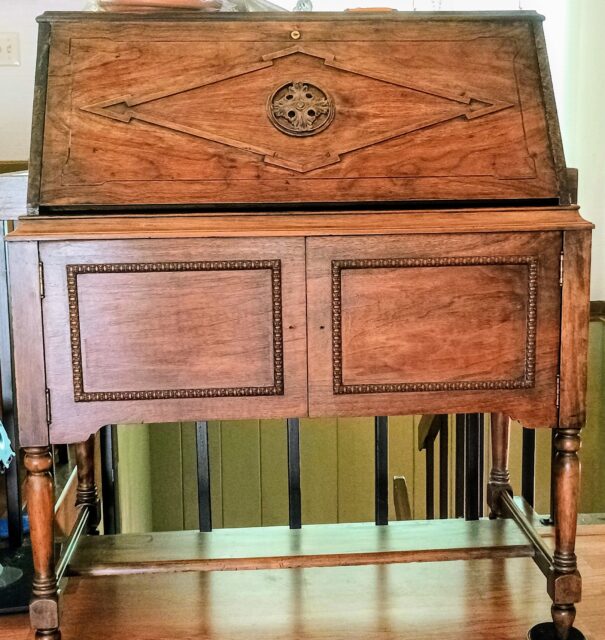
The secretary desk is a beautiful drop down front desk made from what we believe is walnut, that had aged a deep almost black color. I believe it had a lacquer finish originally.
This drop down front desk has been in my family for at least 70 years. It came to be in my mother’s storage room from some relative who had left it to her so I’m sure it is much older. As a child this desk and a tall mirror door cabinet fascinated me. I’m sure that this fascination was based simply on the fact that I was not allowed to touch them. I was not supposed to open them. I needed to know what was in them. As an adult the forbidden fruit of childhood is now mine and I know what is in them, oh I know.
The desk was made by the Udell Furniture Works company of Indianapolis, IN. You can read a bit about their history here.
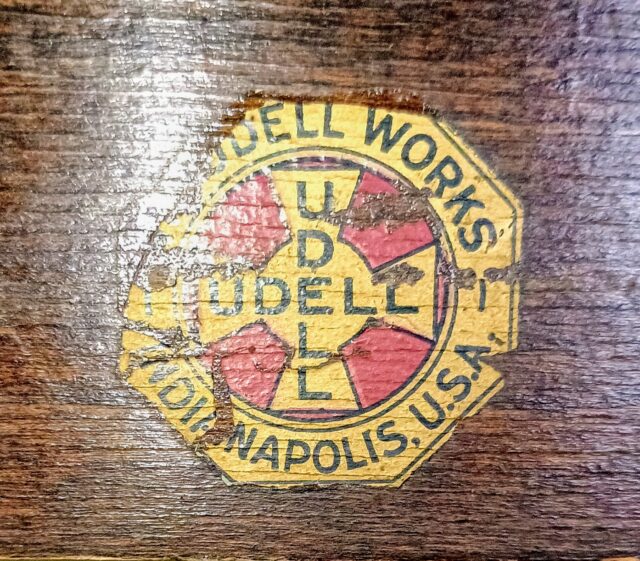
You can see the color of the wood on the inside of the doors where the company stamp was placed.
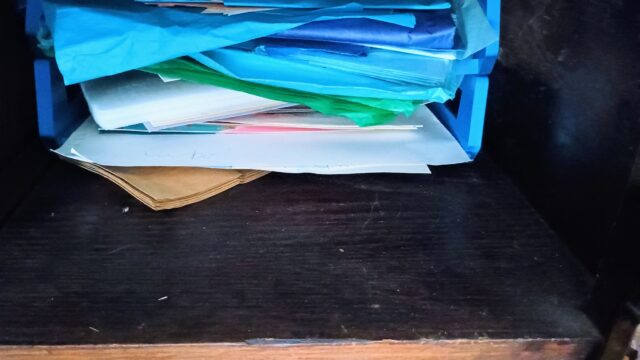
Compared to the deep almost black color here inside the cabinet behind that door. Even as a child this is the color that I remember the desk being, almost black.
When I brought it home I decided to clean it. There were scratches, on the drop down desk there is a water ring from a glass, it had built up years of grime. I was not sure what the finish was, rather than attacking it with harsh cleaners I used micro fiber cloths and cleaner made for furniture. The front of that drop down has a medallion on it which I had honestly always thought was metal. Some of the edges of the upper part of the desk almost have a raw edge feel to them, they are not smooth. Because I am a genius I started my cleaning right there on the main part of the upper desk drop down door. Not on the back. Not somewhere inconspicuous, nope front and center. I cleaned it alright. I cleaned it so good I rubbed off the finish and left a big blotchy spot. Saw what I did and promptly gave up.
My next genius idea was “let’s paint it!” I already ruined the finish might as well just go with the pattern of destructive behavior and cover this thing in paint, but nah not just any paint, lets use chalk paint and wax! At the time I did not know that chalk paint would have it’s own unique set of pain related to it’s removal. I also did not know that when you did “the right thing” and protected that paint with the wax that you up the ante on difficulty when removing all of it. However, I don’t completely believe the interwebs because recently I went to just clean that desk with Pledge and ended up wiping off some of the paint.
Well I’m not going to repaint it. No need to pile on to my list of life regrets. I checked and I’m not holding on to some million dollar rare piece of furniture that would allow us to retire to a life we would like to become accustomed to. This is how a girl gets drawn into the seedy world of stripping.
It’s all slaps and giggles till you get started and find out it’s a hard life, you get dirty, you get tired, you want to give up and you feel shame. How did I go from a painted finish to the picture above? Days of work, tears, failure and not giving up. It went on for so long that Bill took pity on me and stepped in to help.
The process:
- I needed to get the wax off so I wiped the whole thing down with mineral spirits. Then wiped the mineral spirits off.
- I sanded with 80 grit just to micro abrade the surface to help the stripper get in there. This would also help to remove or break up any wax that the mineral spirits didn’t remove.
- I used CitriStrip which has become my favorite finish remover. I painted it on with a chip brush and I worked in small sections. I started with the top, put stripper on, let it sit while I painted a side. Then I would go back to the top with a plastic scrapper and lift off the softened paint and finish. I worked my way over the entire outside of the desk like this. I needed to work in small sections because the stripper was drying quickly. When it dries you have to apply more to soften it again you can’t scrape off the dried gunk,
- I repeated the above steps until I had removed as much of the finish/paint as I could with stripper.
- The front of the desk has detail trim some rope braiding on the lower doors. Some wood trim and a medallion (made of wood who knew) on the front of the drop down door. For these I used brushes and toothpicks. The brushes were actually great in a lot of areas that the scraper could not get. I bought a pack of three from Dollar Tree for $1.50. The brushes could get into places that were not flat or had curves and helped to break up the paint/finish. The toothpicks were able to get into all of the really small areas to pull out the gunk. I could also wrap paper towel around them to get into the larger holes in the medallion.
- After removing as much of the finish as I could with stripper I now had to remove the stripper residue as well as any finish/paint that might still be there. This is where the mineral spirits came back out. If the stripper dries you can reactivate it with more stripper new or used or you can use mineral spirits. Mineral spirits alone might have been enough to remove the finish but it would have been a lot more work. I could also have tried sanding it all off BUT and this is a Bertha Butt and her sisters, sized BUT. I did not know if this was veneer or solid wood. I also knew that doing all of the detail spots would have been extremely difficult just trying to sand it all down.
- I should mention that during both the finish remover and mineral spirits part I was also using steel wool. Wal-Mart had a pack with course, medium and fine steel wool all in one. I would put stripper on a paper plate and then dip either the medium or course steel wool pad in it. I could then apply the stripper using the steel wool effectively “sanding” as I was applying stripper. I did the same thing with the mineral spirits. I had bought a small, cheap, metal pet water bowl from Dollar Tree. I would pour the mineral spirits into the bowl and then dip either the medium or course pad (different from the pads I had used in the stripper) in the bowl and use that to help remove finish/paint or stripper residue. I would dip the wire brushes into either stripper or mineral spirits too. The steel wool not only helped to get the job done they were nice because they were better at forming around round surfaces like the legs or being able to get into edges and grooves that the scrapper could not.
- Finally we are getting to the end. I have almost stopped panicking. Things looked bad when I first started. Like abandon hope all ye who enter here kind of bad. No matter how hard I worked it did not seem be getting better nor did it feel like it was getting anywhere close to ever being done. Finally I could see the end zone. Time to start sanding, my most favorite job in the whole wide world. Initially I was going to put sandpaper on a small piece of foam so I could get into the detail till I remembered I had a foam sanding block! I started by wetting down a section of the desk. While the grain was raised I sanded over it with 80 grit. I repeated that till I had gone over the entire surface. I then sanded with 120 grit and once again with 180 grit.
- I wiped down the entire desk with tack cloth to remove any debris or dust.
- I then brushed on my first coat of General Finishes water based poly. I would link to it but I can’t find it on their site. Why General Finishes? We had it. Why water based? I actually wanted oil because I once watched a video where a guy tested some things then said something about the oil one having the most depth. I like depth. Except in water because I’m not a strong swimmer. Unless I’m in a boat in which case I like depth.
- I let that dry over night. The next day I sanded with 120 grit then 180 grit again, wiped it down with the tack cloth and brushed on another coat of poly.
- I let that dry over night. The next day I, HA gotcha bet you thought I was going to say 120 grit! Nope this time I used the 00000000000 to infinite fine steel wool. Sanded the whole piece down, wiped it with the tack cloth and brushed on the final coat of poly.
- I let that sit for 3 days before moving the piece. I wanted to make sure it was fully dried before touching it. At that point I shut the doors and it has been sitting waiting for me to finish painting the bedroom so it can go home. Today I discovered that the lower doors were stuck shut DUH maybe that poly had not fully dried after all.
It took forever. After it was done I wasn’t 100% sure I loved it. I also knew I had two more pieces waiting for me which was slightly depressing. I did learn a lot with this one. I learned that whole videos and the company website all say “Paint the stripper on. Cover it with plastic. let it sit for hours overnight even!” that did not work for me. I tried it. I painted the whole piece with stripper. I covered it with plastic. I let it sit all day eventually giving in and checking it before bed. This is where I discovered that the stripper was drying or had completely dried. I also discovered that using the steel wool with product made a ton of difference. Those little brushes were another huge win. I learned not just how things looked if they still had product on them but how they felt. If there was residue you could feel the pad sort of hesitate but when you had it all clean it would glide. I learned not to give in to panic just keep working and trust the process. I also learned that there can be a Zen quality to sanding. I’ve never experienced it but maybe others have. I learned that a lot of what freaks me out is I don’t know what something is supposed to look like. I do a lot of, “Is that what it’s supposed to look like or did I screw something up, again?” That’s when I get Bill and have him look at it and tell me if that’s just the way it is or if something else needs to be done. I looked at the piece again today and I realized I really love it. It turned out beautiful and it seems to only be getting more beautiful as it sits there.
Now go tackle something you think is hard, I bet you’re bigger than your project.
NOTE: Before changing any finish make sure you check to see if that will effect the value of that piece. Also before you use any kind of stripper, mineral spirits, steel wool, wire brushes, sand paper etc… be aware you can damage a piece to the point it cannot be repaired. I did what I did knowing with each step I might damage things beyond repair.