
You don’t have to be a professional photographer to post pics of your work but knowing a few tricks can’t hurt. Especially if you are posting to a webstore, sending a pic to a client or potential client, or looking to help clarify a post to help readers.
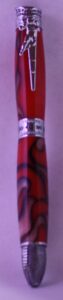 | These two pictures were taken with the same camera, same auto focus settings, same lightbox. | 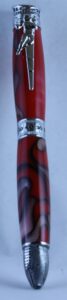 |
The one on the left had no external light source the camera flash was activated. The cast around it has a red or pink tone. The details are not crisp, there is glare from the metal and the overall effect is blurry. The one on the right is better. Two diffused light sources were applied on either side. The color of the background is more natural. The metal doesn’t have as much reflective glare. The whole picture is much crisper and the details are becoming easier to see.
The idea was to create a story around this pen which is being made for a specific human being. In this picture the setup consisted of a trifold cardboard frame with black poster board attached. 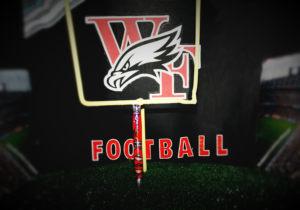 The two sides had photographs of stadium stands with people in them, I flipped the photo in photoshop to create a left and right, while the back contained additional story items. The bottom was astro turf and the top was draped with a sheet of thin children’s drawing paper cut off the roll. I made from an old plastic coat hanger a goal post to lean the pen against. The original photo had the idea but was not good. The three sheets of poster board were slightly different shades of black, there were gaps where things came together, and the pen had way to much glare. Time to do some photo editing and this time I used GIMP. A little blur here, some color blending there, adding blur to the entire outside of the photo while maintaining the clarity in the center and things were looking better. I can’t say that I love it but you have to start.
Because of the glare on the pen I wanted to just get a nice clean picture of the pen by itself, I knew I needed something designed for the job. Enter the lightbox.
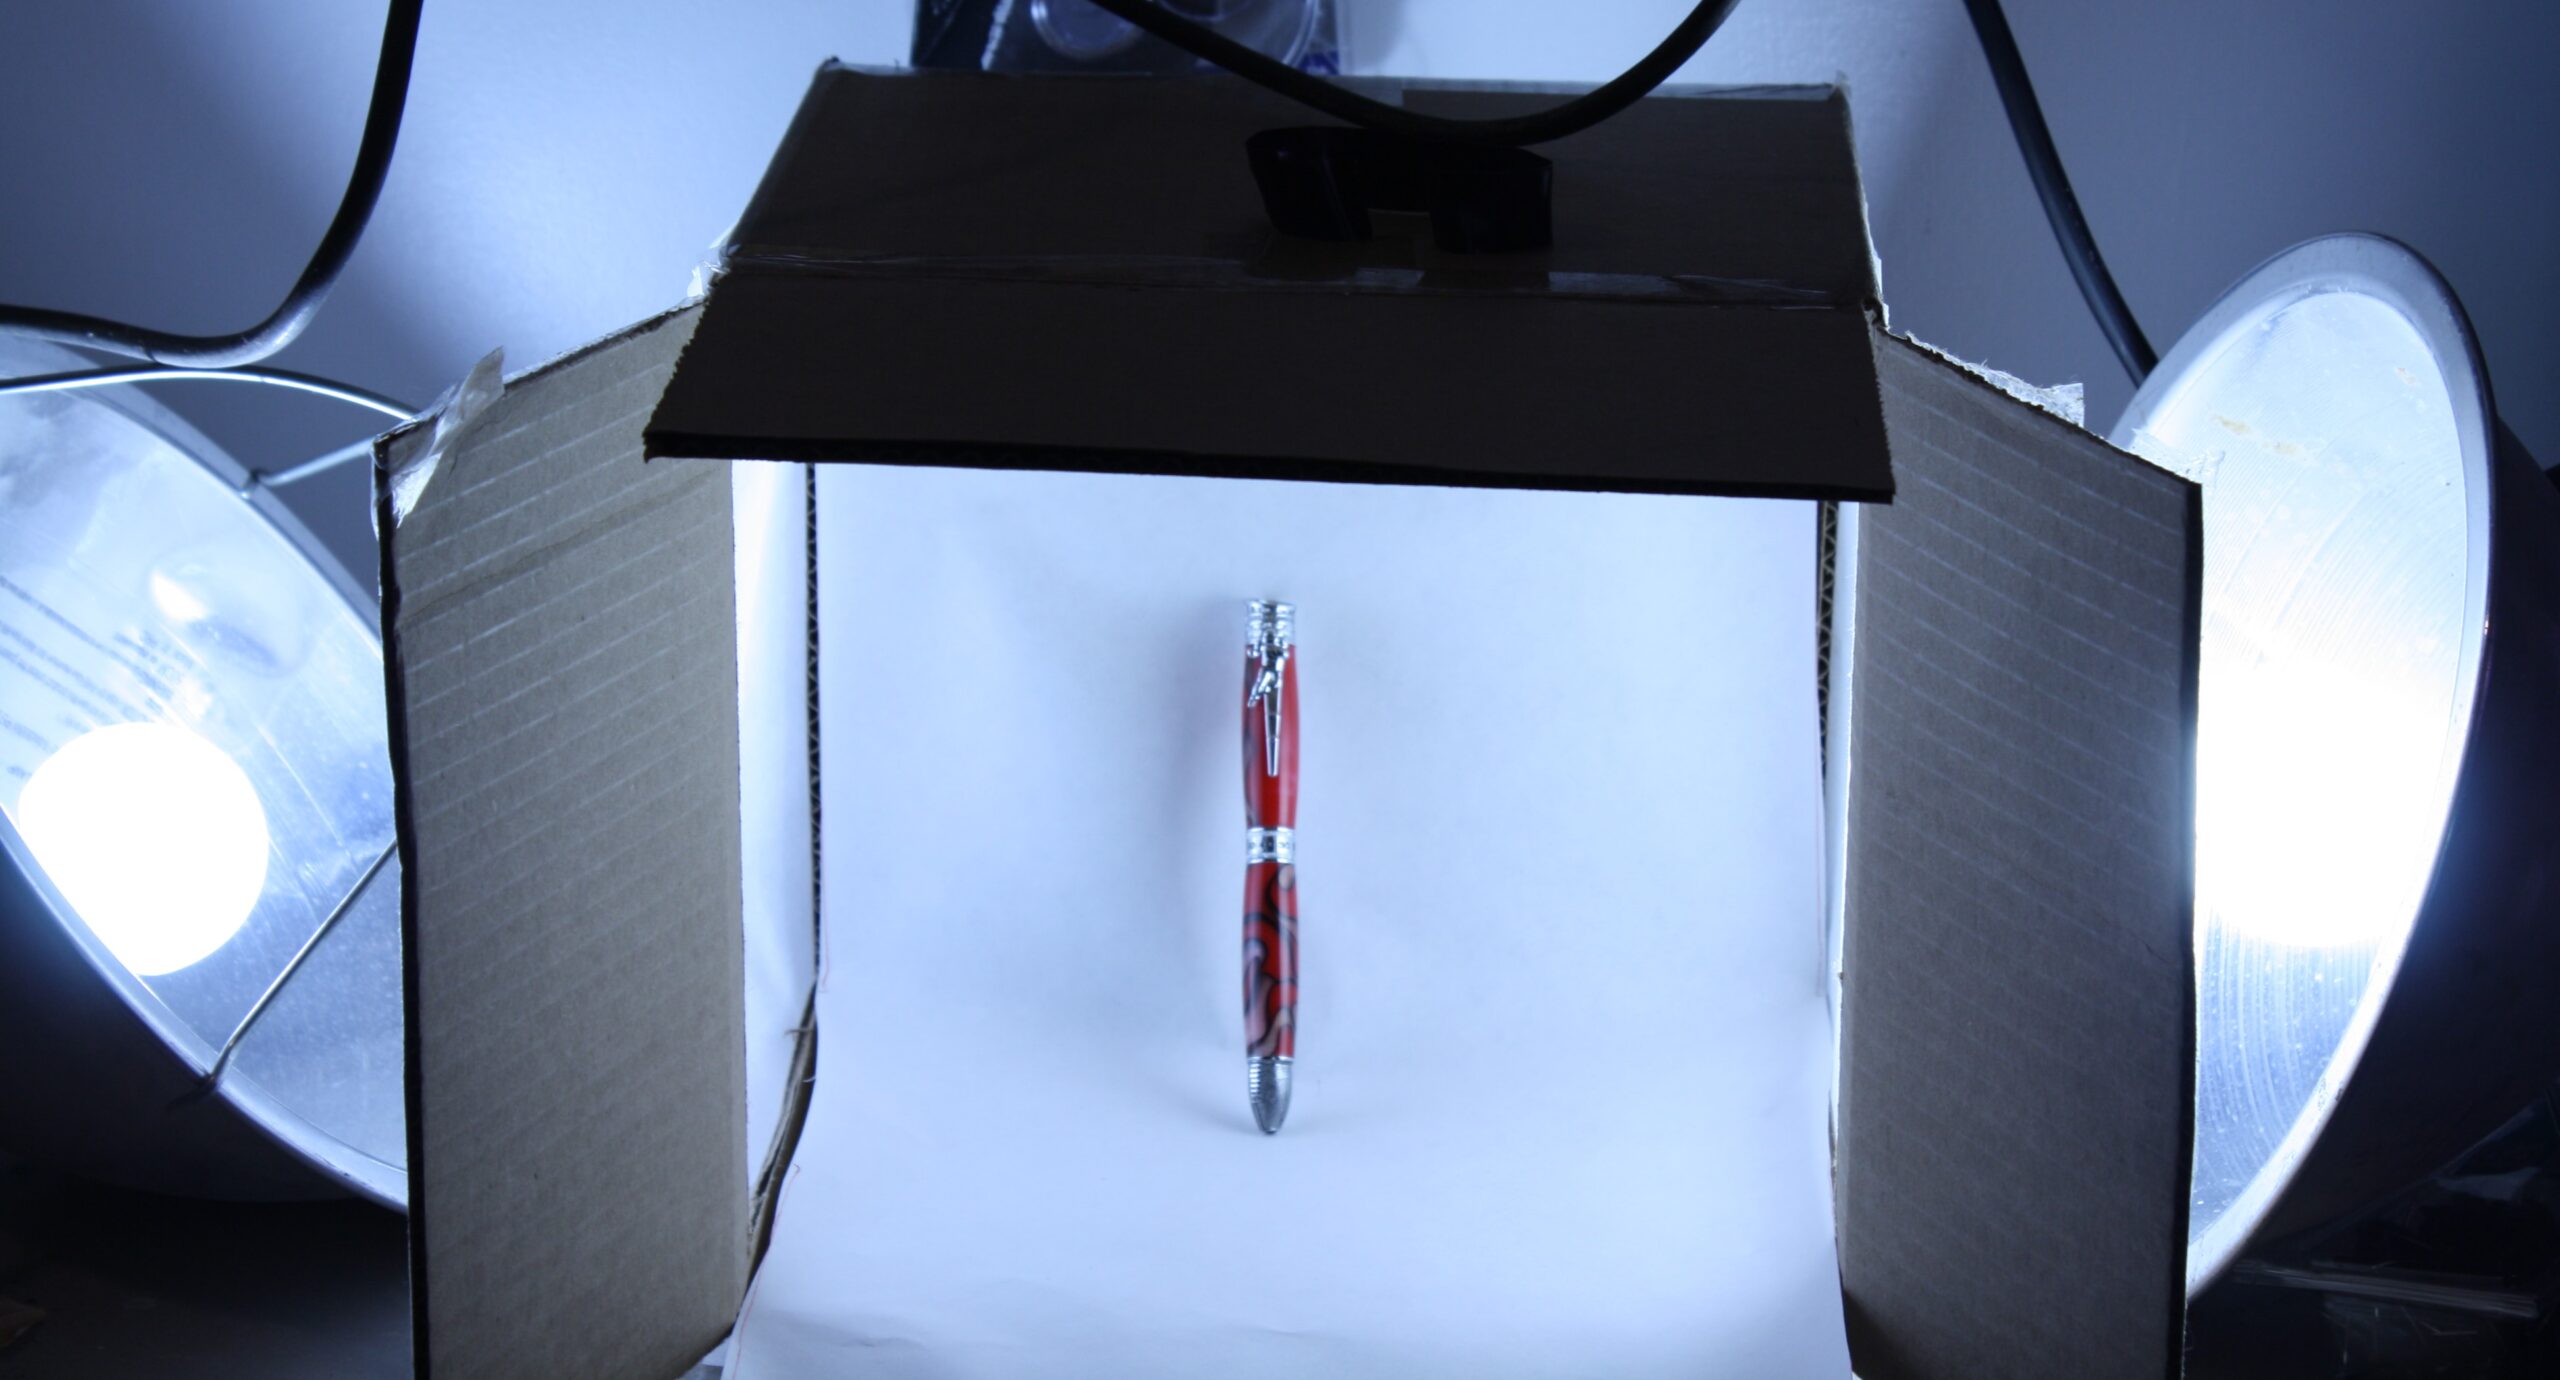
I needed something that is easy to store, inexpensive, quick to setup and could be made from things I already had in the shop. This pen has been especially frustrating there is so much glare off that chrome that it has been difficult to photograph.
Out in the shop I found one small cardboard box, a roll of parchment paper from the kitchen, a roll of children’s drawing paper, and two metal clamp lights left over from the days when we used those in the brooder boxes. Let’s do this! I cut out the two sides to make large windows. then cut out pieces of the parchment paper to tape over the holes to diffuse the light. I then cut a piece of the children’s drawing paper to the width of the box and made it long enough to extend past the opening. I taped it to the top of the box and let it unroll out making sure not to create wrinkles or creases in it. This should be as clean and unmarked as possible. I ran it out of the box because I wasn’t sure exactly where reflections should be. I also left the flaps on the box because those two side flaps can bend back to help prevent light from leaking around back into the box. I only wanted the light to come through those parchment panels to reduce glare. In my initial test I did not add any light sources and the result was better than what I had been getting just trying to lay the pen somewhere and photo it. Adding the light sources made a huge difference!
So what’s next? First I think those lights need to be more straight into the side not angled up the way they are. Second the pen is leaning against the back I think it should either be laying down flat or standing up straight. Third is working on keeping those side flaps out so that they block the light from entering the box from the front. Fourth is working on my camera settings. I have an older digital camera and don’t get me wrong I love this camera it’s a Cannon, EOS, Rebel XS. About 9 or so years ago Wal-Mart had is on the clearance table which was awesome. Especially awesome because close to 30 years ago I had bought a non digital Cannon EOS Rebel XS AND had accumulated lenses and all sorts of goodies over the years to go with it. ALL of those worked with the new digital camera! Just because it is old does not mean it can’t do exactly what I need it to do for product photography.
For now I’ve been using the AUTO setting and letting the camera figure it out. Let’s see if we can make that better. B&H is a company that I have used for purchasing video equipment from professionally. They have good prices, good support, and are reliable. This video is specifically for several older models of the Cannon Rebel cameras.
https://www.youtube.com/watch?v=Myds2jxQTXQ
I got through the beginning and had to do some testing. Several adjustments I made were I set the lights up so that the bulbs were aimed more evenly at the windows rather than pointing down. I also laid the pen down on the bottom of the box rather than leaning it up against the back wall. I then adjusted the camera exposure to 2+ using the AV button and the wheel. Basically what that does is it changes what the camera wants to do because of it’s own programming. The camera thinks there is to much light in one place so it tones down the exposure on the overall composition. By changing that back up again I’m able to even things out and get a better overall light on the entire pen. Let’s see how that looks.
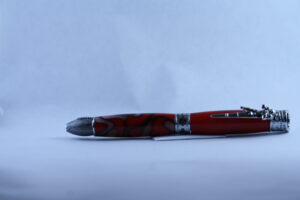
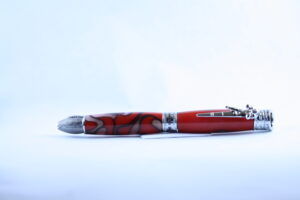
In the first picture the camera auto adjusted the exposure. In the second picture I bumped the exposure up +2 as high as it would go. Now that is pretty amazing. No editing with any other software was done on either of these that is just straight from the camera.
Tomorrow we will be playing with more settings on the camera to get the best still shot I can. I’ll document all the settings used so that you understand what effect each had on the shot. I’ll also document any changes I make to the picture and what editing software’s were used.
After I’ve got this shot down I’ll redo the composition shot and see if we can’t make that look like I picture it in my head.