Ever since installing drip irrigation to our gardens, it has greatly reduced the amount of time spent each day watering. One of the things I wanted to add from the start was a fertigation system. We currently have 5 zones set up on 2 timers. I plan to add 2 more zones to one of the timers, and add an additional timer with 3 zones.

Fertigation Setup
I wanted to use as few fertilizer injectors as possible, and that meant 1 for each timer. I tried to figure out how to create a system placed after the timer, but it got very complicated, and expensive. So I opted to create a bypass system placed before the timer, and put the injector on the bypass.
My initial attempt was with an inexpensive venturi injector, similar to a Mazzei injector. I purchased these injectors from Amazon. The problem with these is you need a decent flow rate and pressure differential. I don’t know if it’s just because they are cheap, but no matter what I tried, I could not get these to draw any fluid up with the water pressure I have.
Venturi Injector
I modified my bypass with valves on both sides of the injector, and put pressure gauges on the inlet and outlet sides, adjusting the valves to ensure I had the recommended pressure differentials, 10 to 25%. I had 42 psi on the inlet, and no matter what I adjusted the outlet pressure to, I could not make these things work.
Next, I tried a Hozon Siphon Mixer, an all-brass device touted as simple to use and works well. One thing that the description on Amazon does not say, but the included instructions do say, is that it is not suited for drip irrigation, as the device needs an adequate flow rate, which is usually missing from a drip system. I tried it anyway.
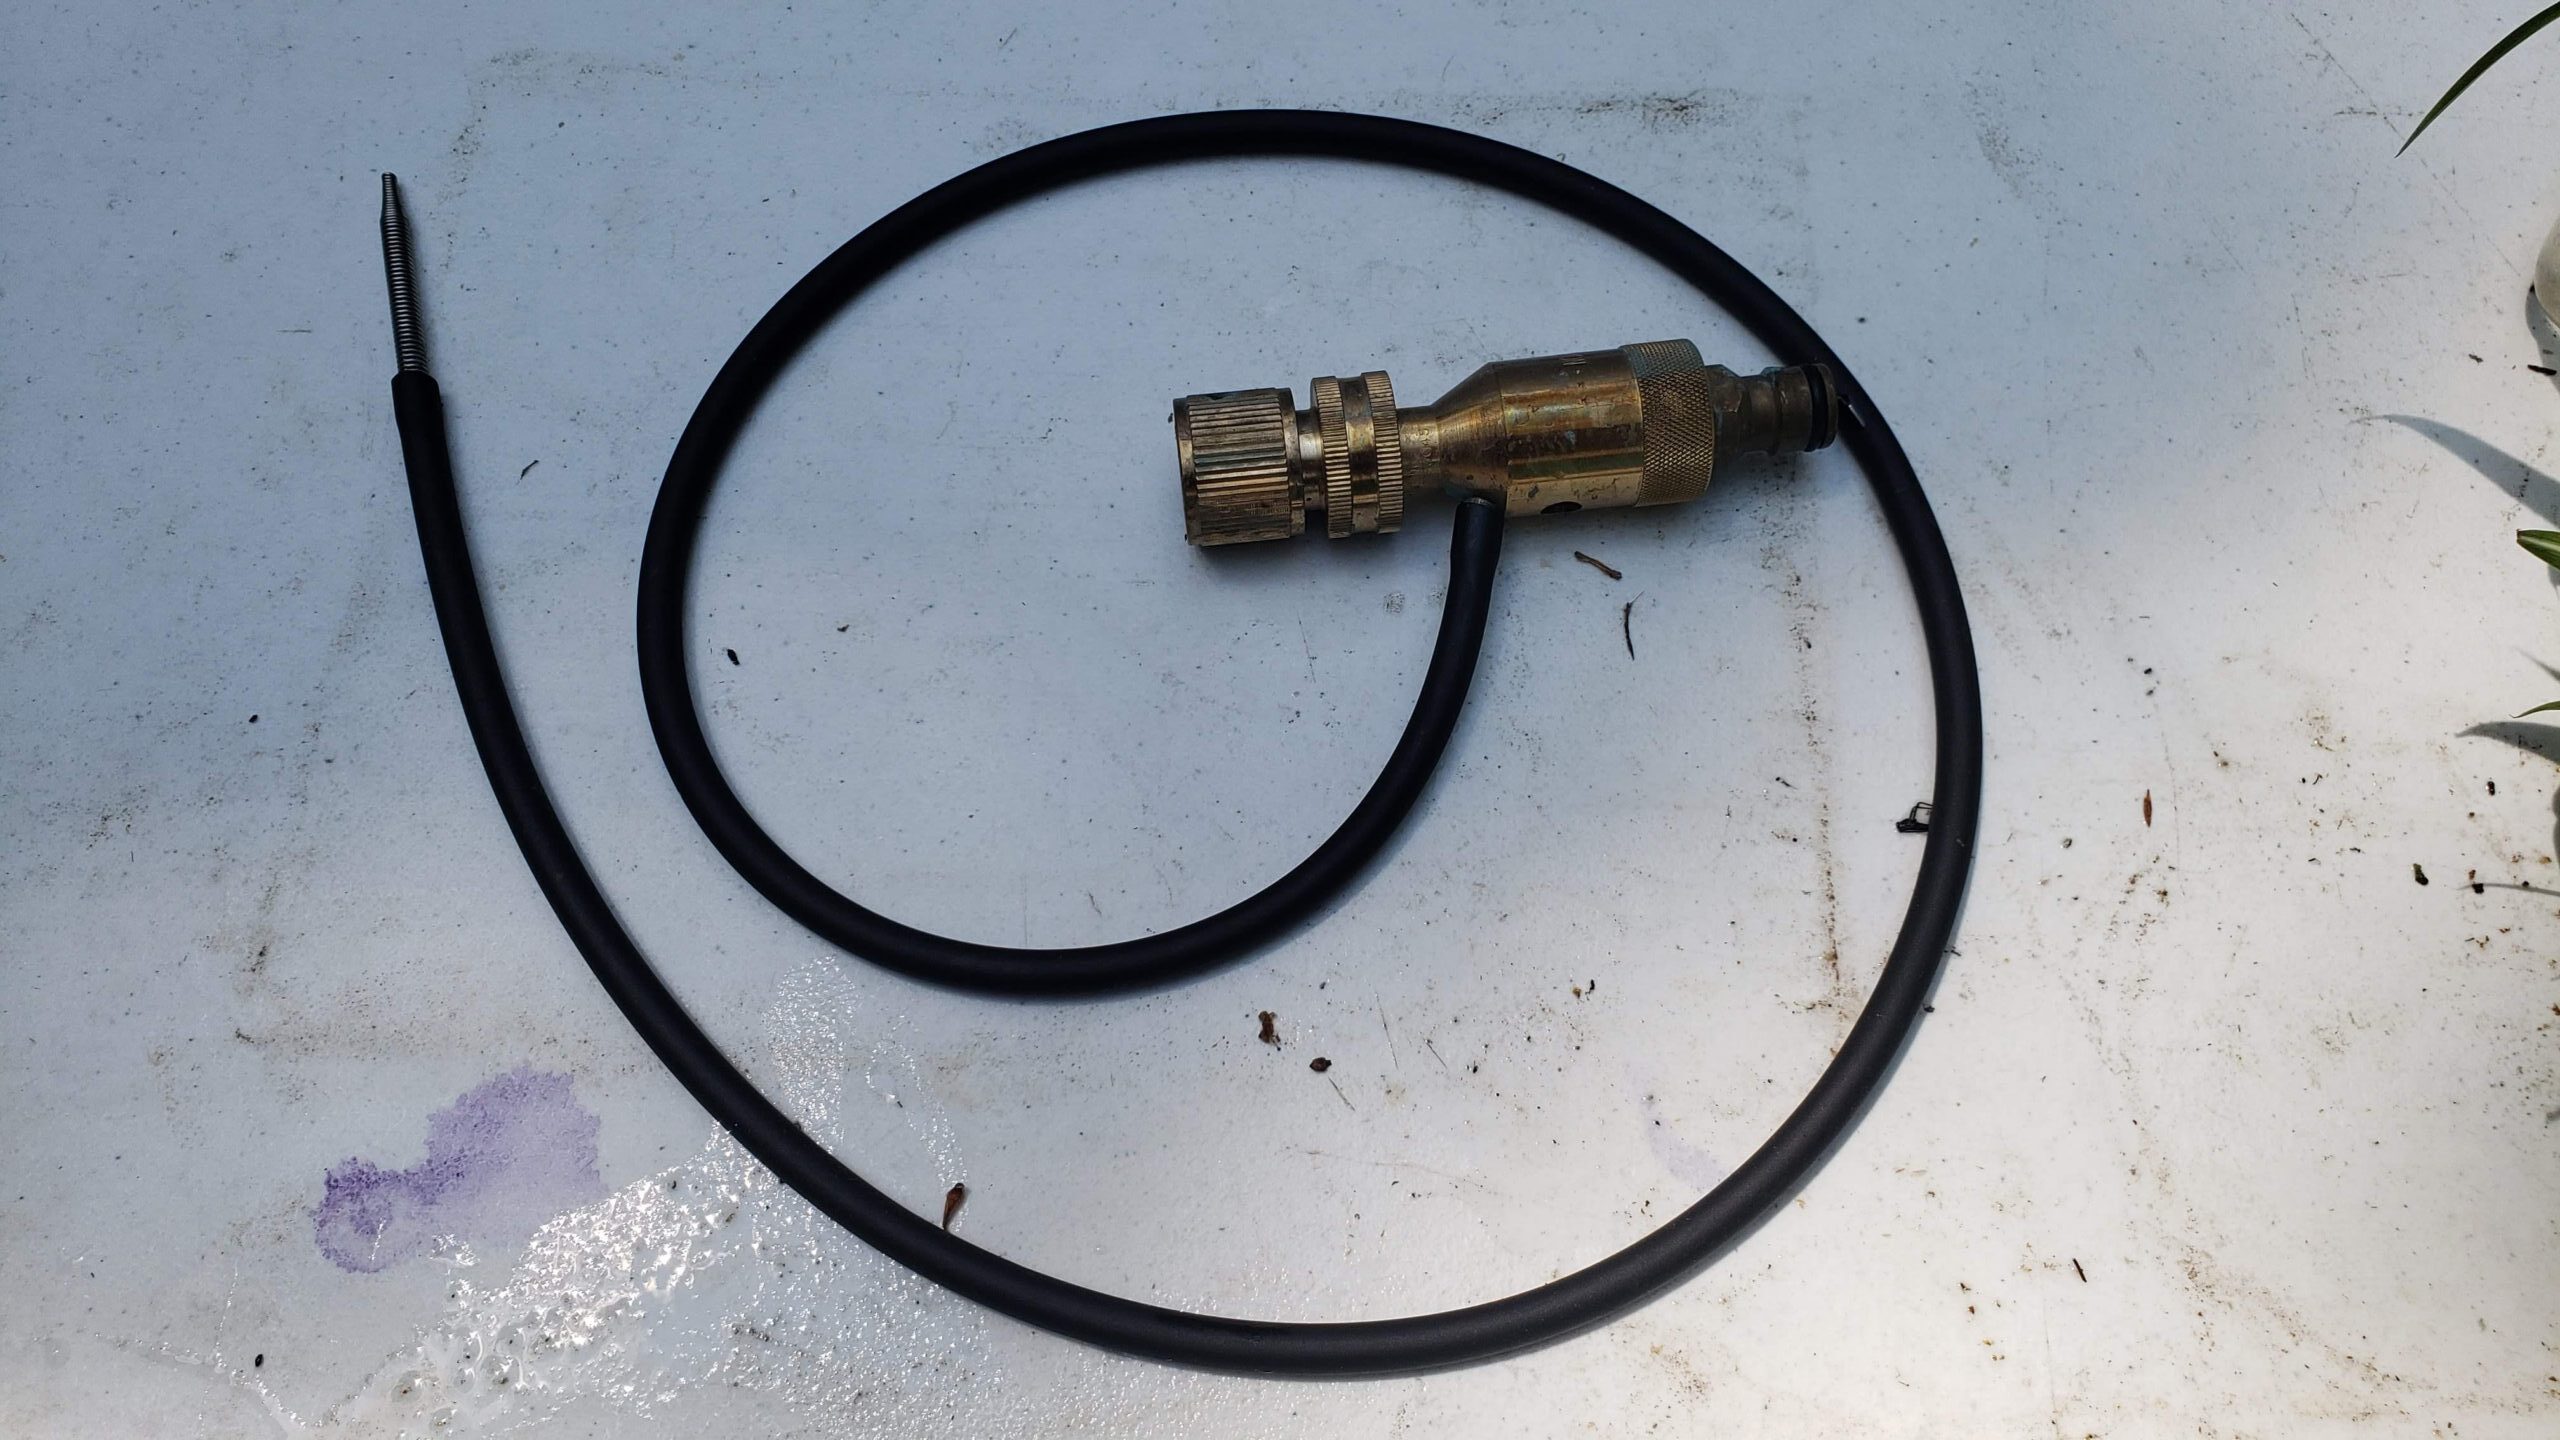
Hozon Siphon Mixer
My fears were realized when there was simply not enough flow to create a suction. But all was not lost, as I put a quick connect on both sides of this, hooked it up to a hose and sprayer, and tried it with hand watering. It works well in this configuration, so I will keep it for that.
My third attempt was with a more simple injector, the Dig Add-it Automatic Proportional Fertilizer Injector. (The Amazon link shows a Generic device, but this is in fact the Dig Add-It.)
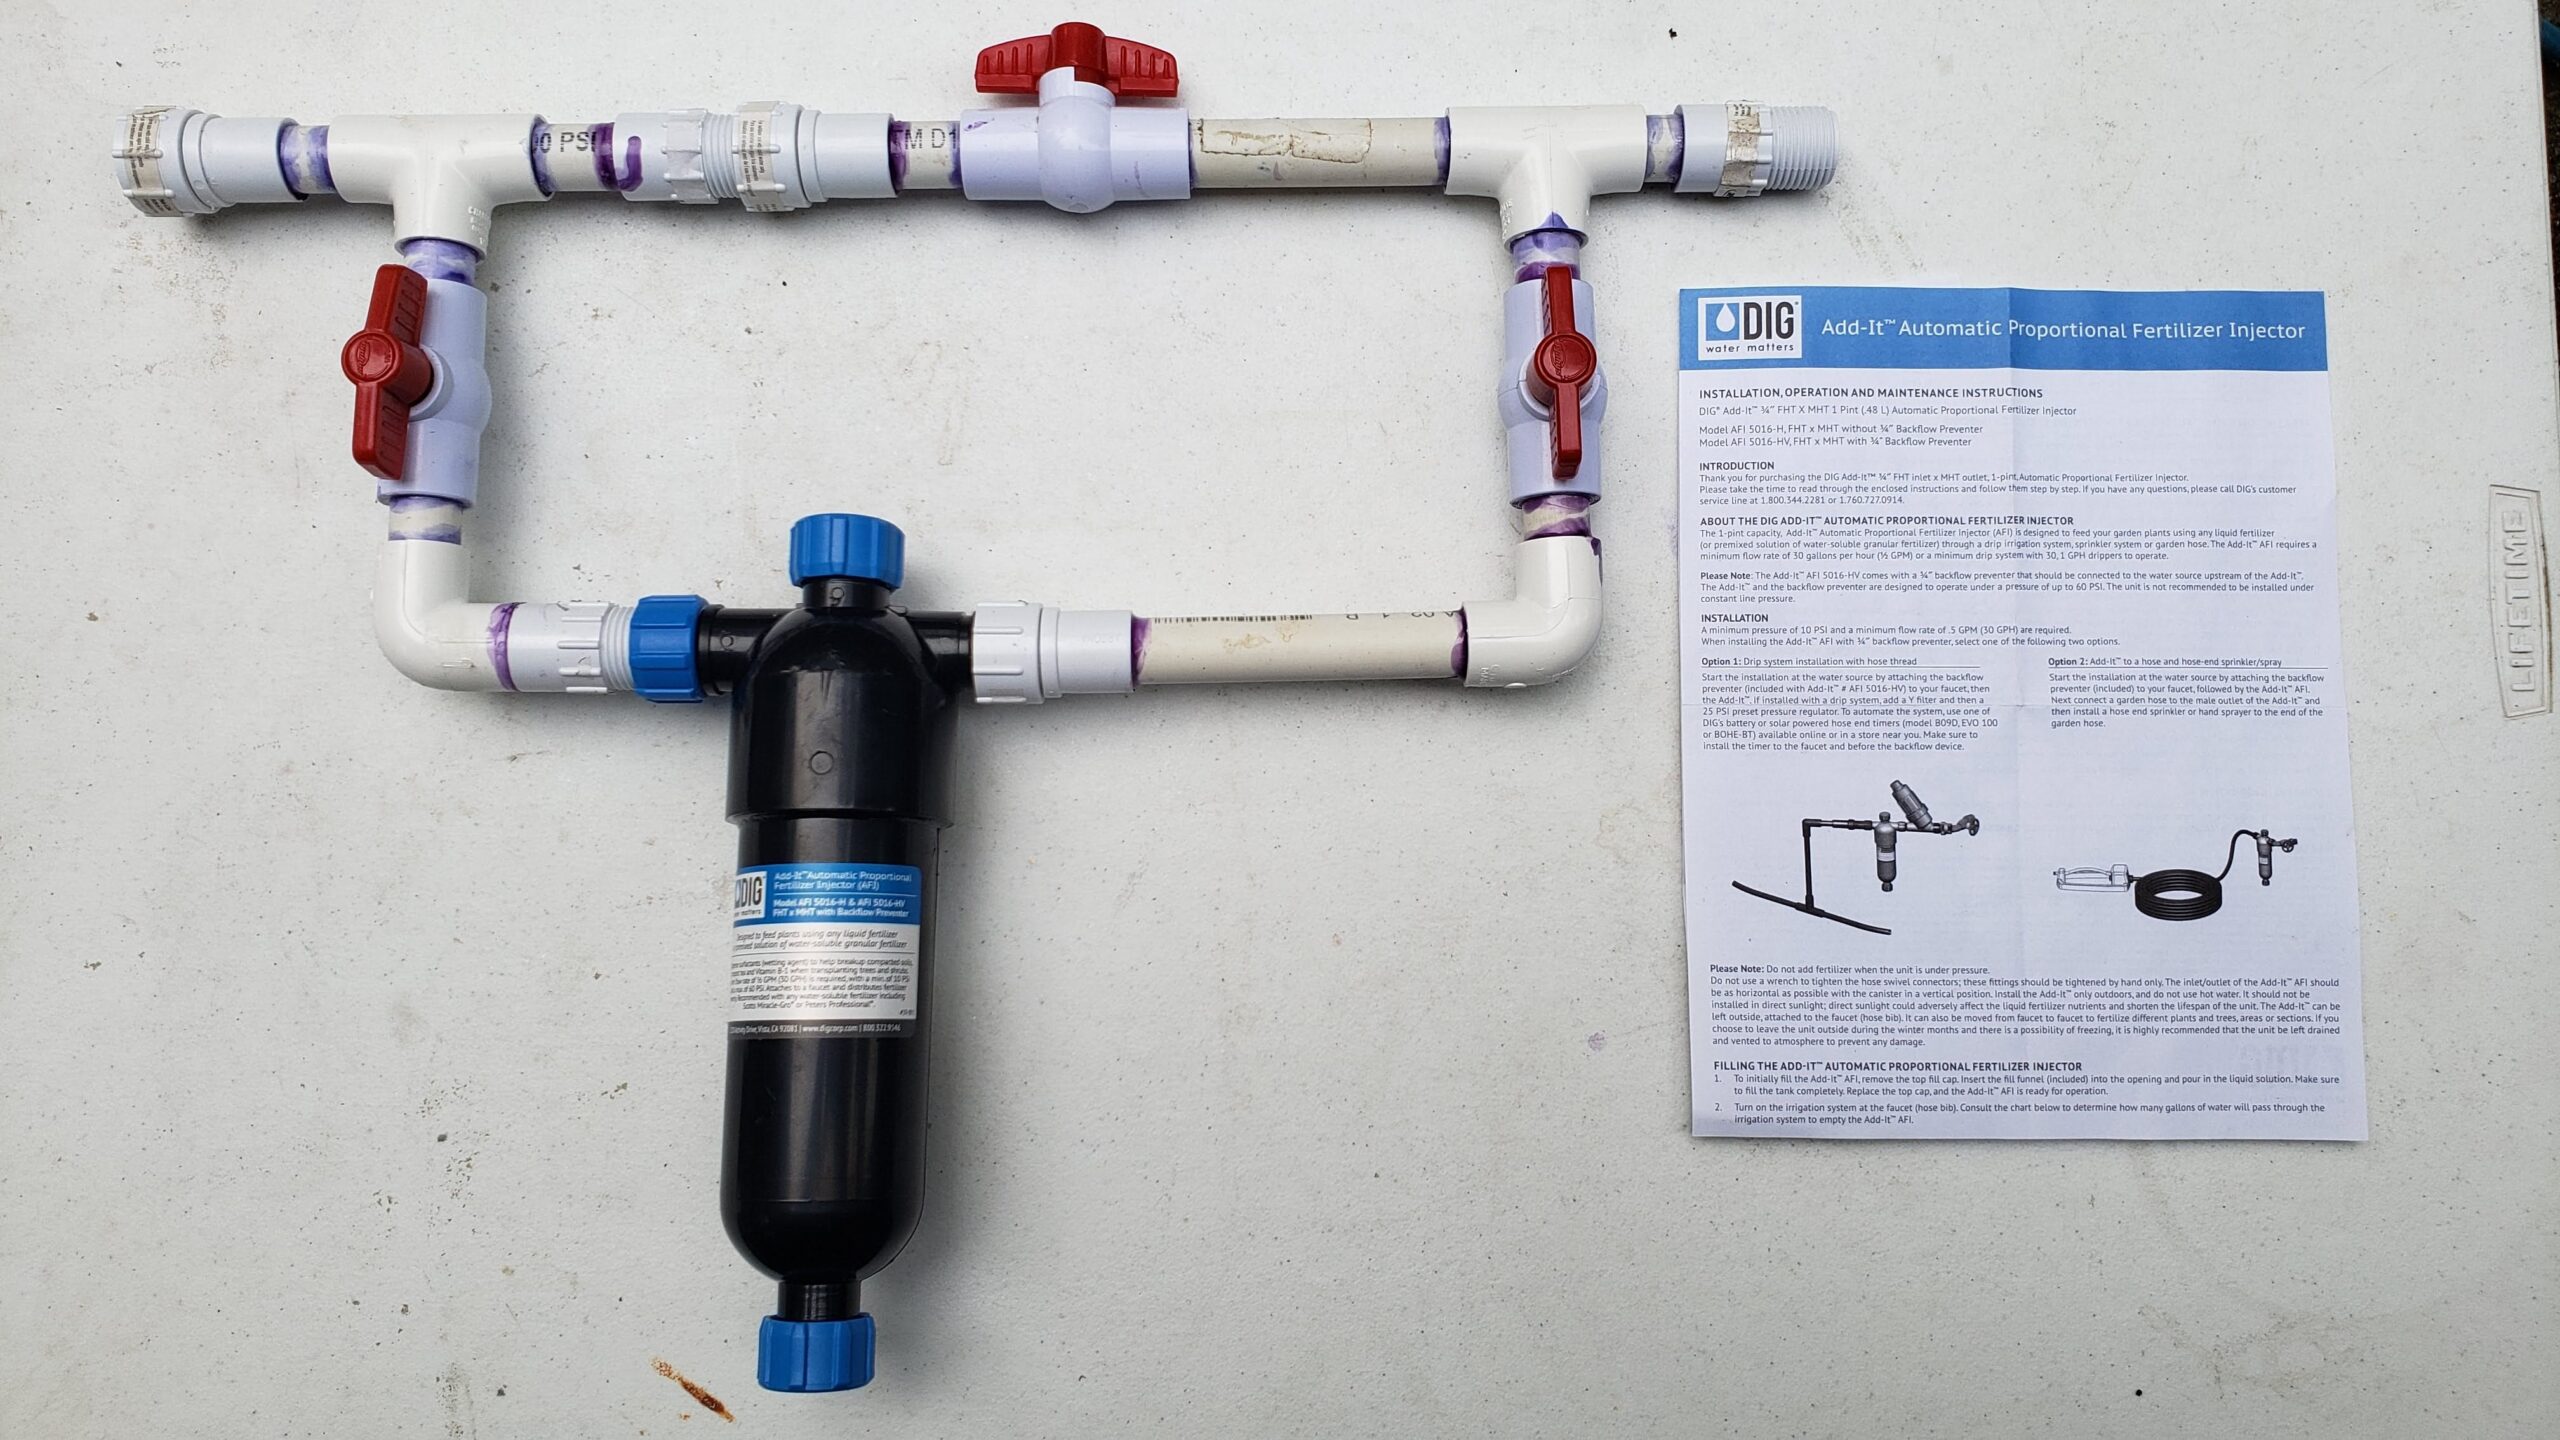
Dig Add-It Fertigation System
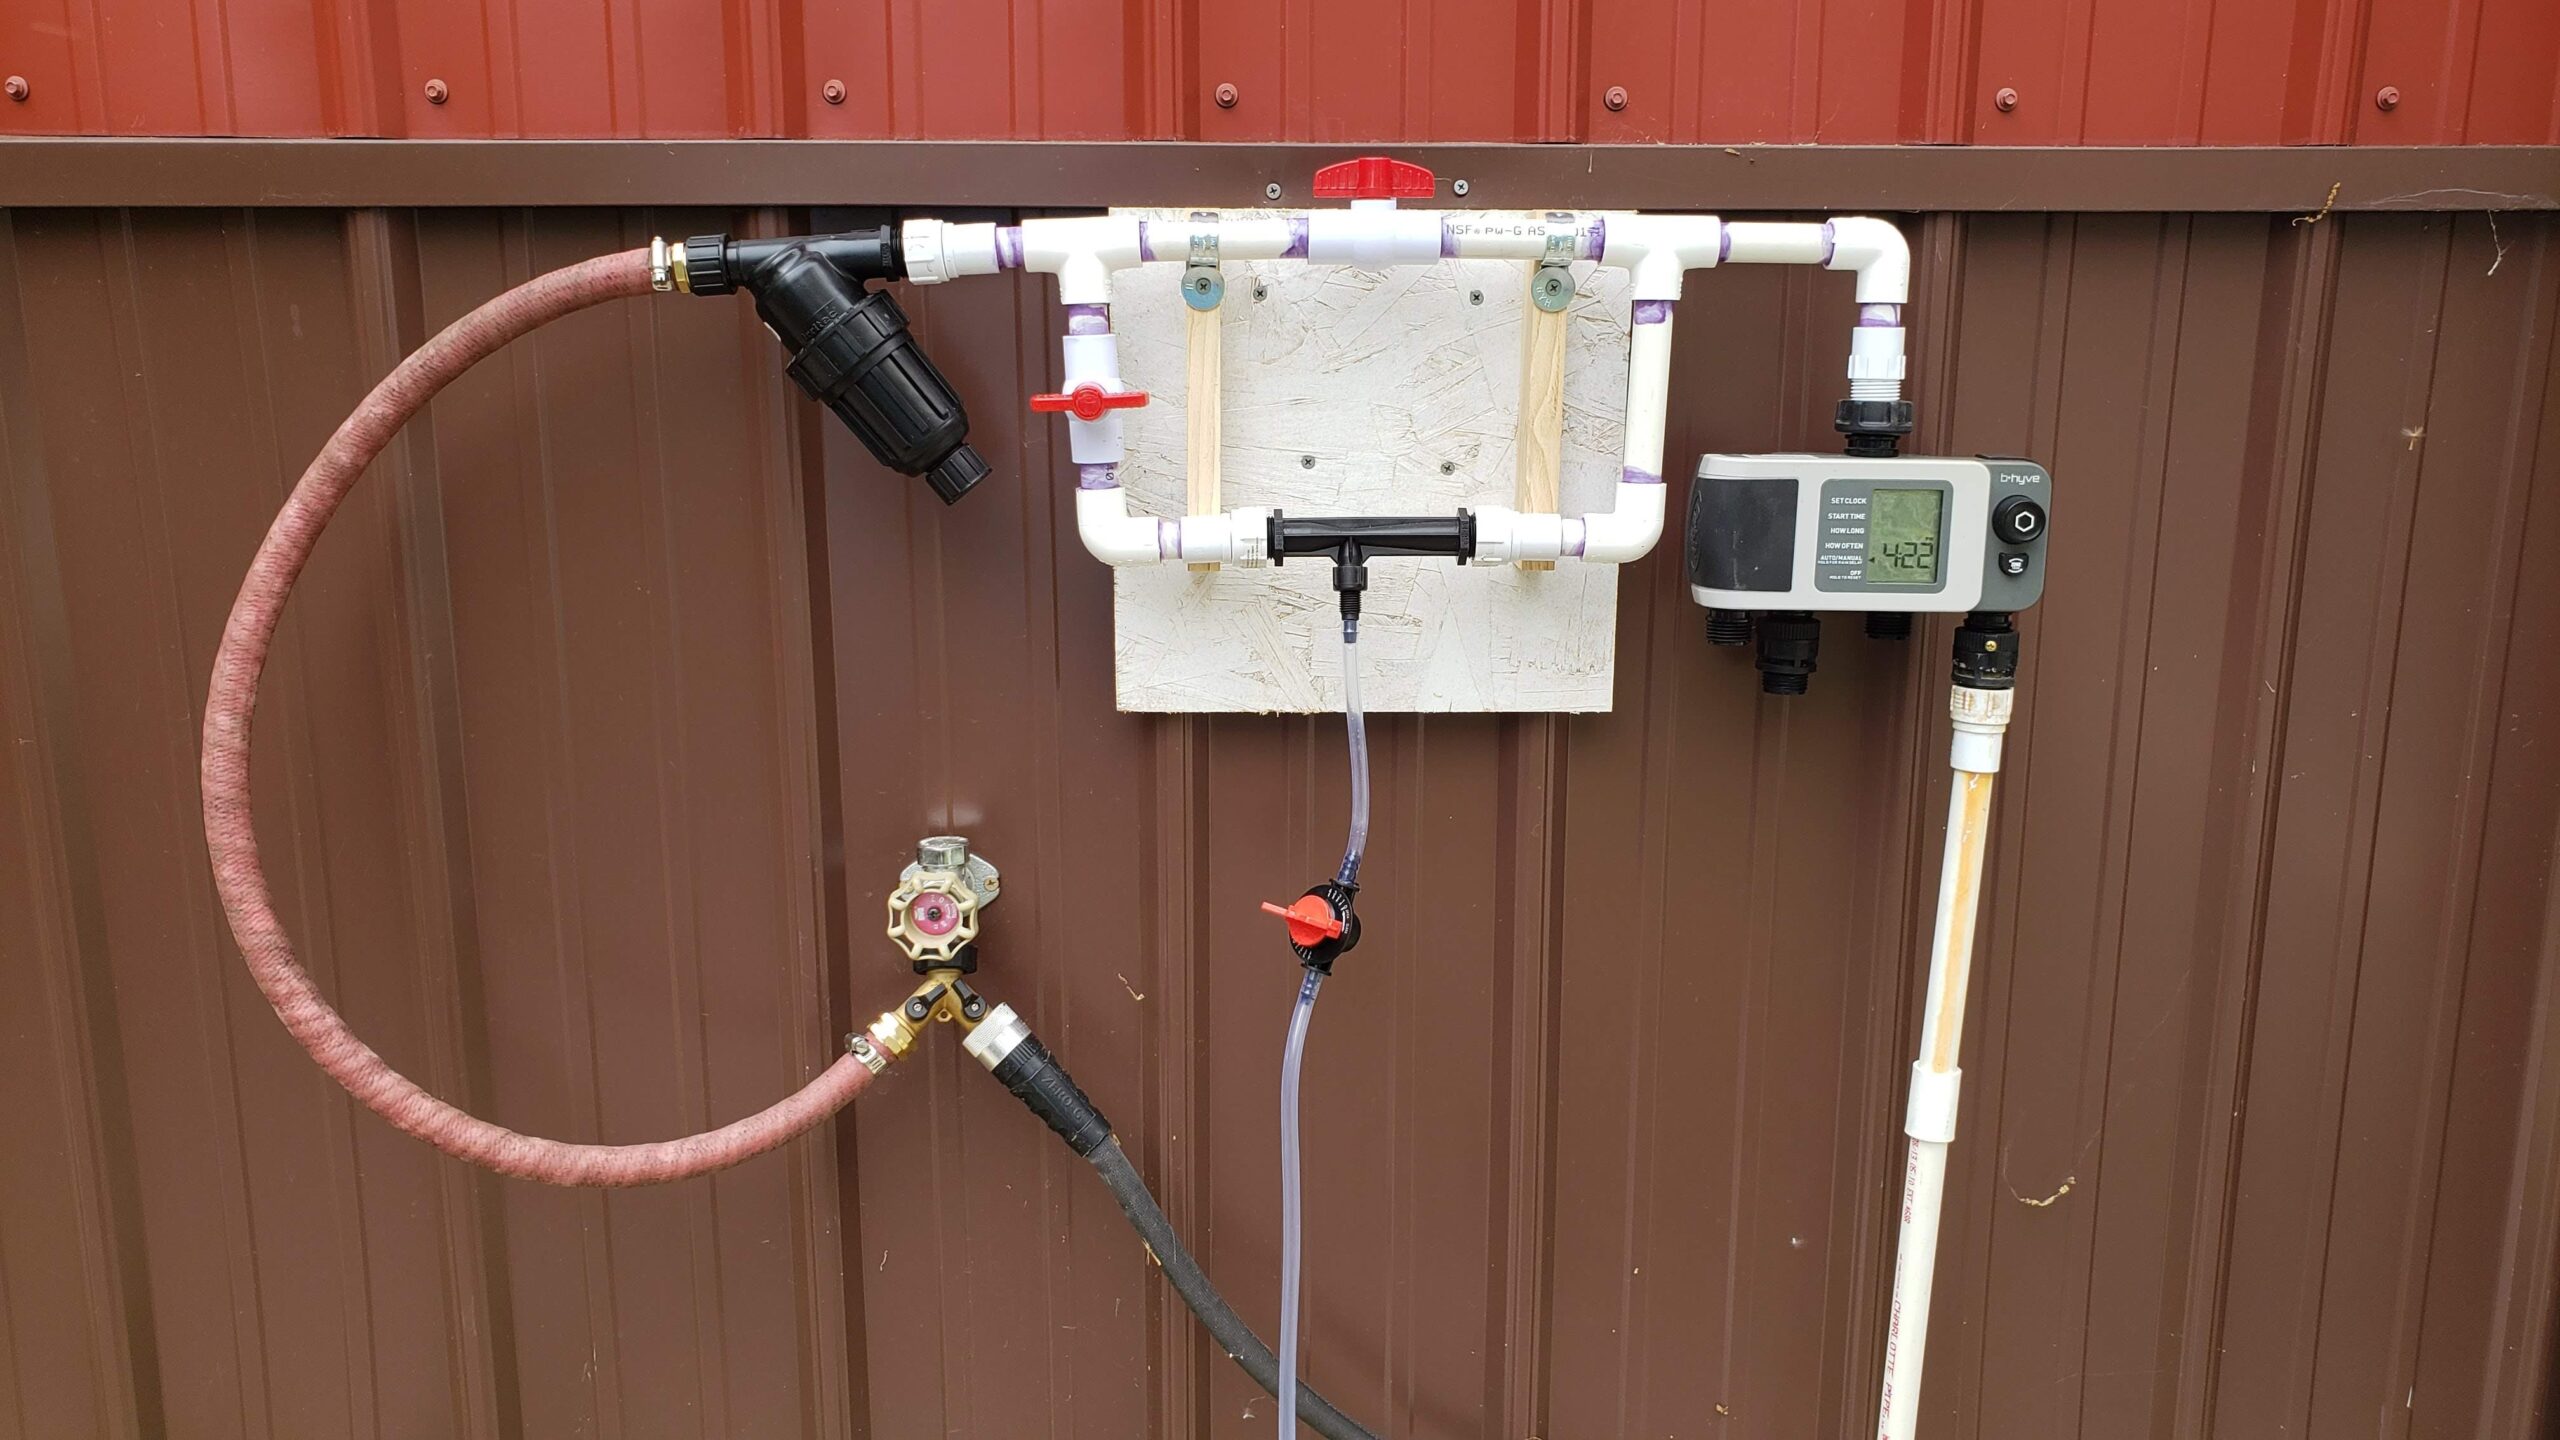
I took the time to make some adjustments to my bypass system, making it more modular to allow for easier disassembly and addition of different injectors.
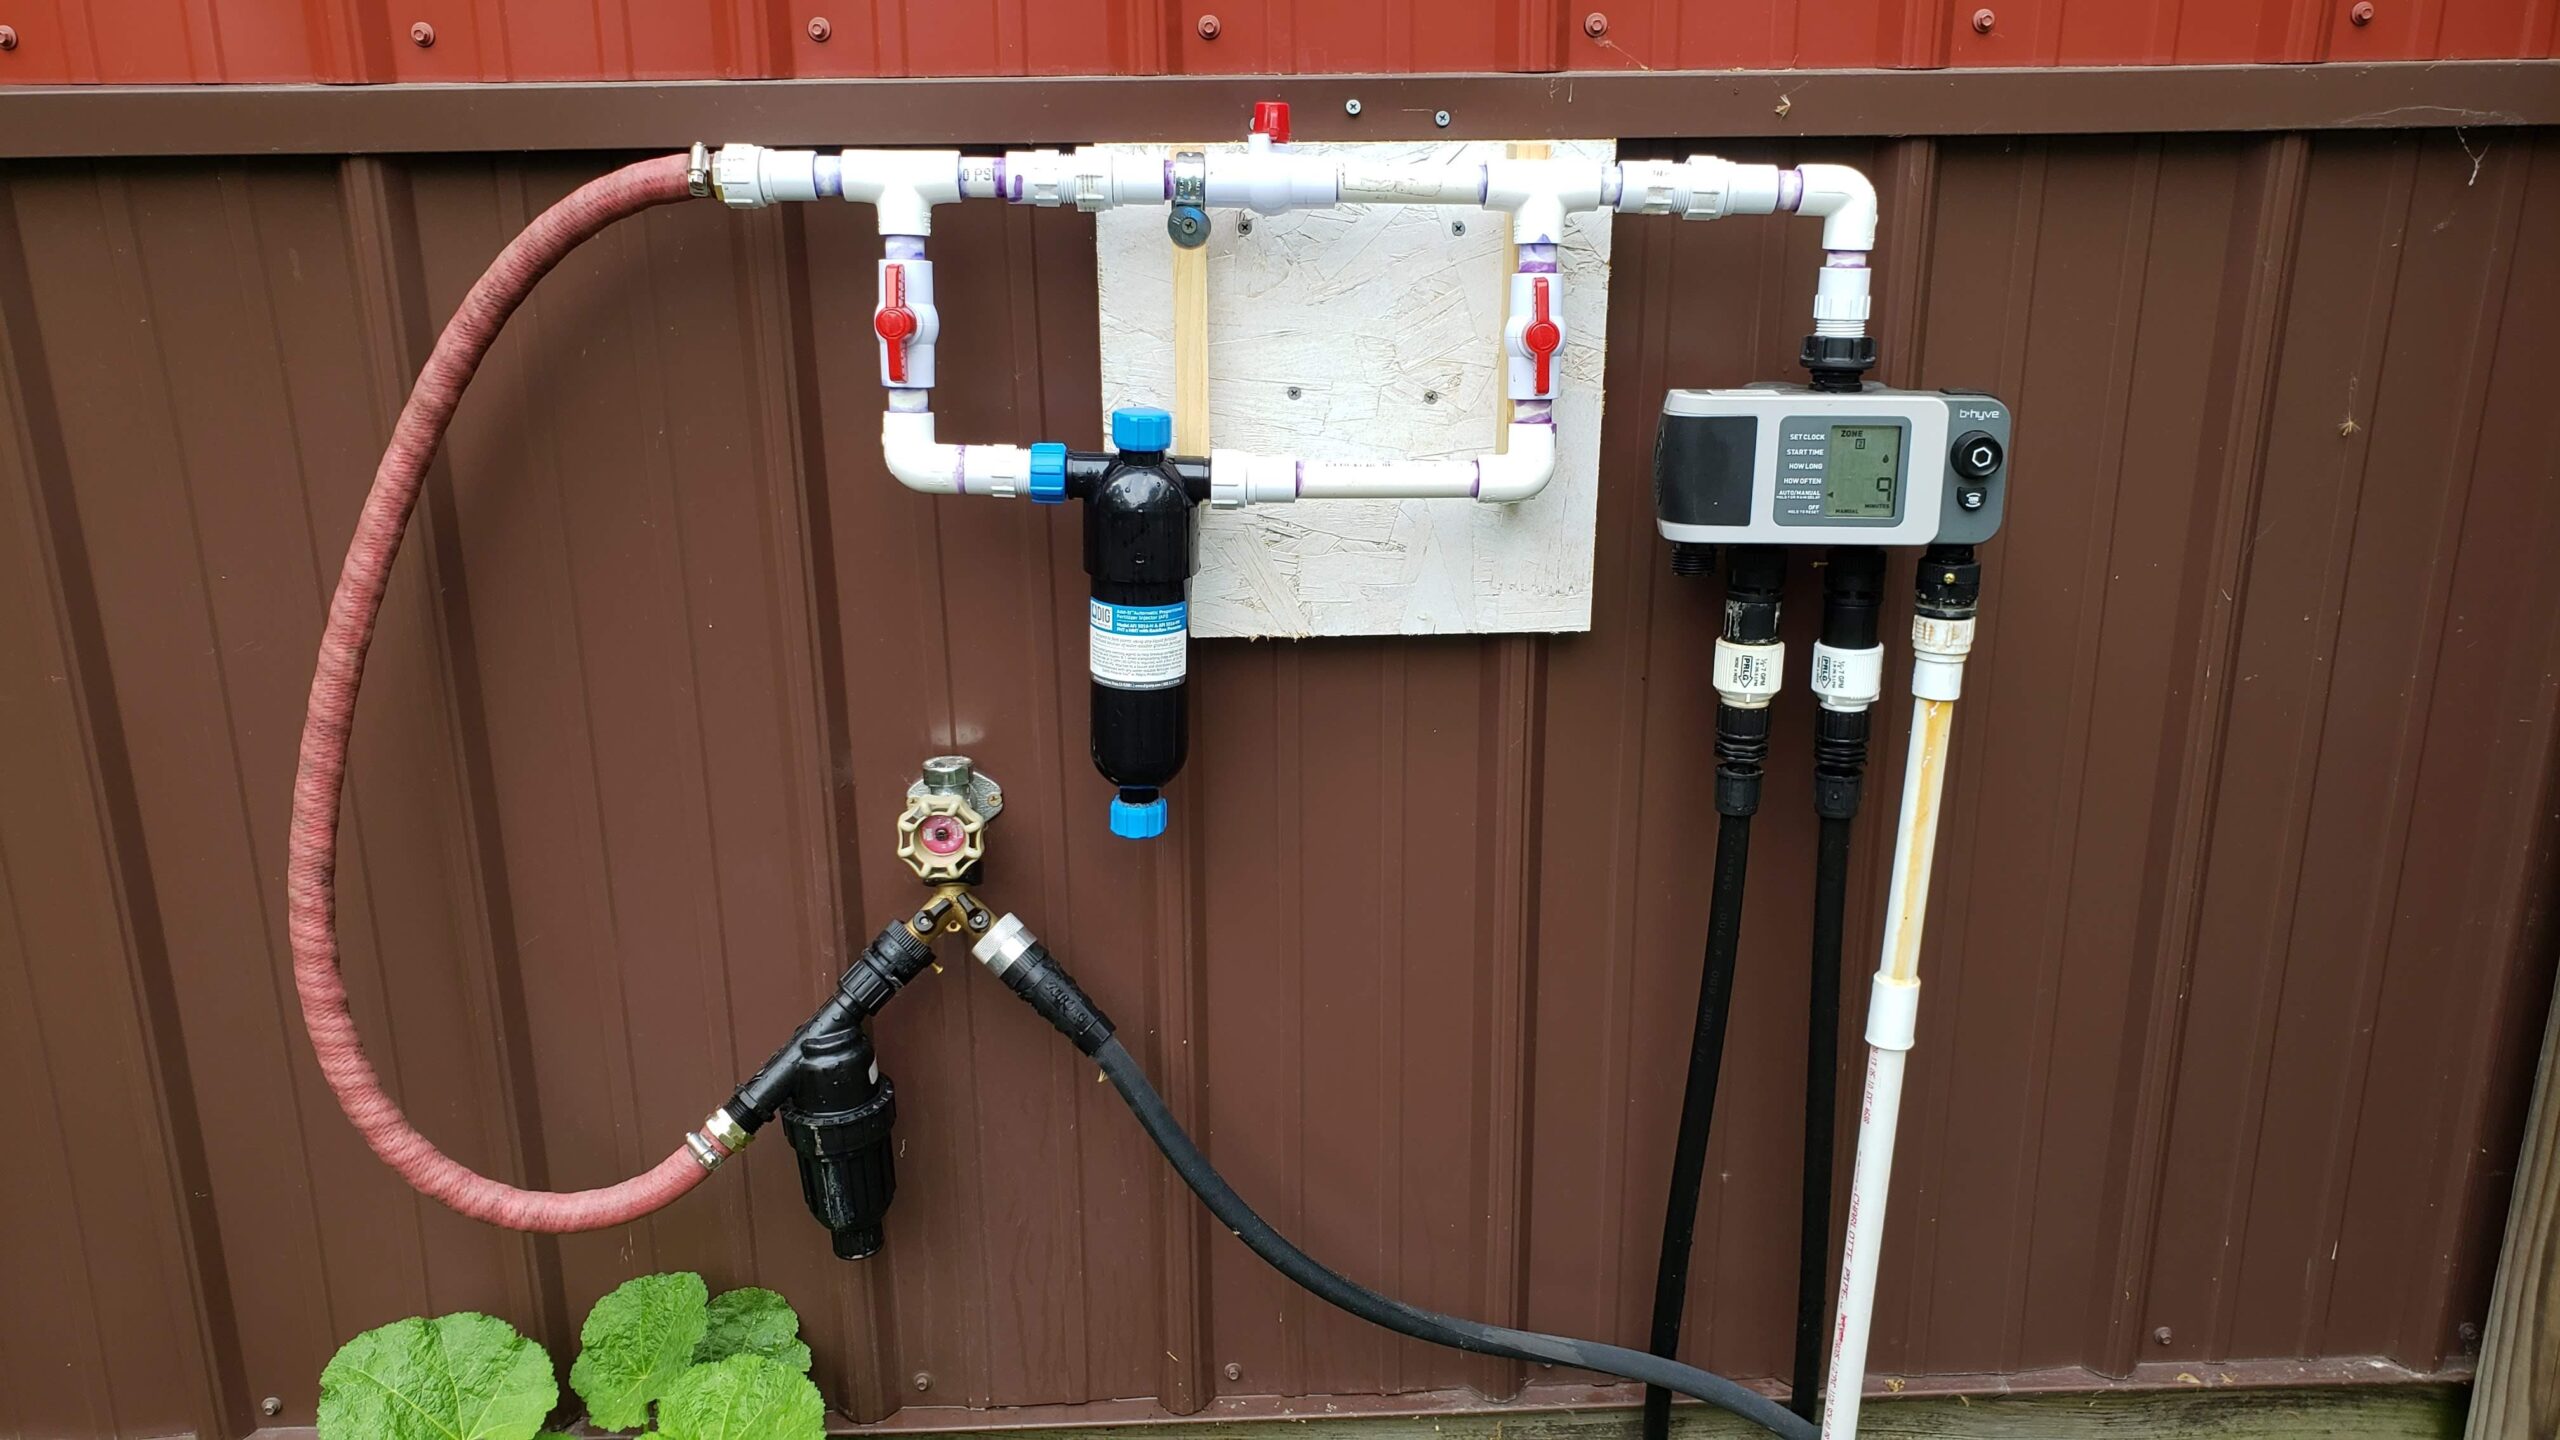
Dig Add-It Fertigation System In Use
This one is much simpler, as you pour liquid fertilizer into the top, and it mixes as water flows through it.
One drawback is it only holds 16 ounces of liquid fertilizer. The chart that comes with shows that this will be used when 15 gallons of water flow through it. I have a spreadsheet of my irrigation system, with the flow of each zone, so I know how long it will take to empty this on each zone.
This one seems to work well. After the prescribed amount of time, I closed the bypass and drained the injector. Since the water soluble fertilizers I use are colored, I can tell if there is any fertilizer left, and what comes out after draining is clear. So I know the fertilizer has been applied to my zones.
One issue I have is it is very slow filling these. If you pour too fast, it runs over. I’m thinking of creating a filling tank that attaches to the top, and then I can simply fill it with 16 ounces, open a valve, and just let it fill into the injector.
For now, this system is working well. I have applied fertilizer twice to all of my zones, and the plants seem very healthy.
Thanks for viewing. I hope this information is useful.
Items listed in this article: