We have lived here for around 18 or 19 years. Our master bathroom has undergone some changes, different flooring, wall colors, wallpaper removal, and even painting the cabinets. One thing that has never changed are the mirrors. Unframed, large, blank canvas mirrors firmly fastened to the walls. They didn’t “bother” me but they bothered me.
About two years ago we redid the hall bathroom that served the two other bedrooms on this level. It also had a large mirror that was unframed. For that redo I had Bill make an actual frame for the entire thing, which spans both sinks from counter to ceiling. I love it so much so that I started giving the mirrors above our sinks the stink eye every time I looked at them. There is nothing wrong with them. I have to admit I thought the only option was to take them down and replace them, until we framed the one in the hall bath. Now getting Bill to make frames requires Bill to have time. He likes making frames and is currently working on six frames for art we have had for years now. I feel like when I say he is “making frames” you won’t understated what is happening. He is taking walnut and hickory boards, planning them, cutting them to size, routing profiles, staining them, and creating mutli layered frames for the art, plus doing the matting for me and we need to get glass cut. Which is why I hesitated to ask him to make frames for the bathroom. Mostly I knew I would have to wait till he was able to do it and I’m not really good at waiting.
Plus there are times when I think something will be cool and I’ll love it but the reality doesn’t live up to the hype in my head. I’m big on proof of concept living. If I have to change something, once it’s been lived with for awhile, I don’t count that as a fail. I count it as a nod to, this is why we don’t just run out and buy or build something, till we know exactly how it will live in a space and how we will interact with it, plus our lives change.
I like “Do It On A Dime” videos. She does a lot of DIY videos that are inexpensive and relatively simple. I have used her ideas in the basement bathroom using Amazon peel and stick tiles. You can find the inspiration video here.
Faux Wood Subway Tiles on wall behind the toilet and sink. Plus I had some left over so I put them around the bedroom bookshelves we had added to a nook. 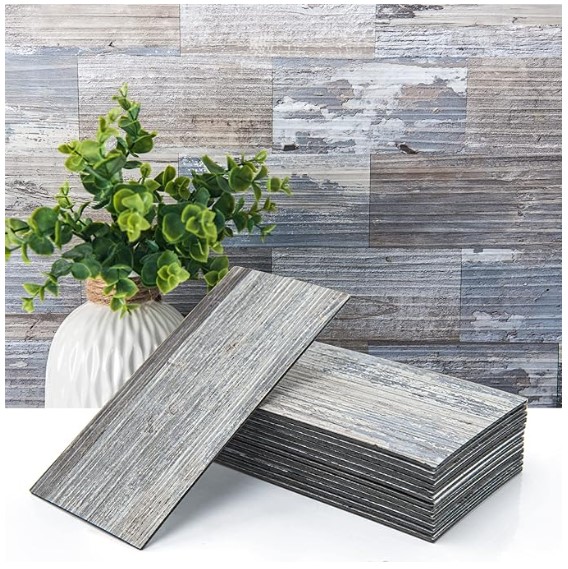
White Subway Tiles The bathroom down there has a shower stall with glass door. It has always felt dark even when it was painted a light color and the ceiling was redone with a white tile. I put these gloss white subway tiles on all the shower walls and it feels more finished and also much brighter in there.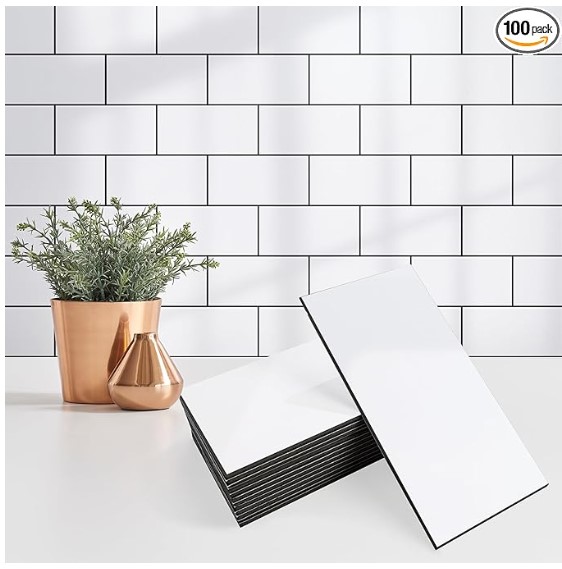
This whole project was so simple and quick. Initially I was cutting all the tiles with a utility knife and then started using the small bandsaw we have down there. Life got much easier and my fingers thanked me. They have been up for about a year now and so far so good.
One of the things that the “Do It On A Dime” video talked about was faux peel and stick moldings and that got my attention. She has also talked about peel and stick rolls of faux wood grain products and using them to frame mirrors. In her video she applied directly to the mirror. I bought two rolls of different colors and sat on them for about a year. I tried each color in the room and decided I liked the redder color (the color selection is no longer available) than the walnut. (The walnut is stiffer almost more like thin veneer.)
I then cut pieces and taped them up to see if we liked how it looked, we did. Time passed, tape failed, things were looking not great.
Actually Alli DIY fixed the part in my head that had been holding me back. I did not want to permanently attach them to the wall or mirror. I wanted them to stay up but be easy too remove if I didn’t like them or when Bill makes me real frames for them. This young lady is a genius if you are renting, want to try something without committing to it, don’t have tools or need inexpensive options I would watch her videos. She has laid peel and stick flooring, tiled walls, painted cabinets, added bead board walling and chair rail to her rentals, WHAT? How? Did she get her deposit back? She is the command strip/shelf liner master.
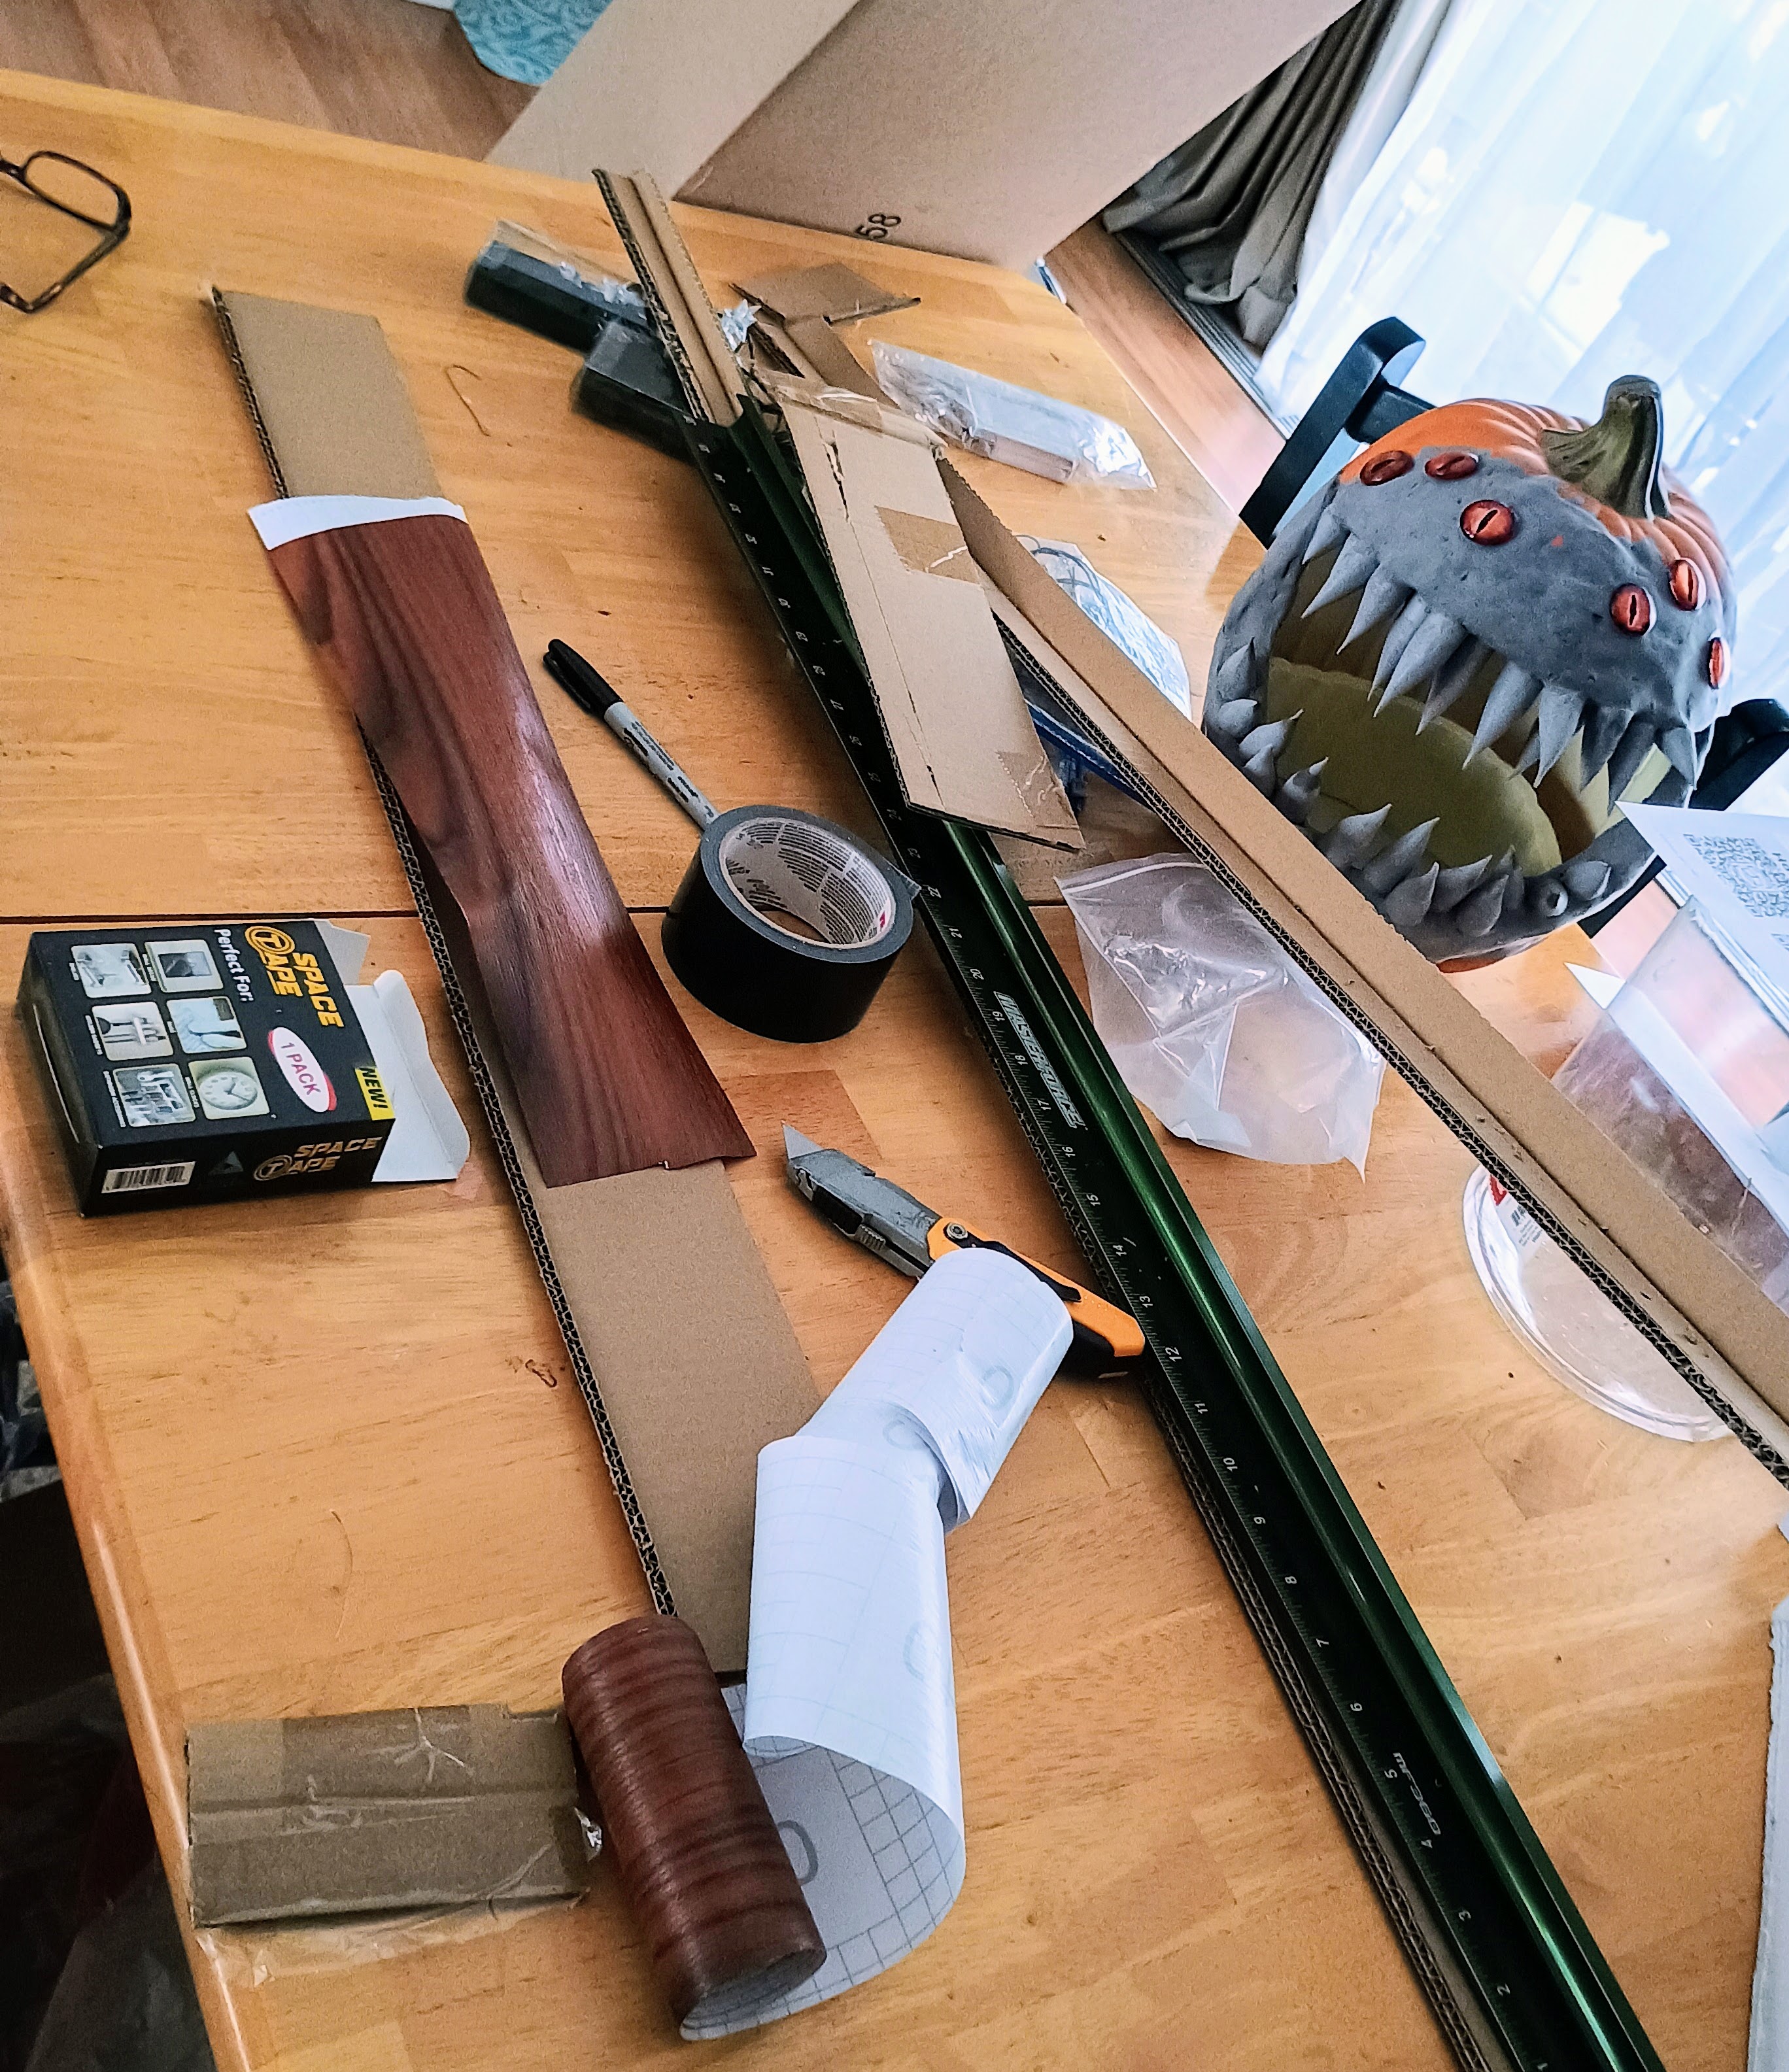
With utility knife in hand, an Amazon box, a ruler, a marker, a roll of black duct tape, double sided sticky tape and my roll of faux wood I started. The project cost was around $14 for the roll of faux wood, duct tape and sticky tape from the dollar store. Even if I completely mess this up all I’m out if some time.
I used the width of my faux wood tape to determine how wide the cardboard strips should be cut, subtracting about 3/4″. This allowed me to wrap the tape around to the back of the cardboard. I then used the duct tape to hold down the edges on the back. Not only did it help secure them but I also thought it might help to act as a moisture barrier and reduce the risk of having cardboard reflect in the mirror. Initially I tried to make a frame but the walls are not perfectly square. I ended up putting up the two sides on each mirror and then adding the top and bottom separately.
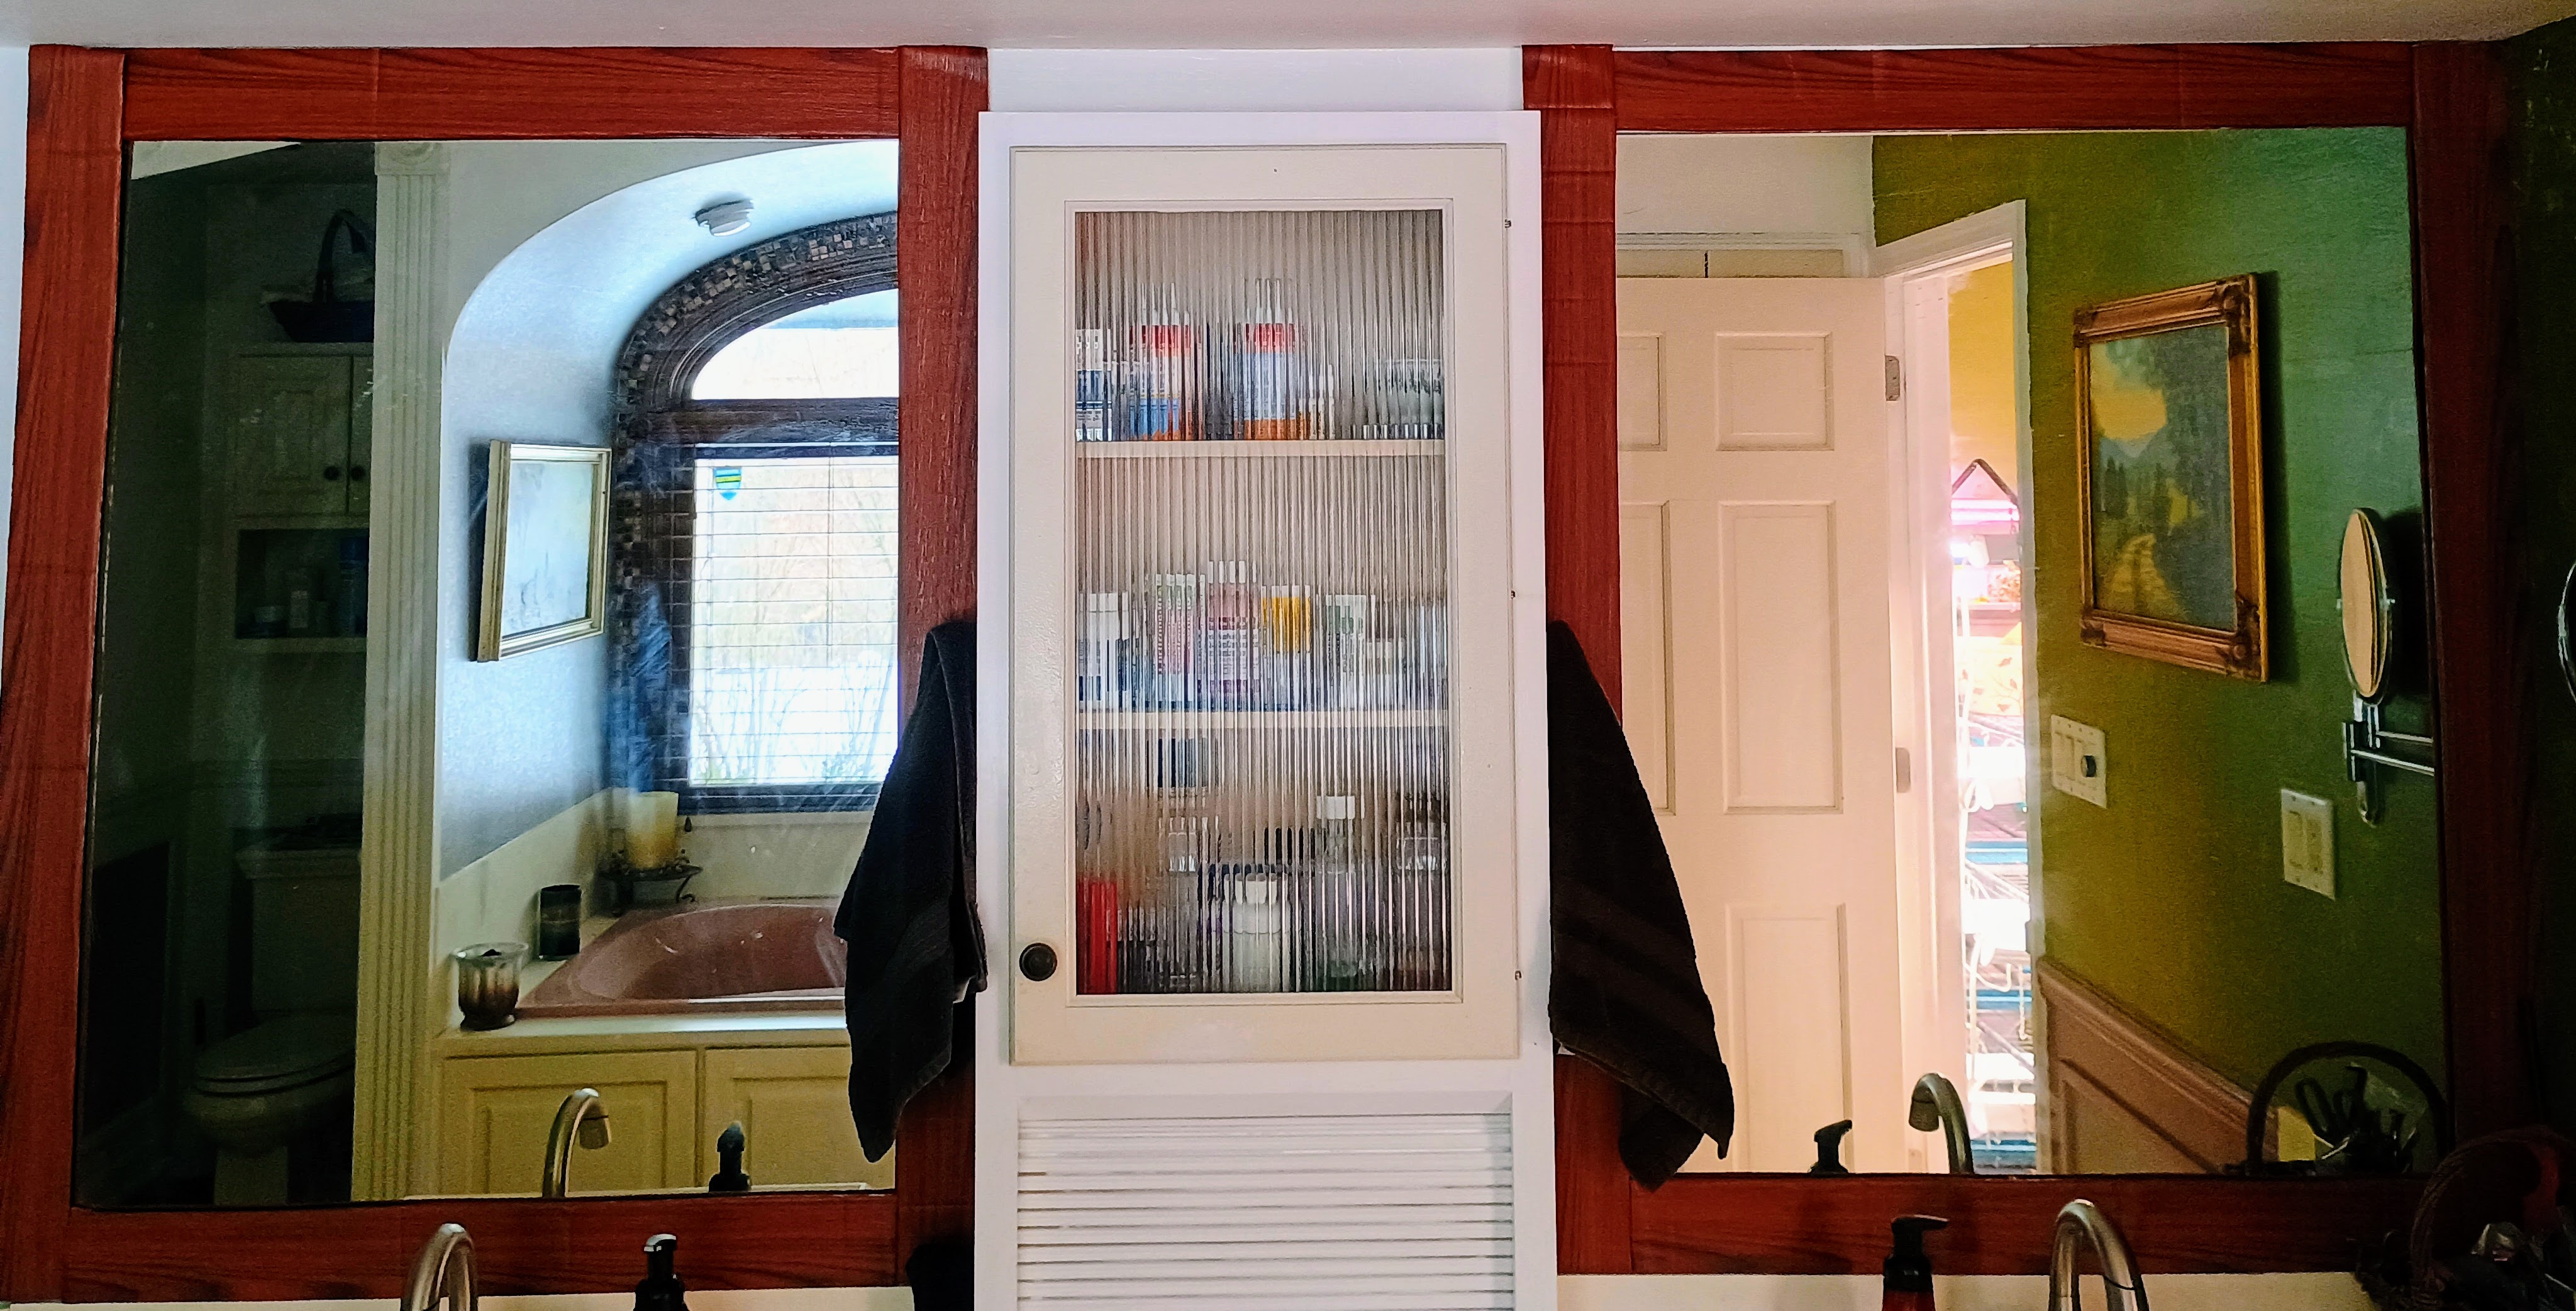
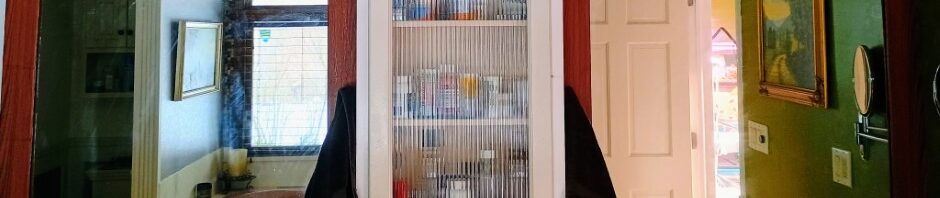
The top pieces slid behind the two sides and rest on the top of the mirror against the wall. This was one of the things that I had trouble working out in my head. I thought maybe I would need to add some kind of filler to bring that top piece flush with the mirror. I knew I wanted to go all the way up to the ceiling not just over top the mirror. I just didn’t know how that was going to work. Ends up that just sitting them on top of the mirror behind the two sides doesn’t look bad. Is it perfect? No. The cardboard had bends and those show. There are gaps at the joints and I am not Bill, perfect is not my jam. They are up and we have both decided we really like the color and we like having those mirrors framed. They look finished now. Bill had not even realized that the mirrors did not go all the way to the ceiling before they were framed! The decision now is do we paint the cabinet between them to match the wood tones or leave them white? Bill is already thinking about just making new cabinets for in there. I believe this is referred to as the “while we are at it syndrome.”
The point is don’t wait for the perfect circumstances or time or money. You can create spaces that make you happy regardless of where you are in life. You can do things and you don’t have to be perfect. If it makes you happy and it makes you love your space a little more then go for it.