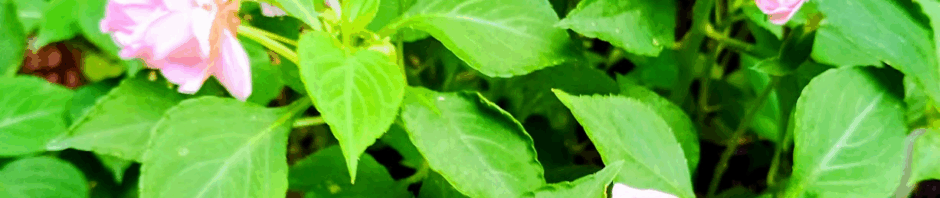
Years ago I went flower shopping for the very first time, best friend in tow. It was the nursery section of Builder’s Square and I had $20 burning a hole in my pocket. Flower money, which was also a first. My new home had a row of established lilacs bordering the grassland beyond and I wanted a pretty little flower bed underneath them. Suddenly my “friend” shouts out, “Hey they named a flower after you!” I was like, “Really?” Her reply, “Impatient!” Funny girl, but I bought them. This started my love of these little flowers and every year after that I planted them under my lilacs.
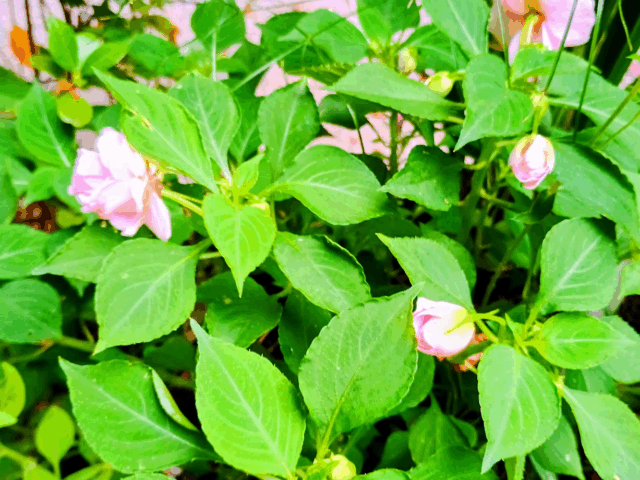
A few years back something happened and you could not find an Impatient anywhere. I did find a package of seeds and tried to grow them from seed. It didn’t work. Slowly they started showing back up in the garden centers again. I think there may have been a disease and to stop it from spreading they simply stopped selling them till it had burned itself out. This year I happened to be watching a video on Budget Gardening with Vita Loca she was collecting seeds from Impatients. She also collected seeds from begonias and I swear she did a video on propagating both from cuttings. Now this blew my mind because the stem bodies seem so fragile on both flowers that I never considered trying to propagate them. I had just seen the propagation vase at Aldi’s  put two and two together came up with 7 and decided to try it. I had purchased these lovely pink double Impatients and thought okay let’s take a few cuttings and see what we get. It worked! Having them sitting on the kitchen window sill helped me remember to change the water and to keep checking them for roots. Once they had roots I potted them up and moved them out to the little greenhouse. Did they need the greenhouse? No, but it’s right there and everyday I water the things in it so… All six cuttings rooted and all six cuttings were thriving once they got potted up. Then we left to get Sam from boot camp and came back to only three. I’m still calling this a HUGE win! I will be doing some more cuttings and I will also be attempting to save seed.
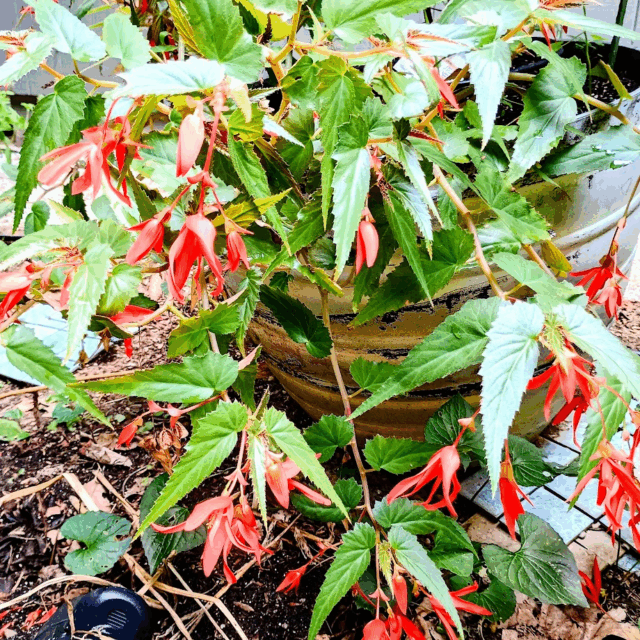
We have two large planters in front the house that have evergreens planted in them and I like to put begonias around them. I have no idea what the name of these is but they remind me of Bird of Paradise, one plant is all that is needed holy moly they get big. While potting them up I accidently broke about half of one plant off. Oops. Making the best of the bad I decided to try and propagate it.
I had just watched a video that Mike Kincaid did using the 3 cup method. It took me a long time to get around to potting them up. I had stuck them into a cup with water in it, the cat knocked it over and they sat out of water for an unknown amount of time. I would forget to change the water and things started to look a little sad. 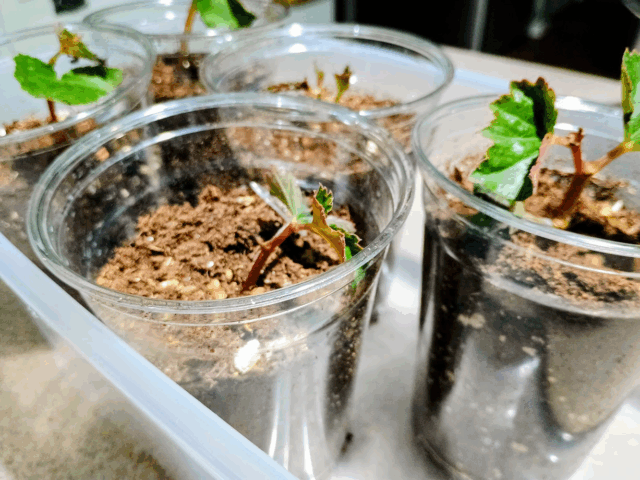
I still managed to get 5 cuttings that I think might make it. Originally I was going to do some in water to root and some with rooting hormones directly into media. After having them sitting in water for a fairly long time and not seeing any signs of roots I thought well let’s just try with hormone and media.
The 3 cup method just calls for a cup with two parts of the bottom snipped to allow extra water to get out. 
I used my plant snippers and made a cut like this in two places in the cup that would hold the medium and the plant. 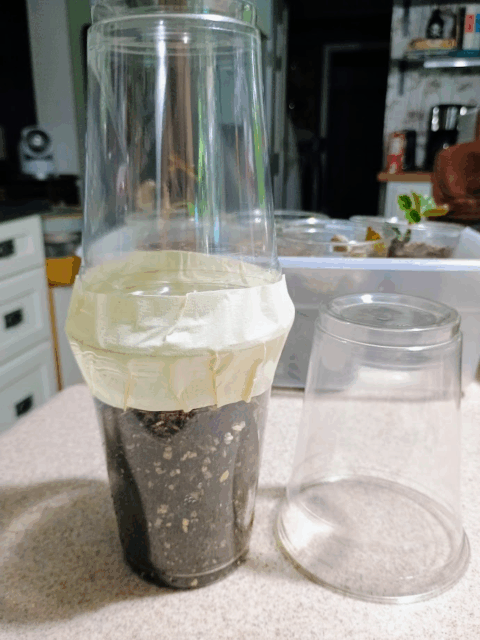 Then the second cup is put on top of the first like a little mini greenhouse and the two are taped together. The tape I had in the kitchen is just regular 2″ masking tape. That width is nice because it easily caught both cups and the light color was easy to write on. I put what the plant was and the date I potted it up. I won’t think about this guy again for at least a month maybe longer. One reason for using a clear cup for the potting medium is you can see what’s happening, are there roots is there to much water or is nothing happening. Once the two are taped together the bottom cup is simply slid into the third cup with no holes in it. This cup is only there to catch any water or medium that might escape. After I had snipped the cuttings just below a leaf bud, then stripped away all but 2 or 3 leaves and cut down any larger ones, I dipped the stem in water and then into my rooting hormone. Popped them into the “dirt”, let them sit for a few minutes so they could absorb the rooting hormone and then sprayed them with the water wand just to settle everything in. They sat like that for a few minutes just so any extra water could run out and then I brought them in to finish them off. They are now in the house not under a light but in a room where grow lights are on. I was going to put them on a window sill or out in the greenhouse but since this is my first time I wanted to make sure I was paying attention. I check them to make sure that they have condensation going on and that everything is still looking okay several times a day. Not because they need that much attention but simply because I walk by them.
In addition to these begonias, I potted up a white cone shaped hydrangea and two cuttings from a smoke tree. The hydrangea stems were fairly soft so I think that the 3 cup was the right way to go. Now the smoke tree cuttings had a harder stem and I think I probably should not have used the 3 cup. However, they were in really bad shape so I figured if I start them like this maybe they can recover and then I can always take that top cup off or untape them and let a little air in or even make some holes in it.
That’s the fun of propagation, it’s like a box of chocolates, you never know if it will grow or something like that. Since we, cough, I mean me or I or well you get it, were in a propagating mood and since I had eggs that were about to go on the compost bin, you get the chicken math.
Say Hi to the kids. Bill needed to take a quick trip to Ohio for business so not our dog and I tagged along. Now I had forgotten to collect eggs before we left and we were gone two days and temps were ugly hot. I’m not eating those eggs, they were about to go on the compost heap. Until I had the genius idea of incubating them. We have the incubator, we have the eggs, we have a rooster, I know where the incubator is and I can get to it, why not? Well me having said no more new chickens because we have an established flock and the last time we hatched we didn’t have good results, might be why not. Our original incubators are old and were not keeping an even heat/humidity so we lost two batches of eggs. We got this little guy and tried again and only had one hatch. That ended sadly, so I packed it all up and vowed to not try that again.
Which is why we now have an incubator in our house, with eggs in it. I actually like this little incubator my biggest issue is figuring out how to get the humidity right and not add to much water. After the last time I’m super paranoid about messing it up.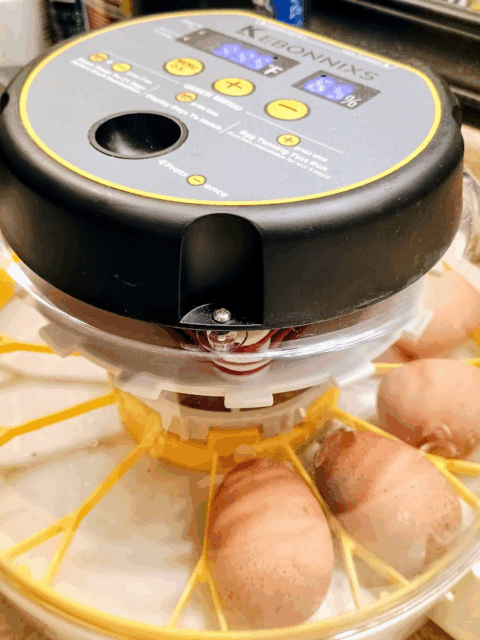
This thing is simple and it has features I really like such as the digital display and being able to add water from the outside. That is also how I got in trouble last time. It’s very easy to add to much water to quickly. Inside there is a reservoir that has two sections you fill one way for 18 days and then 3 days before hatch you bump the humidity up. Your supposed to be around 50% humidity for 18 days and then bump up to 60% I cannot get it to the 50. It’s either above 60 or down to 40. The temp is very consistent. The little air opening in the back is open about half way till day 18 and then you open it all the way at the same time you take the turner out (that yellow thing it moved to keep the eggs moving but you don’t want that once you have chicks or it could hurt them). That little black circle you see has a light for candling the eggs which if you have never done it, it’s so cool. Before you see a chick you see a heart beating and veins forming, the heart beat is there just days after the eggs is laid. It is extremely difficult to not want to candle the eggs frequently but resist you must.
Now we are not new to hatching our own eggs. We have done this many times and been very successful, till the last time we tried. Fingers crossed that all goes well this time but since we don’t see many fertilized eggs on the plate I’m not sure if Max is um well we don’t know if he is a hit with the ladies.