One of the biggest problems we have had over the years is keeping track of the things we grow. For the most part, it’s easy to tell a tomato plant from a zucchini plant, but when starting seeds, it’s important to keep track of what you planted and where. As the seedlings grow, it becomes easier to tell what kind of plant it is, but if you plant multiple varieties, this becomes more difficult.
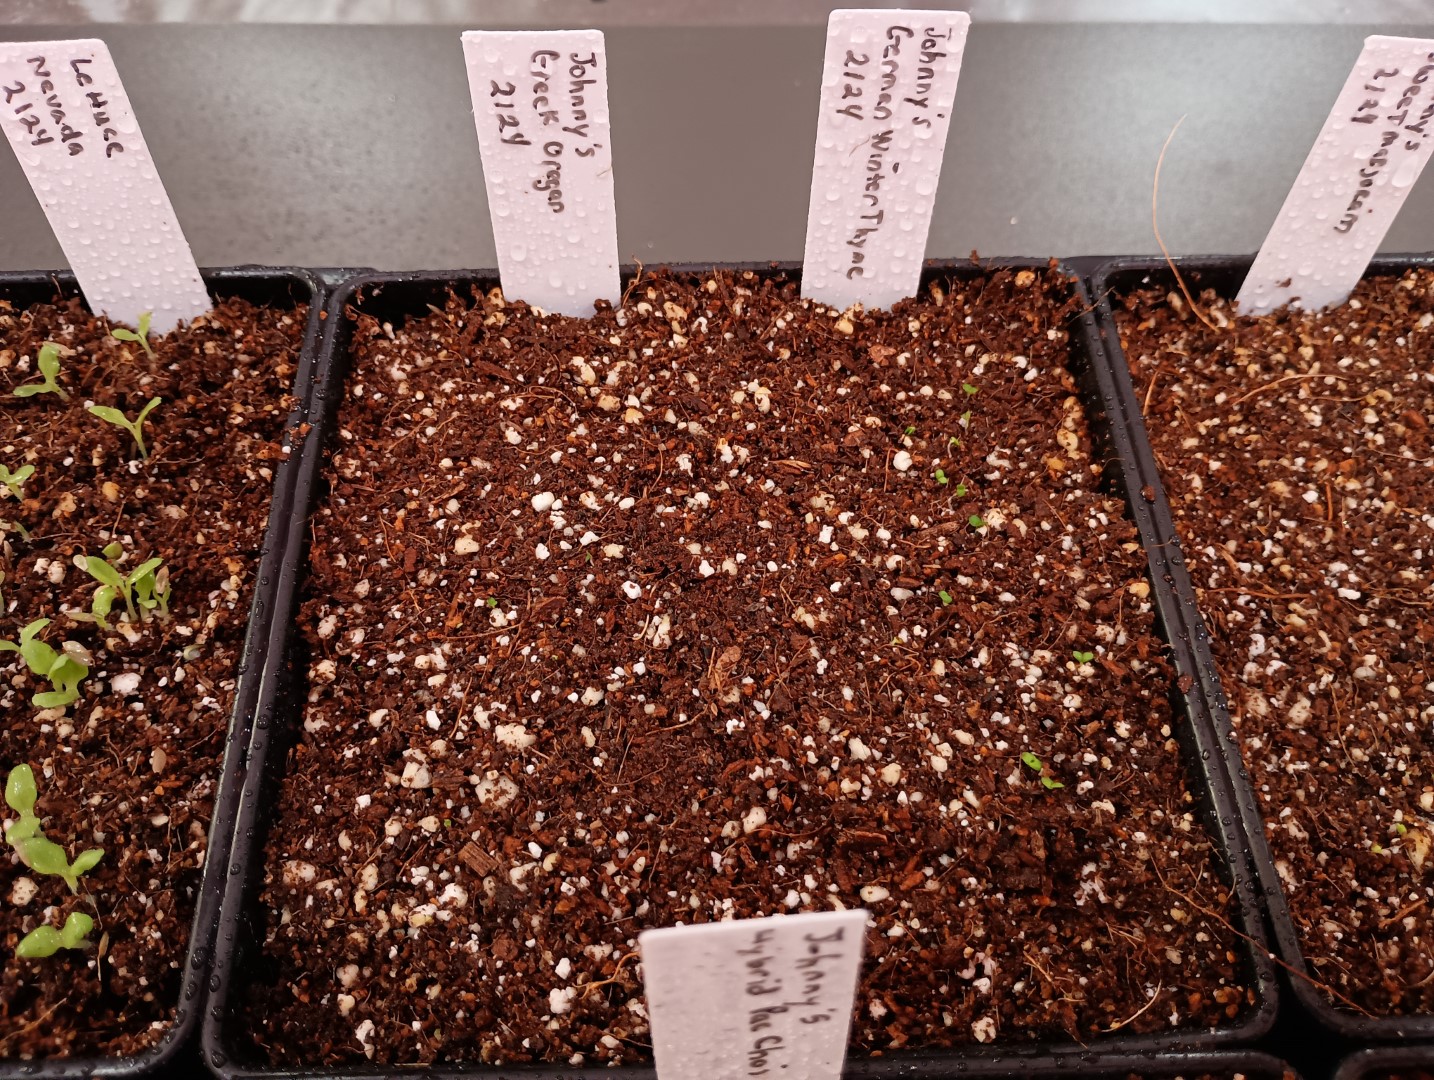
We’ve become much better at making tags for the seed trays as we plant them.
Seedlings with Tags
The problem we run into is that the ink fades to nothing in the sun. We’ve tried multiple types of “permanent” markers, but still they fade and you can no longer read what was written.
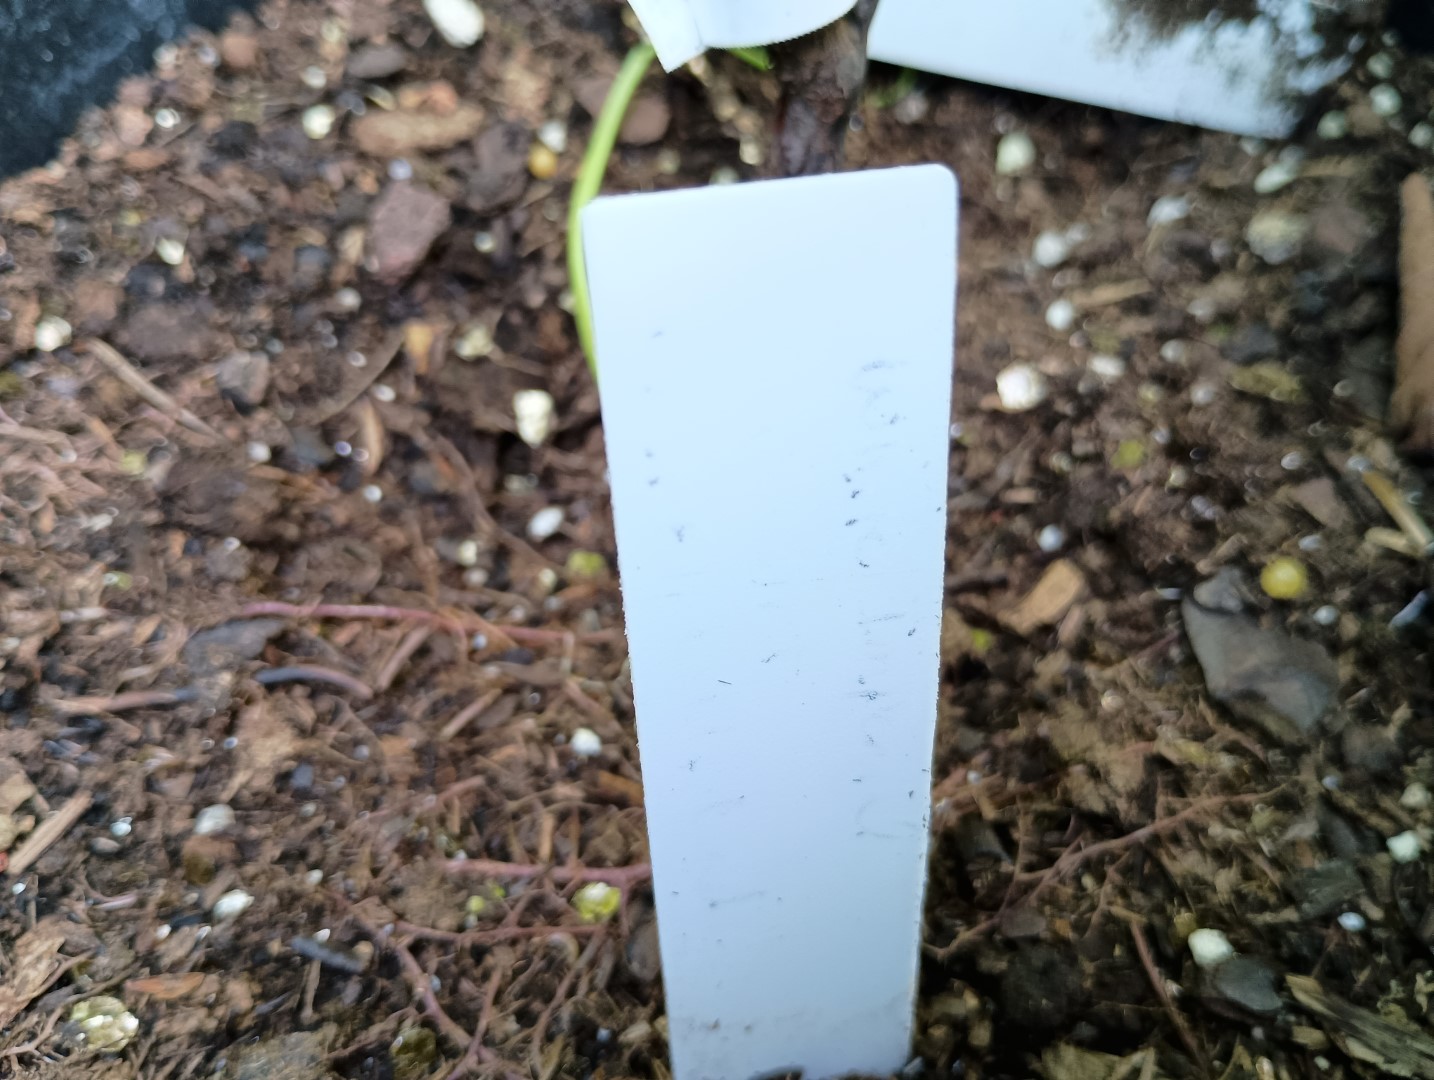
Can you tell what that says?
I’ve made wooden stakes cut on the laser, and these are great, but too big for just six-cell seed starting trays. They also take a while. These took around 30 minutes to engrave and cut 5 stakes. These also do not tell you the variety of the plane.

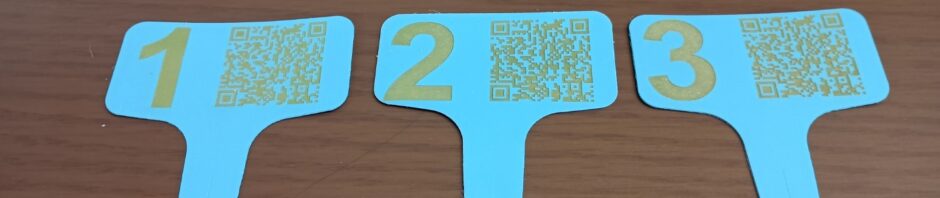
Tomato ID Stakes
After cutting, they need to be sealed with a film finish, at least two coats including the edges, to prevent them from rotting in the dirt. So the full time to make them increases to about 2 days. But they look cool.
I had the idea of engraving on the cheap plastic tags we use for seed starting. The problem is that diode lasers do not cut or engrave on white plastic. It has to do with the wavelength of the laser beam. They do, however, engrave on darker colored plastic. Blue, for instance, works particularly well. So I ordered some blue plant tags.
Another idea I had was to just engrave a number on them, and then we could reference the number in our garden planner spreadsheet, where we track what we plant. I store the spreadsheet on Onedrive, so it can be accessed over the Internet. I decided to also put a QR code on the tags, linking to the spreadsheet link. That way, if we are in the garden and want to see what a particular plant is, we can just scan the tag with our phone, and it will bring up the spreadsheet.
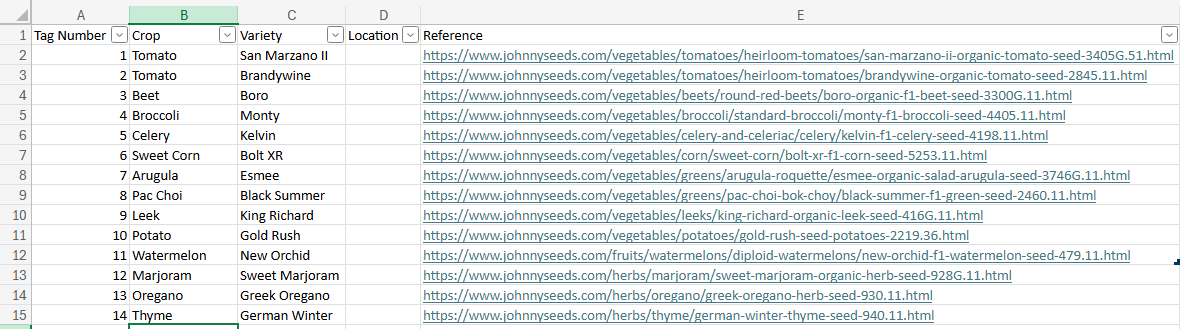
Garden Planner Spreadsheet
The beauty of using a number code is that you can reuse the tags from year to year, you just update the spreadsheet with the current crop.
Lightburn has a built-in QR code generator. You just select it from the Tools menu, and then enter your text. It automatically generates the QR code in your workspace.
I use bar magnets on my laser honeycomb bed as a positioning guide for the blank tags.
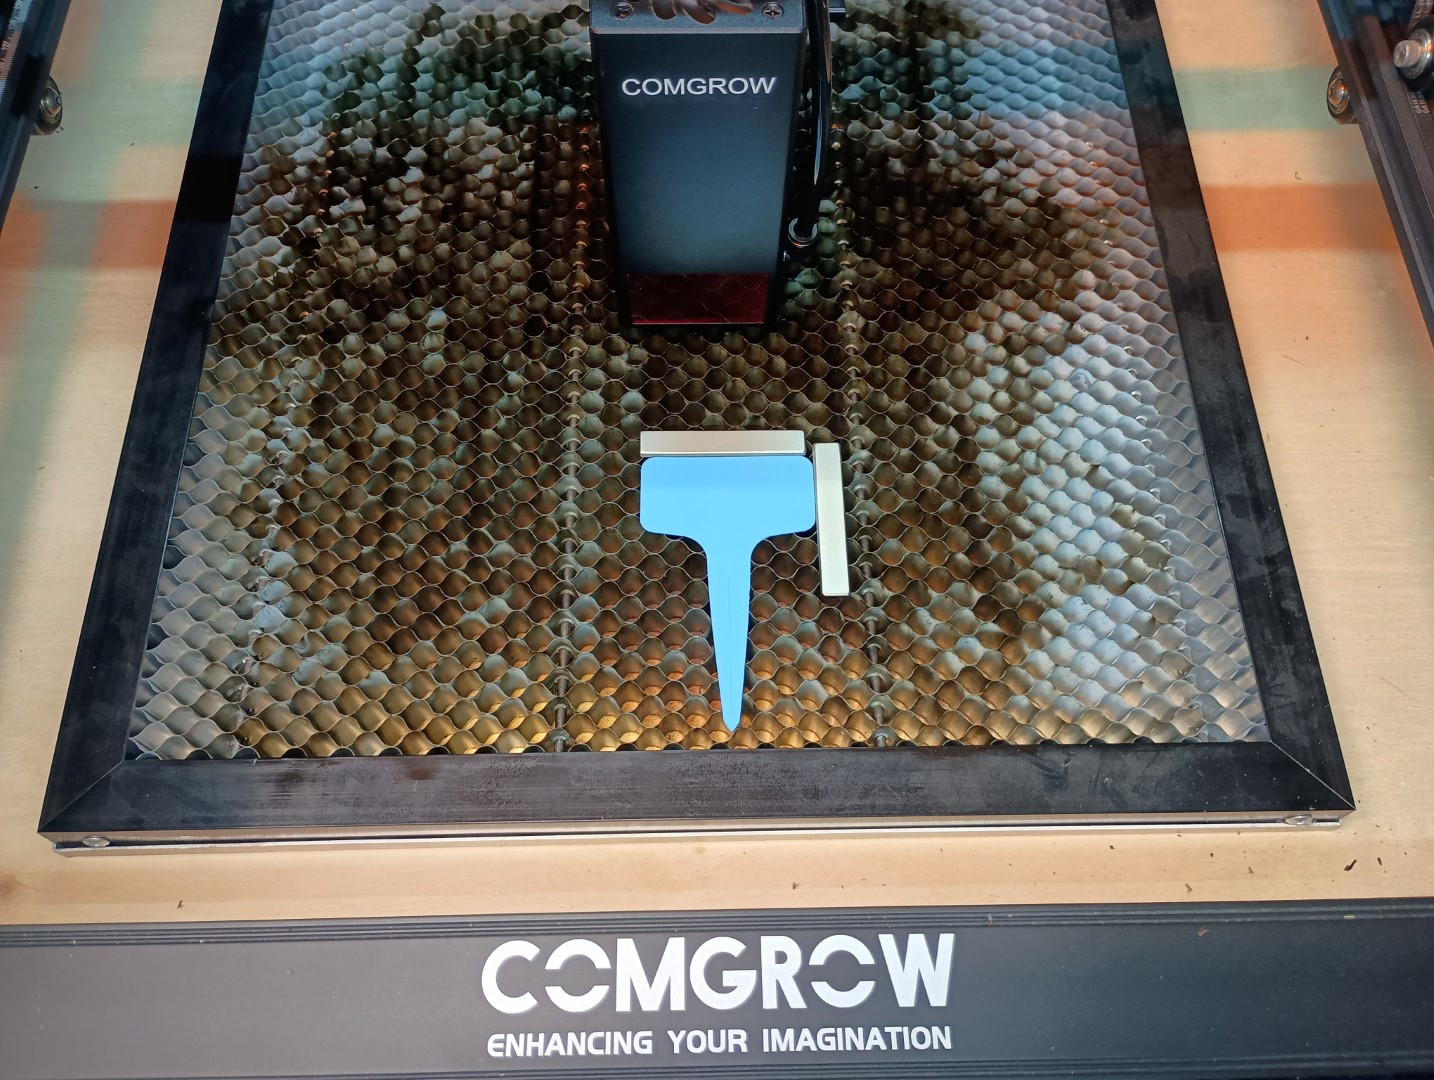
Laser Bed with Blank Tag
This allows for fast positioning of the tags.
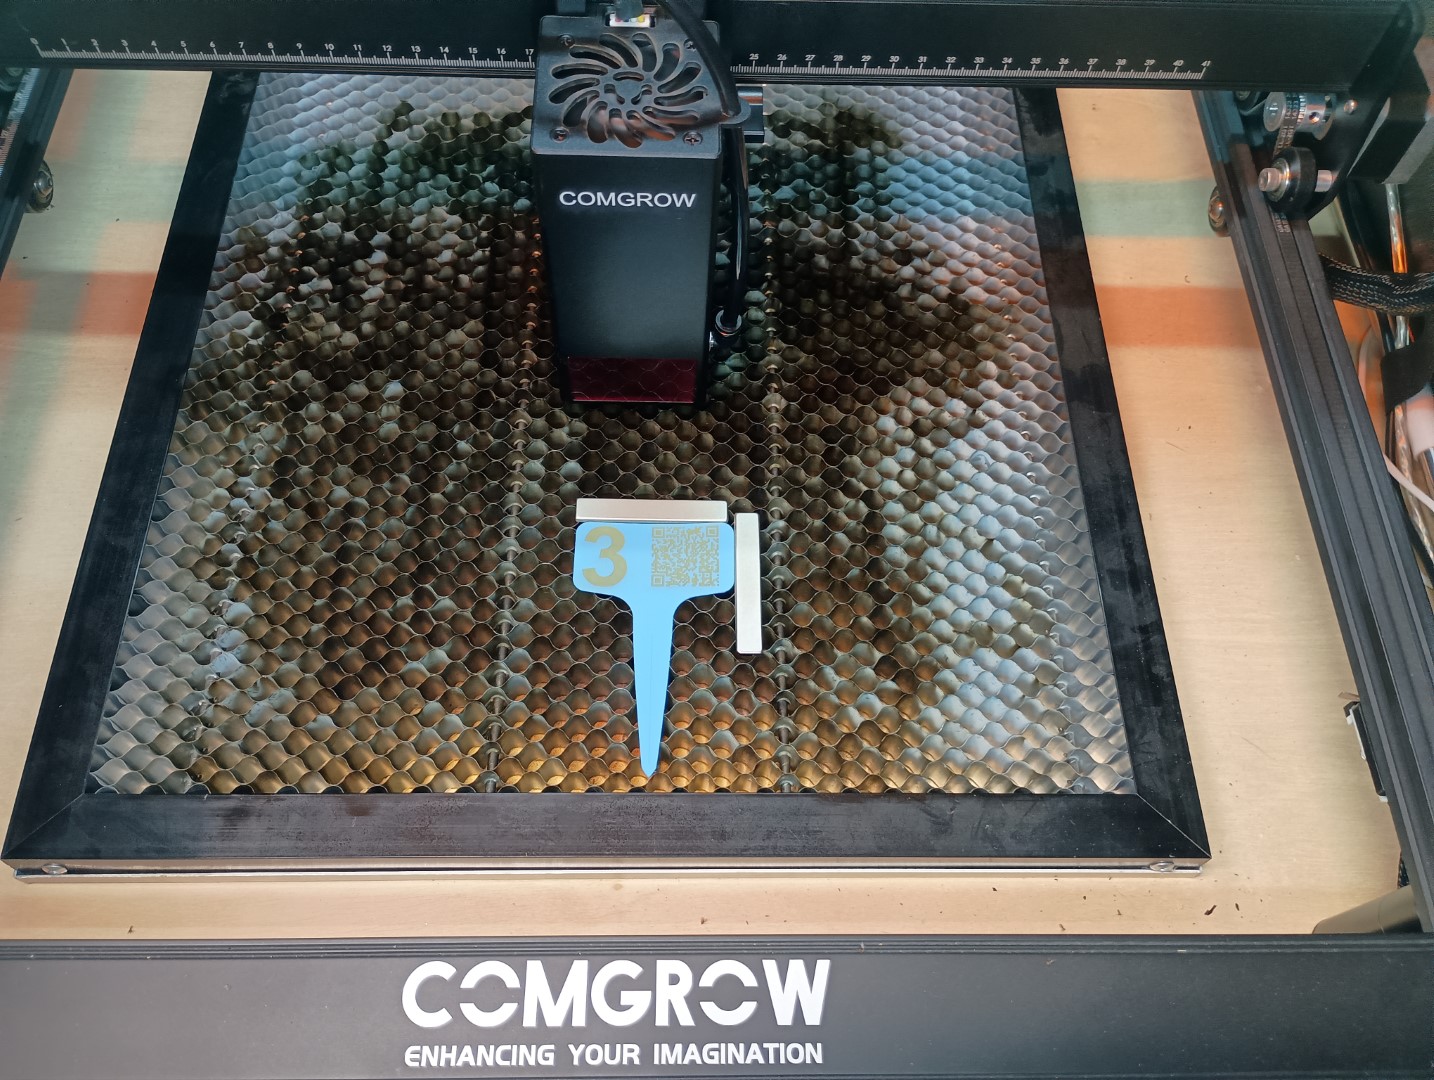
Engraved Tag
The tags take about 2 minutes to engrave.
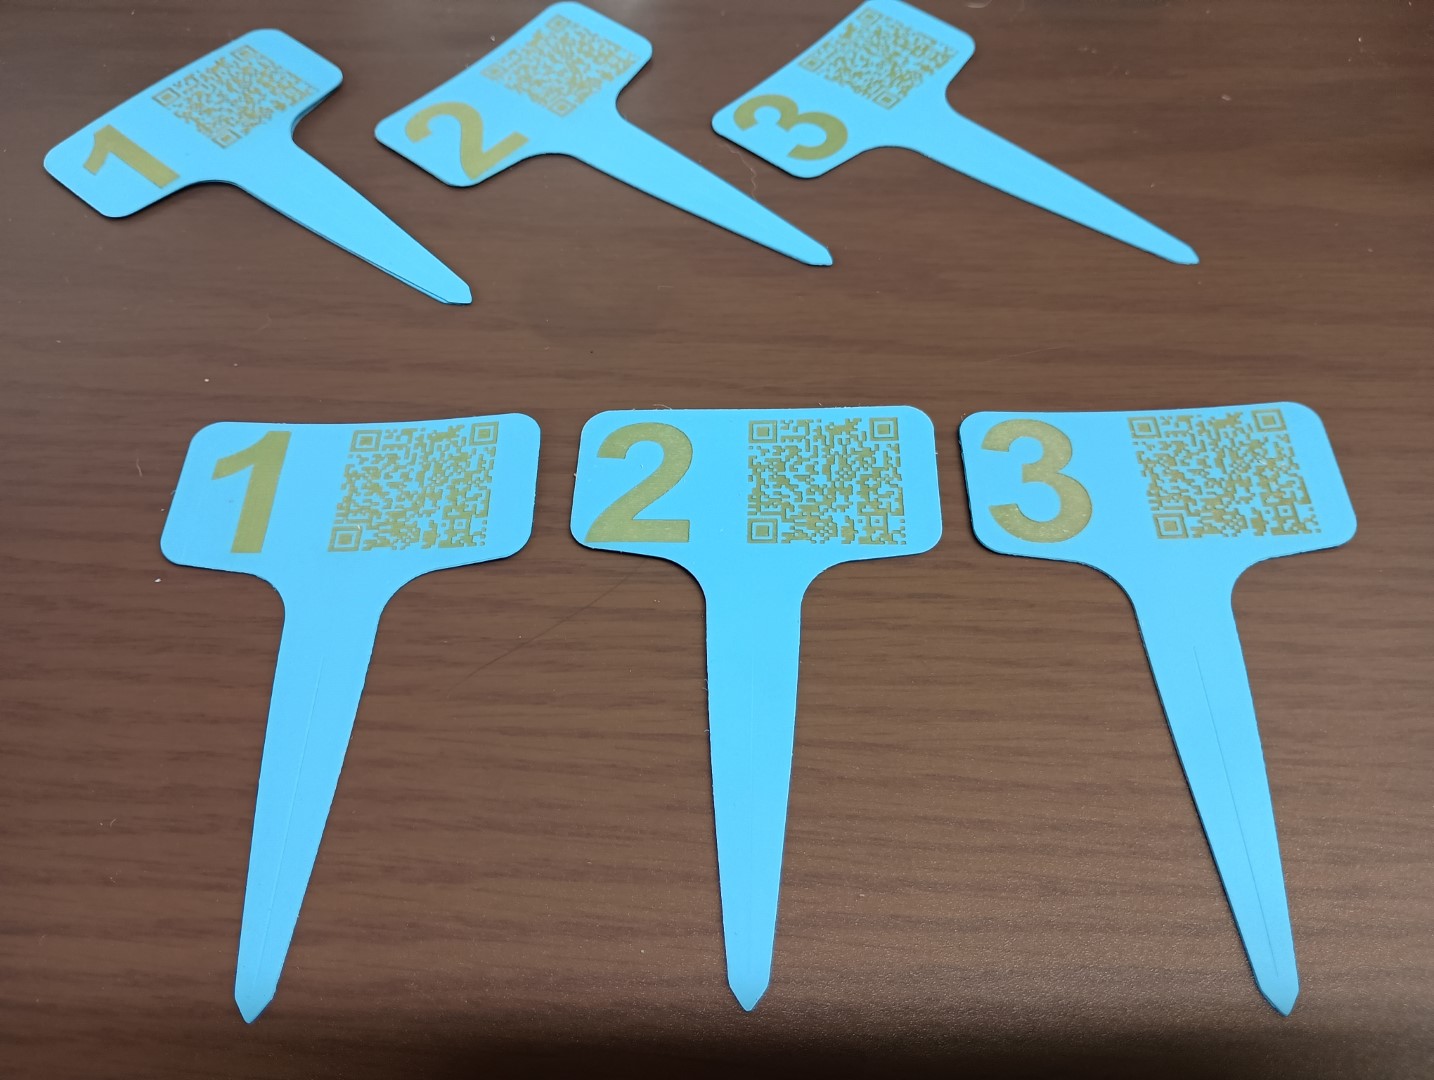
Laser Engraved Plant Tags
I also got some 3/4″ wide tags and made a smaller QR code. This works fine as well.
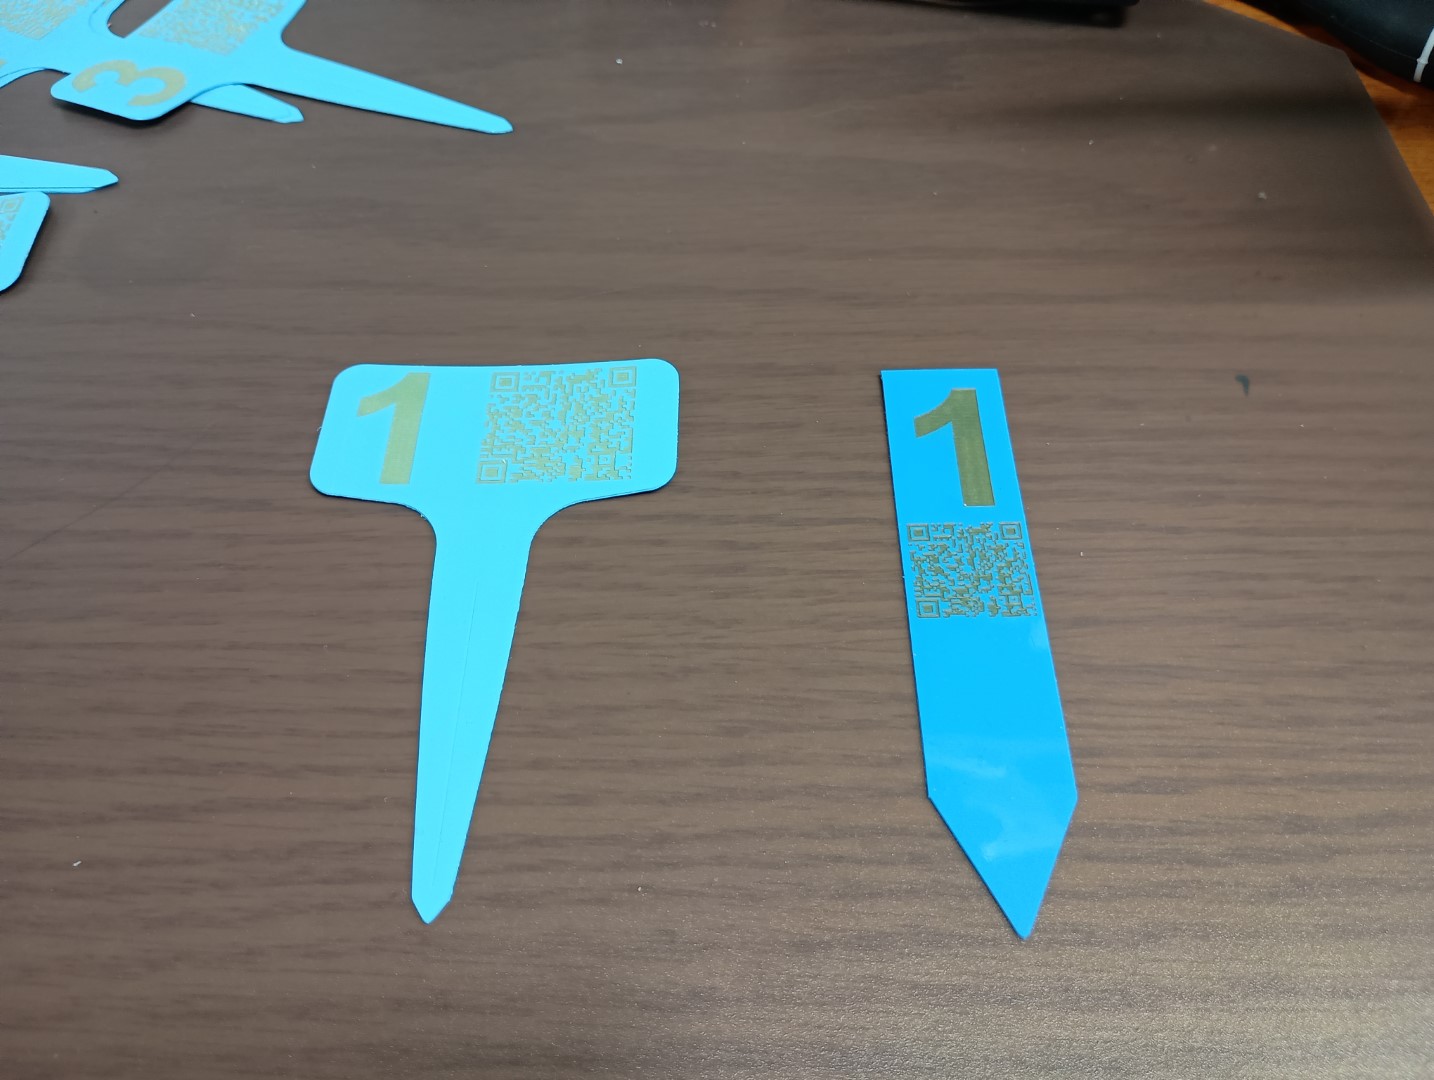
Two Sizes of Tags